CefSharp is the the easiest way to embed a full-featured standards-complaint web browser into your C# or VB.NET app. CefSharp has browser controls for WinForms and WPF apps, and a headless (offscreen) version for automation projects too. CefSharp is based on Chromium Embedded Framework, the open source version of Google Chrome. You can get more information about the CefSharp project in the official homepage here.
You can use CefSharp either as a Browser component instead of depend of the version of internet explorer that your user has installed on windows or as a predefined user interface of your app. Yes, you can use HTML controls (buttons, inputs) in your winforms c# application and customize with CSS as you want (Bootstrap, etc).
This is your chance to make a beautiful native windows application with HTML, Javascript and CSS, let's get started.
In this article we'll work with CefSharp version 49.0, if you want to use CefSharp version +51 we'll provide some tips that you need to know with the new version.
Requirements
- Visual Studio with NuGet Package Manager (>=2010).
1) Create a basic Winforms App and add CefSharp using NuGet package
Proceed to create a Winforms application as you usual do it targetting the latest version of .NET Framework, nothing difficult isn't?. Before procced be sure that your machine has installed :
- CefSharp 45.0 and later requires VC 2013 Redistributable Package x86 be installed.
- Earlier versions require VC 2012 Redistributable Package x86.
Otherwise, you'll find errors like :
An unhandled exception of type 'System.IO.FileNotFoundException' occurred in browser.exe Additional information: Could not load file or assembly 'CefSharp.Core.dll' or one of its dependencies.Now after the creation, add CefSharp. To add CefSharp, go to the Solution Explorer on the Top Right of Visual Studio, then right click on your app (under the solution) and select Manage NuGet Packages.
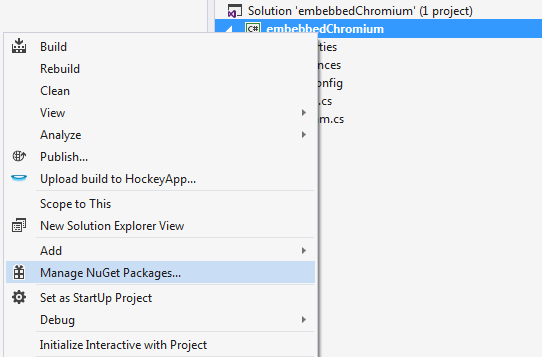
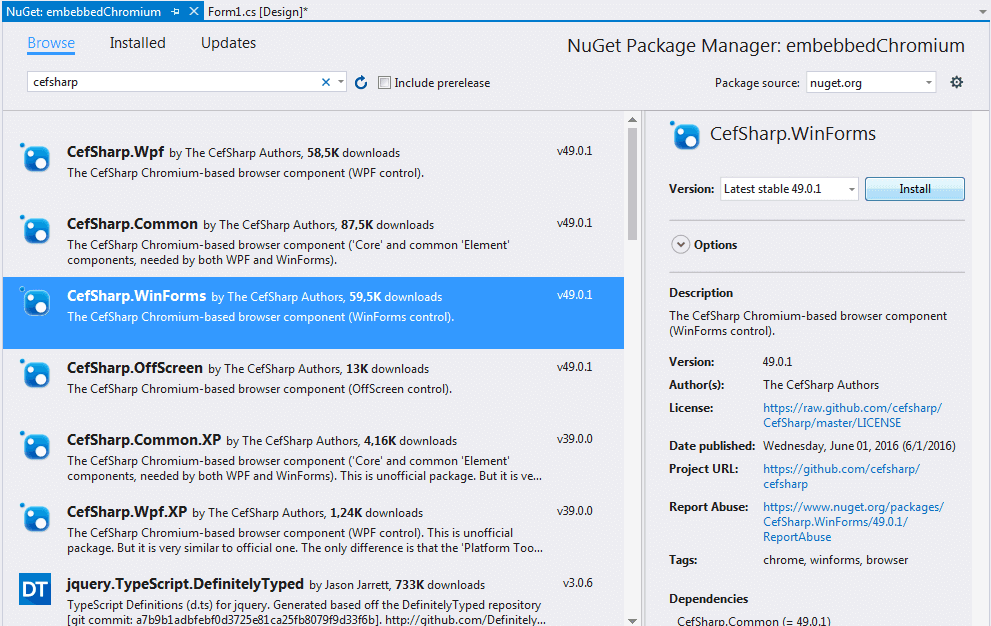
When the search menu appears, type cefsharp , select the WinForms distributtion and install it.
As with every version of Visual Studio, the interface may vary, just be sure to install a distribution of CefSharp.WinForms by The CefSharp located in the nuget.org Package source, in this example we're using Visual Studio 2015
Follow the installation setup (accept therms and install). During the installation you should see related information about the process in the console :
Attempting to gather dependency information for package 'CefSharp.WinForms.49.0.1' with respect to project 'embebbedChromium', targeting '.NETFramework,Version=v4.5.2'
Attempting to resolve dependencies for package 'CefSharp.WinForms.49.0.1' with DependencyBehavior 'Lowest'
Resolving actions to install package 'CefSharp.WinForms.49.0.1'
Resolved actions to install package 'CefSharp.WinForms.49.0.1'
  GET https://api.nuget.org/packages/cef.redist.x64.3.2623.1401.nupkg
  OK https://api.nuget.org/packages/cef.redist.x64.3.2623.1401.nupkg 29ms
Installing cef.redist.x64 3.2623.1401.
Adding package 'cef.redist.x64.3.2623.1401' to folder 'F:\C# Development\Winform projects\embebbedChromium\packages'
Added package 'cef.redist.x64.3.2623.1401' to folder 'F:\C# Development\Winform projects\embebbedChromium\packages'
Added package 'cef.redist.x64.3.2623.1401' to 'packages.config'
Successfully installed 'cef.redist.x64 3.2623.1401' to embebbedChromium
  GET https://api.nuget.org/packages/cef.redist.x86.3.2623.1401.nupkg
  OK https://api.nuget.org/packages/cef.redist.x86.3.2623.1401.nupkg 31ms
Installing cef.redist.x86 3.2623.1401.
Everybody loves succesfully messages, do you ? I do !
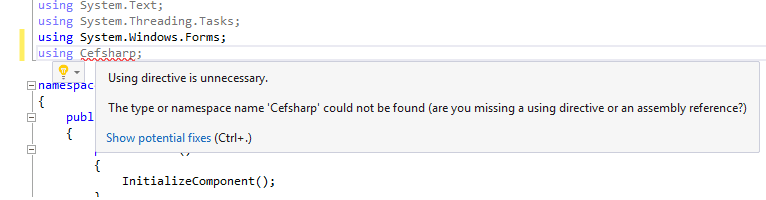
Important before continue: Normally with the latest version of CefSharp, after installing the Nuget package is recommendable to close Visual Studio completely and then reopening (as this ensures your references show up and you have full intellisense), otherwise you'll end up with the error:
The type or namespace name 'Cefsharp' could not be found (are you missing a using directive or an assembly reference?)
2) Change the platform configuration (x86, x64 or AnyCPU)
After a succesfully installation, according to the version of CefSharp that you're using, you'll need to configure some things to make it work:
A. CefSharp version 51 and newer
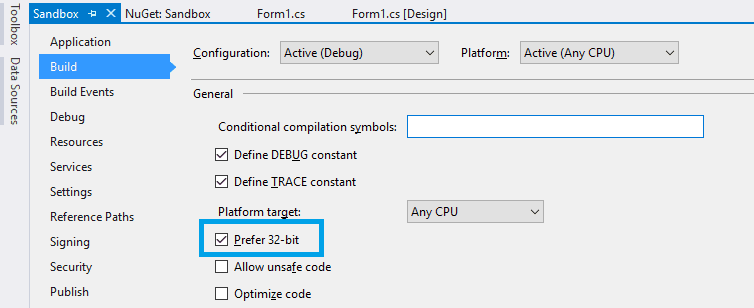
From CefSharp 51, you're able to work with CefSharp using AnyCPU, however it won't work alone, as you will need to make some changes in 2 specific files. As first, enable the Prefer 32bit option in your project, do right click on the Properties item in the solution explorer (or in the toolbar Project > Your Project Properties) and go to the Build tab. In the general properties check the Prefer 32 Bit option:
Then, search for the your-project-name.csproj file, it can be found in <your-project-name>/<your-project-name>/your-project-name.csproj and the following tag in the first <PropertyGroup> of the file:
<CefSharpAnyCpuSupport>true</CefSharpAnyCpuSupport>Your *.csproj file should look like:

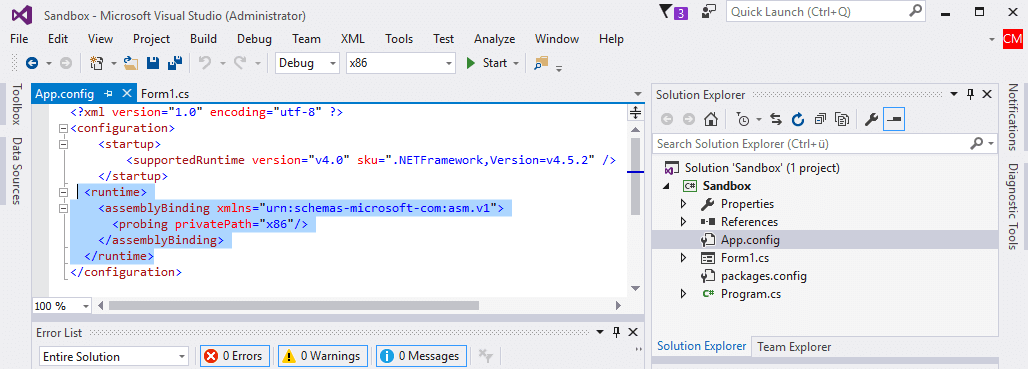
Finally, modify the App.config file, it is visible in the solution explorer of your project in Visual Studio and add the following tags in the configuration tag:
<runtime>
    <assemblyBinding xmlns="urn:schemas-microsoft-com:asm.v1">
        <probing privatePath="x86"/>
    </assemblyBinding>
</runtime>
Then, your config file will look like:
If you need more help or you can't modify those files, then take a look to the issue about AnyCPU in Github here for more help.
B. CefSharp version 49 and older (x86 or x64)
With CefSharp 49 or older versions, you'll need to provide the architecture of your project or CefSharp won't work. Proceed to change the configuration of your project with the configuration manager.

As boromir said, the target platform of your project can't be anyCPU, it must be either x86 or x64, otherwise you'll get the following warning in your console and your app will not compile.
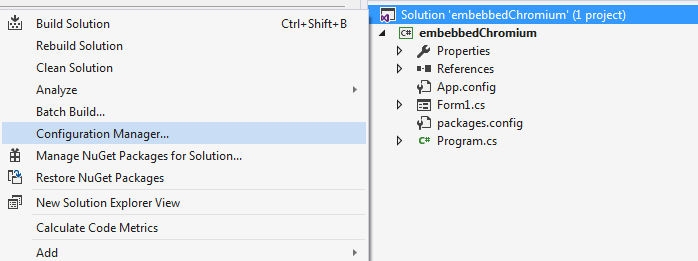
CefSharp.Common does not work correctly on AnyCPU platform. You need to specify platform (x86 / x64).Proceed to change it first in the Configuration Manager. Right click on the Solution Explorer on the top right area of visual studio (Direct in the solution) and select Configuration Manager:
And select the platform that matches with your requirements in the project :
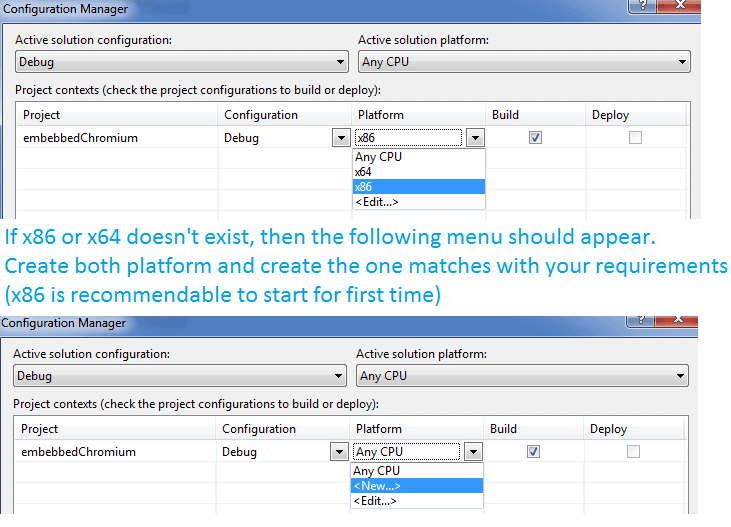
Note that you need to create the x86 or x64 if they don't exist selection <New...> option, adding it and then selecting it.
After the basic configuration of CefSharp in your project, the project will build successfully as we have all that we need to use chromium. Now we need just to append to our form and use it with code.
3.1. Using CEF (as Browser)
Now that our application has support for CefSharp, we just need to use it with code. Import CefSharp into your code using :
using CefSharp;
using CefSharp.WinForms;
Now add the following method and create a class accessible variable as the browser (to use it in other methods) in your class :
public ChromiumWebBrowser chromeBrowser;

public void InitializeChromium()
{
   CefSettings settings = new CefSettings();
   // Initialize cef with the provided settings
   Cef.Initialize(settings);
   // Create a browser component
   chromeBrowser = new ChromiumWebBrowser("http://ourcodeworld.com");
   // Add it to the form and fill it to the form window.
   this.Controls.Add(chromeBrowser);
   chromeBrowser.Dock = DockStyle.Fill;
}
And execute it after the InitializeComponent() function of your class (which normally is in the constructor):
public Form1()
{
     InitializeComponent();
     // Start the browser after initialize global component
     InitializeChromium();
}
Don't forget to close the cef component in the FormClosing event of your form :
private void Form1_FormClosing(object sender, FormClosingEventArgs e)
{
     Cef.Shutdown();
}
Now your class should look like (note that the name of the project is embebbedChromium):
using System;
using System.Collections.Generic;
using System.ComponentModel;
using System.Data;
using System.Drawing;
using System.Linq;
using System.Text;
using System.Threading.Tasks;
using System.Windows.Forms;
using CefSharp;
using CefSharp.WinForms;

namespace embebbedChromium
{
    public partial class Form1 : Form
    {
        public ChromiumWebBrowser chromeBrowser;

        public Form1()
        {
            InitializeComponent();
            // Start the browser after initialize global component
            InitializeChromium();
        }

        private void Form1_Load(object sender, EventArgs e)
        {

        }

        public void InitializeChromium()
        {
            CefSettings settings = new CefSettings();
            // Initialize cef with the provided settings
            Cef.Initialize(settings);
            // Create a browser component
            chromeBrowser = new ChromiumWebBrowser("http://ourcodeworld.com");
            // Add it to the form and fill it to the form window.
            this.Controls.Add(chromeBrowser);
            chromeBrowser.Dock = DockStyle.Fill;
        }

        private void Form1_FormClosing(object sender, FormClosingEventArgs e)
        {
            Cef.Shutdown();
        }
    }
}
Now start your app (F5) or click on start in the toolbar, and you'll see how Our Code World is loaded in your C# Winforms Application.
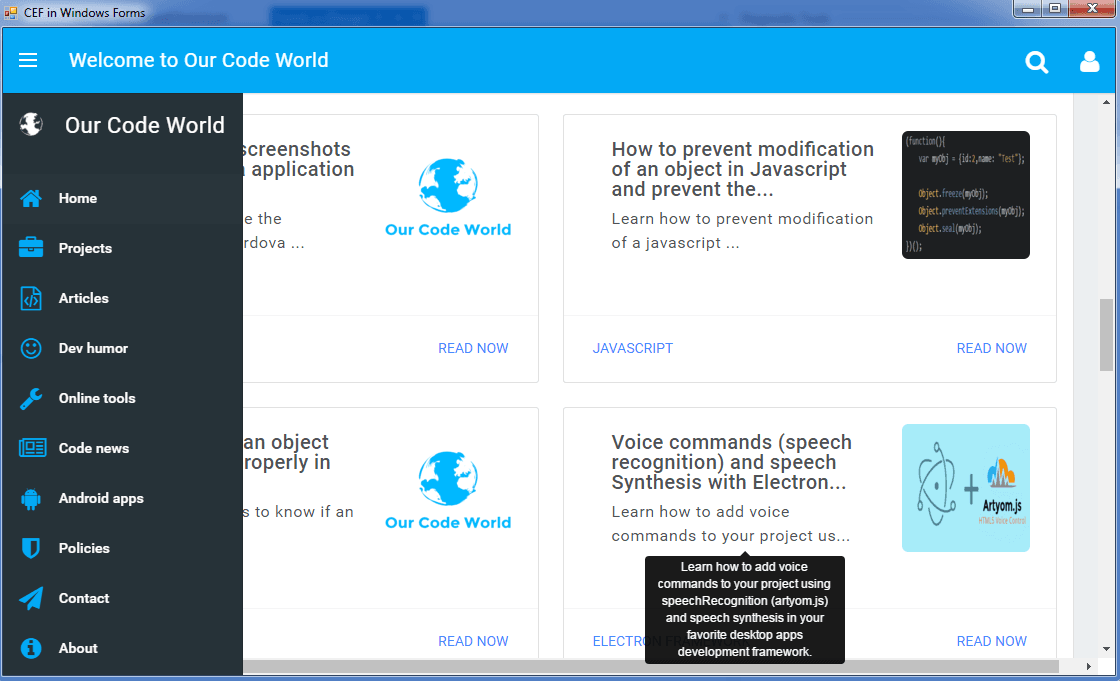
Congratulations ! You've just implemented CefSharp in your application at its most basic expression. We recommend you to keep reading the documentation of the framework and see how can you create more awesome things.
3.2. Using CEF (as User Interface)
In the previous point, you've implemented CefSharp as a browser component. But you can do more than that, now we are going to implement a pure based HTML, Javascript and CSS (Bootstrap) UI with local files and manipulate System things with it.
We need to include our HTML Assets in our Visual Studio Project. You can create them directly either from visual studio or the windows explorer, but via visual studio is easier as the folder is automatically added to the project resources.
In this case, we are going to use a simple Bootstrap Interface (which includes bootstrap and jQuery) which is componed in the following directories :
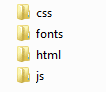
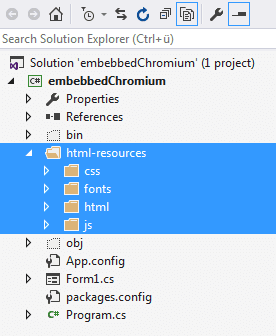
After adding in the visual studio project (Right click on the solution explorer, then on the project, add folder and paste your resources there), the project should look like :
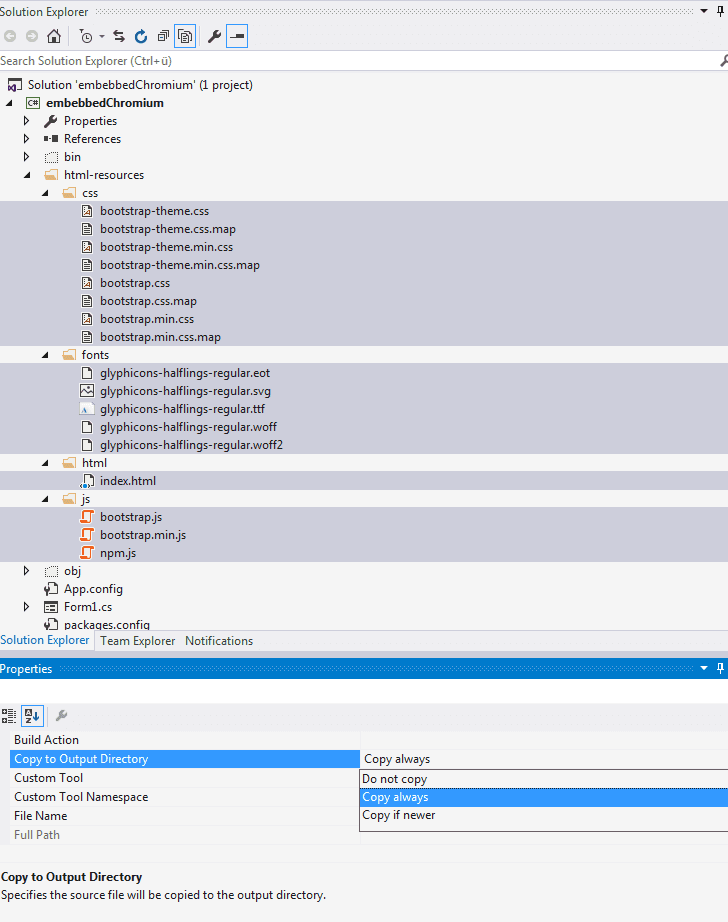
Important : Now you need to select all the files inside every folder and do the following action :
- Select all
html,js,cssresources inside the folder. - In the bottom set the
Copy to Output Directoryvalue toCopy Always.
Now we need to setup CefSharp to point to our index.html file instead a webUrl. As now our resources are located in the project you can use the following code to get the path of your resources :
Note that you need to provide a full local path to your files always. As a normal project needs to be able to work everywhere, therefore the path is relative to the executable of our project.
// Now instead use http://ourcodeworld.com as URL we'll use the "page" variable to load our local resource
String page = string.Format(@"{0}\html-resources\html\index.html", Application.StartupPath);
However , this will not work yet, if you try to execute your app now you'll get a white screen. We need first :
- Expose a C# Class to be used in Javascript as an object.
- Allow the use of local files (file://).
We are going to expose a class of c# in Javascript in order to manipulate native functions with Javascript. We need to create a new class, this class expects 2 items in the constructor (ChromiumBrowserInstance and The Main Form). This class will have 2 functions, one to start the chromium developer tools and other to start the command prompt of windows (cmd.exe).
The class should look like :
using System;
using System.Collections.Generic;
using System.Linq;
using System.Text;
using System.Threading.Tasks;
using System.Windows.Forms;
using CefSharp;
using CefSharp.WinForms;
using System.Diagnostics;

namespace embebbedChromium
{
    class CefCustomObject
    {
        // Declare a local instance of chromium and the main form in order to execute things from here in the main thread
        private static ChromiumWebBrowser _instanceBrowser = null;
        // The form class needs to be changed according to yours
        private static Form1 _instanceMainForm = null;


        public CefCustomObject(ChromiumWebBrowser originalBrowser, Form1 mainForm)
        {
            _instanceBrowser = originalBrowser;
            _instanceMainForm = mainForm;
        }

        public void showDevTools()
        {
            _instanceBrowser.ShowDevTools();
        }

        public void opencmd()
        {
            ProcessStartInfo start = new ProcessStartInfo("cmd.exe", "/c pause");
            Process.Start(start);
        }
    }
}
This class will be exposed in Javascript Later as you can see is very basic, shows the dev tools of the chrome browser and starts a cmd.exe process.
Now our InitializeChromium function should look like :
public void InitializeChromium()
{
    CefSettings settings = new CefSettings();

    // Note that if you get an error or a white screen, you may be doing something wrong !
    // Try to load a local file that you're sure that exists and give the complete path instead to test
    // for example, replace page with a direct path instead :
    // String page = @"C:\Users\SDkCarlos\Desktop\afolder\index.html";

    String page = string.Format(@"{0}\html-resources\html\index.html", Application.StartupPath);
    //String page = @"C:\Users\SDkCarlos\Desktop\artyom-HOMEPAGE\index.html";

    if (!File.Exists(page))
    {
        MessageBox.Show("Error The html file doesn't exists : "+page);
    }

    // Initialize cef with the provided settings
    Cef.Initialize(settings);
    // Create a browser component
    chromeBrowser = new ChromiumWebBrowser(page);

    // Add it to the form and fill it to the form window.
    this.Controls.Add(chromeBrowser);
    chromeBrowser.Dock = DockStyle.Fill;

    // Allow the use of local resources in the browser
    BrowserSettings browserSettings = new BrowserSettings();
    browserSettings.FileAccessFromFileUrls = CefState.Enabled;
    browserSettings.UniversalAccessFromFileUrls = CefState.Enabled;
    chromeBrowser.BrowserSettings = browserSettings;
}
We use the File.Exists method to see if the providen path exists, otherwise you did something wrong on the previous steps.
Now we just need to execute it and expose the class in the InitializeComponent function:
public Form1()
{
    InitializeComponent();
    // Start the browser after initialize global component
    InitializeChromium();
    // Register an object in javascript named "cefCustomObject" with function of the CefCustomObject class :3
    chromeBrowser.RegisterJsObject("cefCustomObject", new CefCustomObject(chromeBrowser, this));
}- Be careful if your project is in a different hard drive than the main disk as in development other path rather than (C://) is most likely to fail.
- Note the
RegisterJsObjectfunction register as a global object a class with the providen name as first parameter. In this case the global object in Javascript will becefCustomObject.
That's it ! Now you just need to prove the app, the main class now should be look similar to this with all the previous code :
using System;
using System.IO;
using System.Collections.Generic;
using System.ComponentModel;
using System.Data;
using System.Drawing;
using System.Linq;
using System.Text;
using System.Threading.Tasks;
using System.Windows.Forms;
using CefSharp;
using CefSharp.WinForms;
using System.Runtime.InteropServices;

namespace embebbedChromium
{
    public partial class Form1 : Form
    {
        public ChromiumWebBrowser chromeBrowser;

        public Form1()
        {
            InitializeComponent();
            // Start the browser after initialize global component
            InitializeChromium();
            // Register an object in javascript named "cefCustomObject" with function of the CefCustomObject class :3
            chromeBrowser.RegisterJsObject("cefCustomObject", new CefCustomObject(chromeBrowser, this));
        }

        private void Form1_Load(object sender, EventArgs e)
        {
            chromeBrowser.ShowDevTools();
        }

        public void InitializeChromium()
        {
            CefSettings settings = new CefSettings();

            // Note that if you get an error or a white screen, you may be doing something wrong !
            // Try to load a local file that you're sure that exists and give the complete path instead to test
            // for example, replace page with a direct path instead :
            // String page = @"C:\Users\SDkCarlos\Desktop\afolder\index.html";

            String page = string.Format(@"{0}\html-resources\html\index.html", Application.StartupPath);
            //String page = @"C:\Users\SDkCarlos\Desktop\artyom-HOMEPAGE\index.html";

            if (!File.Exists(page))
            {
                MessageBox.Show("Error The html file doesn't exists : "+page);
            }

            // Initialize cef with the provided settings
            Cef.Initialize(settings);
            // Create a browser component
            chromeBrowser = new ChromiumWebBrowser(page);

            // Add it to the form and fill it to the form window.
            this.Controls.Add(chromeBrowser);
            chromeBrowser.Dock = DockStyle.Fill;

            // Allow the use of local resources in the browser
            BrowserSettings browserSettings = new BrowserSettings();
            browserSettings.FileAccessFromFileUrls = CefState.Enabled;
            browserSettings.UniversalAccessFromFileUrls = CefState.Enabled;
            chromeBrowser.BrowserSettings = browserSettings;
        }

        private void Form1_FormClosing(object sender, FormClosingEventArgs e)
        {
            Cef.Shutdown();
        }
    }
}
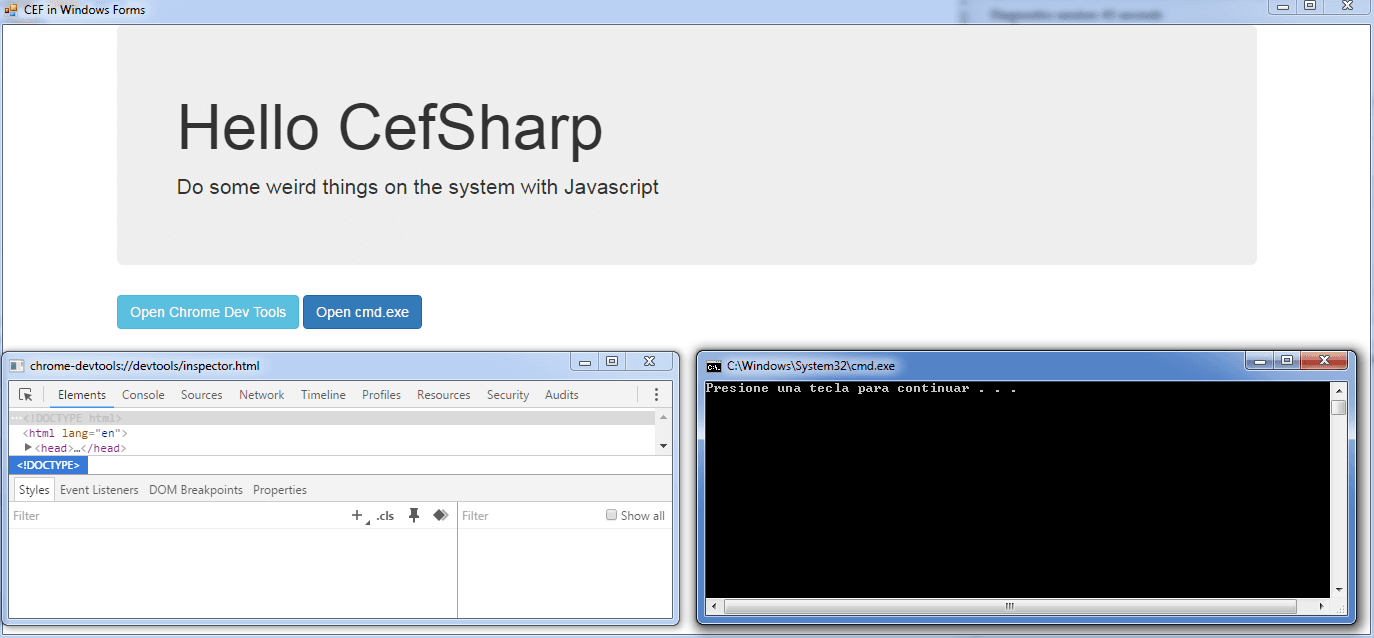
To handle the Javascript part, as said before the RegisterJsObject function creates an object with the name providen as first parameter. In index.html file we are going to create the following buttons which execute the native functions with javascript :
<button class="btn btn-info" onclick="cefCustomObject.showDevTools();">Open Chrome Dev Tools</button>
<button class="btn btn-primary" onclick="cefCustomObject.opencmd();">Open cmd.exe</button>
Remember to respect the "camelCase", the method in C# needs to start with lowerCase and obey the camelCase rule (no underscore _ ), as shown in the class.
As you can see, with CefSharp everything is bi-directional, you are able to handle javascript from c# or handle c# from javascript dinamically easily.
Now start your app and enjoy HTML controls as graphical user interface in windows !
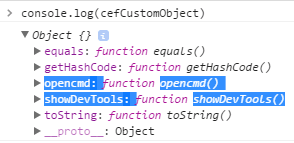
If you see the registered class in javascript, you'll see the object with all the registered methods and functions as native code (equals, getHashCode and toString are automatically added).
Have fun