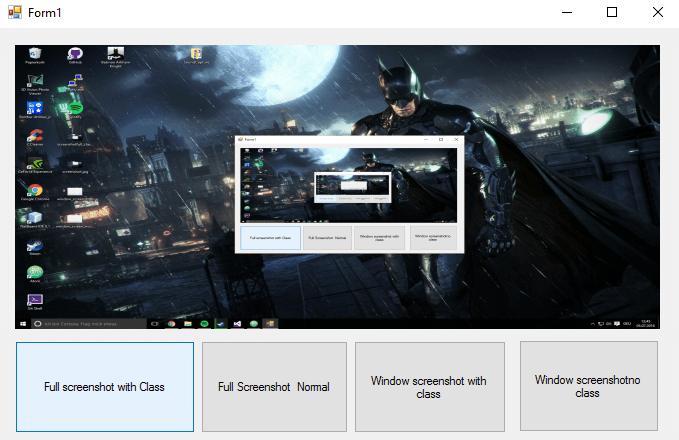
To report errors, an application destinated to only take the screenshot of the window etc. Whatever the use is, an image says more than 1000 words.
In this article you're going to learn how to take a screenshot of the monitor or only a specified winform window.
We offer 2 different methods to achieve every screenshot type.If you want to use those that uses the ScreenCapture class, you'll need the following class in your project, the code is the following, do not forget to change the namespace according to the one of your project :
Note : you don't need this class if you use the methods that doesn't require the ScreenCapture, as you can use the second option that only uses the CopyFromScreen method.
using System;
using System.Runtime.InteropServices;
using System.Drawing;
using System.Drawing.Imaging;

namespace ChangeThisNamespace
{
    /// <summary>
    /// Provides functions to capture the entire screen, or a particular window, and save it to a file.
    /// </summary>
    public class ScreenCapture
    {
        /// <summary>
        /// Creates an Image object containing a screen shot of the entire desktop
        /// </summary>
        /// <returns></returns>
        public Image CaptureScreen()
        {
            return CaptureWindow(User32.GetDesktopWindow());
        }
        /// <summary>
        /// Creates an Image object containing a screen shot of a specific window
        /// </summary>
        /// <param name="handle">The handle to the window. (In windows forms, this is obtained by the Handle property)</param>
        /// <returns></returns>
        public Image CaptureWindow(IntPtr handle)
        {
            // get te hDC of the target window
            IntPtr hdcSrc = User32.GetWindowDC(handle);
            // get the size
            User32.RECT windowRect = new User32.RECT();
            User32.GetWindowRect(handle, ref windowRect);
            int width = windowRect.right - windowRect.left;
            int height = windowRect.bottom - windowRect.top;
            // create a device context we can copy to
            IntPtr hdcDest = GDI32.CreateCompatibleDC(hdcSrc);
            // create a bitmap we can copy it to,
            // using GetDeviceCaps to get the width/height
            IntPtr hBitmap = GDI32.CreateCompatibleBitmap(hdcSrc, width, height);
            // select the bitmap object
            IntPtr hOld = GDI32.SelectObject(hdcDest, hBitmap);
            // bitblt over
            GDI32.BitBlt(hdcDest, 0, 0, width, height, hdcSrc, 0, 0, GDI32.SRCCOPY);
            // restore selection
            GDI32.SelectObject(hdcDest, hOld);
            // clean up
            GDI32.DeleteDC(hdcDest);
            User32.ReleaseDC(handle, hdcSrc);
            // get a .NET image object for it
            Image img = Image.FromHbitmap(hBitmap);
            // free up the Bitmap object
            GDI32.DeleteObject(hBitmap);
            return img;
        }
        /// <summary>
        /// Captures a screen shot of a specific window, and saves it to a file
        /// </summary>
        /// <param name="handle"></param>
        /// <param name="filename"></param>
        /// <param name="format"></param>
        public void CaptureWindowToFile(IntPtr handle, string filename, ImageFormat format)
        {
            Image img = CaptureWindow(handle);
            img.Save(filename, format);
        }
        /// <summary>
        /// Captures a screen shot of the entire desktop, and saves it to a file
        /// </summary>
        /// <param name="filename"></param>
        /// <param name="format"></param>
        public void CaptureScreenToFile(string filename, ImageFormat format)
        {
            Image img = CaptureScreen();
            img.Save(filename, format);
        }

        /// <summary>
        /// Helper class containing Gdi32 API functions
        /// </summary>
        private class GDI32
        {

            public const int SRCCOPY = 0x00CC0020; // BitBlt dwRop parameter
            [DllImport("gdi32.dll")]
            public static extern bool BitBlt(IntPtr hObject, int nXDest, int nYDest,
                int nWidth, int nHeight, IntPtr hObjectSource,
                int nXSrc, int nYSrc, int dwRop);
            [DllImport("gdi32.dll")]
            public static extern IntPtr CreateCompatibleBitmap(IntPtr hDC, int nWidth,
                int nHeight);
            [DllImport("gdi32.dll")]
            public static extern IntPtr CreateCompatibleDC(IntPtr hDC);
            [DllImport("gdi32.dll")]
            public static extern bool DeleteDC(IntPtr hDC);
            [DllImport("gdi32.dll")]
            public static extern bool DeleteObject(IntPtr hObject);
            [DllImport("gdi32.dll")]
            public static extern IntPtr SelectObject(IntPtr hDC, IntPtr hObject);
        }

        /// <summary>
        /// Helper class containing User32 API functions
        /// </summary>
        private class User32
        {
            [StructLayout(LayoutKind.Sequential)]
            public struct RECT
            {
                public int left;
                public int top;
                public int right;
                public int bottom;
            }
            [DllImport("user32.dll")]
            public static extern IntPtr GetDesktopWindow();
            [DllImport("user32.dll")]
            public static extern IntPtr GetWindowDC(IntPtr hWnd);
            [DllImport("user32.dll")]
            public static extern IntPtr ReleaseDC(IntPtr hWnd, IntPtr hDC);
            [DllImport("user32.dll")]
            public static extern IntPtr GetWindowRect(IntPtr hWnd, ref RECT rect);
        }
    }
}
Active winform window screenshot
There are 2 ways to take a fullscren screenshot, using a self-implemented screenshots with the Drawing lib of windows or using the previous mentioned class.
To take a screenshot only from the active window we are going to use the following class that allow you to do different type of screenshots.
First, do not forget to add the following use statements in the top of your class (where you are going to use the methods) to access the necessary methods :
using System.Drawing;
using System.Drawing.Imaging;
Now to take the screenshot of the active window, use the following method in your main class :
/// <summary>
/// Creates a screenshot of the active winform window.
/// It uses the ScreenCapture class.
/// </summary>
/// <param name="filepath"></param>
/// <param name="filename"></param>
/// <param name="format"></param>
private void WindowScreenshot(String filepath, String filename, ImageFormat format)
{
    ScreenCapture sc = new ScreenCapture();

    string fullpath = filepath + "\\" + filename;

    sc.CaptureWindowToFile(this.Handle, fullpath, format);
}

// Use like :

WindowScreenshot(Environment.GetFolderPath(Environment.SpecialFolder.Desktop), "window_screenshot.jpg", ImageFormat.Jpeg);
Now the other way is to use the CopyFromScreen method from the Graphics class of .NET.
Use the following method to take a screenshot from the active window without need any class :
/// <summary>
/// Take the screenshot of the active window using the CopyFromScreen method relative to the bounds of the form.
/// </summary>
/// <param name="filepath"></param>
/// <param name="filename"></param>
/// <param name="format"></param>
private void WindowScreenshotWithoutClass(String filepath, String filename, ImageFormat format)
{
    Rectangle bounds = this.Bounds;

    using (Bitmap bitmap = new Bitmap(bounds.Width, bounds.Height))
    {
        using (Graphics g = Graphics.FromImage(bitmap))
        {
            g.CopyFromScreen(new Point(bounds.Left, bounds.Top), Point.Empty, bounds.Size);
        }

        string fullpath = filepath + "\\" + filename;

        bitmap.Save(fullpath,format);
    }
}


// Use it like :

WindowScreenshotWithoutClass(Environment.GetFolderPath(Environment.SpecialFolder.Desktop), "window_screen_noclass.jpg", ImageFormat.Jpeg);
Fullscreen screenshot
There are 2 ways to take a fullscren screenshot, using a self-implemented screenshots with the Drawing lib of windows or using the previous mentioned class.
The first method take a fullscreen screenshot, we are going to use the CopyFromScreen method from the Graphics class of .NET.
First, do not forget to add the following use statements in the top of your class to access the necessary methods :
using System.Drawing;
using System.Drawing.Imaging;
Now to take the screenshot and save it in a specified directory, use the following method :
/// <summary>
/// Takes a fullscreen screenshot of the monitor and saves the specified file in a directory with custom name.
/// It expects the Format of the file.
/// </summary>
/// <param name="filepath"></param>
/// <param name="filename"></param>
/// <param name="format"></param>
private void FullScreenshot(String filepath,String filename,ImageFormat format)
{
    Rectangle bounds = Screen.GetBounds(Point.Empty);
    using (Bitmap bitmap = new Bitmap(bounds.Width, bounds.Height))
    {
        using (Graphics g = Graphics.FromImage(bitmap))
        {
            g.CopyFromScreen(Point.Empty, Point.Empty, bounds.Size);
        }

        string fullpath = filepath + "\\" + filename;

        bitmap.Save(fullpath, format);
    }
}


// Use it as

FullScreenshot(Environment.GetFolderPath(Environment.SpecialFolder.Desktop), "screenshot.jpg", ImageFormat.Jpeg);
And to create a screenshot using the ScreenCapture class, use the following method:
/// <summary>
///  Creates a screenshot using the ScreenCapture class.
/// </summary>
/// <param name="filepath"></param>
/// <param name="filename"></param>
/// <param name="format"></param>
private void FullScreenshotWithClass(String filepath, String filename, ImageFormat format)
{
    ScreenCapture sc = new ScreenCapture();
    Image img = sc.CaptureScreen();

    string fullpath = filepath + "\\" + filename;

    img.Save(fullpath, format);
}


// And use it like

FullScreenshotWithClass(Environment.GetFolderPath(Environment.SpecialFolder.Desktop), "screenshotfull_class.jpg", ImageFormat.Jpeg);
More info
- Remember that you can change the format of your image changing the extension and the ImageFormat type. This class supports the following formats :
- ImageFormat.Jpeg
- ImageFormat.Gif
- ImageFormat.Tiff
- ImageFormat.Icon
- ImageFormat.MemoryBmp
- ImageFormat.Bmp
- ImageFormat.Exif
Have fun .