
Subversion is a powerful version control system that helps you to manage and track changes in each of your projects efficiently. It doesn't matter if you're a freelance developer working on your own or along with a team of developers, subversion enhances the overall organization of your projects. Although the way to go nowadays is Git, there are a lot of legacy projects that still work with Subversion and therefore, some devs need to provide support for this infrastructure.
In this guide, I will walk you trough the process of setting up and configuring SVN on your Ubuntu server.
Pre-requisites
In this tutorial, we will only mount an SVN repository that is accessible through the svn:// protocol and svn over ssh (svn+ssh). To continue with this tutorial you will need:
- Ubuntu 20.04.
- SSH access to your server.
- Port 3690 must be open.
1. Install subversion
For the installation of subversion in your server, you can use the binary packages from the repositories of Ubuntu. Be sure to update the package lists first:
sudo apt-get updateThen, simply install subversion with the following command:
sudo apt-get install subversionThe installation of SVN itself without including the storage space needed for the repositories shouldn't take more than 20MB. This will install several CLI tools such as the svn client and the svn server. In this case for the server setup, we need svnserver, which is a lightweight standalone server program that comes with subversion. It is the second option for hosting subversion repositories (the first option is via http). This tool is designed to server repositories over the network allowing you to clone the repositories and work on them. svnserve uses the custom svn protocol for communication between the clients and the server, operating on port 3690 by default.
Once the installation finishes, you can print the version of svnserver (the tool that we are going to use to mount the repo):
svnserve --versionThe output should be something similar to the following:
svnserve, version 1.14.1 (r1886195)
   compiled May 21 2022, 10:52:35 on x86_64-pc-linux-gnu

Copyright (C) 2021 The Apache Software Foundation.
This software consists of contributions made by many people;
see the NOTICE file for more information.
Subversion is open source software, see http://subversion.apache.org/

The following repository back-end (FS) modules are available:

* fs_fs : Module for working with a plain file (FSFS) repository.
* fs_x : Module for working with an experimental (FSX) repository.
* fs_base : Module for working with a Berkeley DB repository.

Cyrus SASL authentication is available.
2. Adjust directory structure and user permissions
To set up the svn server, we will need to create an extra user in the system with the svn group as it's a bad practice to run this kind of tool with the root user. Proceed to create the svn user with the following command:
sudo adduser --disabled-login --gecos GECOS svnThis will create the svn user under the svn group, it won't prompt details about the user such as the email, etc. Now, we need to create the directory where the repository will be mounted.
It's a good practice to have a dedicated directory to store all your SVN repositories, so for example you might house your repositories under a directory like /var/svn or /svn. In my case, I'm going to store them under the /srv/svn directory, so I'll create it with the following command:
mkdir -p /srv/svnAfter creating it, change the ownership of the directory to the svn user:
sudo chown svn:svn /srv/svn3. Create your first repository
All of the repositories will be stored under the /srv/svn directory. In this example, I'm going to create a single repository with the name repo1. Switch to the svn user:
su svnCreate the new repository using svnadmin inside the svn folder:
cd /srv/svn && svnadmin create repo1You can create as many repositories as you need inside the /srv/svn directory, where each repository inside the folder will need to be created through the svnadmin tool.
4. Setup configuration file of the repository
The SVN repository is configured through a configuration file named svnserve.conf, where you can set parameters like authentication methods, log paths, repository paths, and access control rules. In my case, I'm going to configure a couple of users that can access the repository through the svn protocol. Modify the passwd file inside the repository:
nano /srv/svn/repo1/conf/passwdAnd add the users manually in there:
[users]
user1 = password1234
user2 = password1234
user3 = password1234
Save the changes and proceed to modify the configuration file:
nano /srv/svn/repo1/conf/svnserve.confIn this file, we are going to specify that:
- Anonymous access is disabled by default.
- Authenticated users can write to the repository.
- The password file that will be used is the
passwdfile that we modified previously. - Specify the path to the log file where SVN will write the log messages.
[general]
anon-access = none
auth-access = write
password-db = passwd
realm = My SVN Repository
log-file=/var/log/svn.log
Save the changes, create the log file, and adjust its owner so the svnserve process can write to it:
sudo touch /var/log/svn.log && chown svn:svn /var/log/svn.logNow we only need to create the service that will handle the svnserve process.
5. Create the svn service
To handle the svn server, we will create systemd service unit configuration for running the Subversion (SVN) protocol daemon using svnserve. Create the file with:
nano /etc/systemd/system/svnserve.serviceUse the following configuration in this file that will serve all the repositories inside the /srv/svn directory when the service is started:
[Unit]
Description=Subversion protocol daemon
After=syslog.target network.target

[Service]
Type=forking
RuntimeDirectory=svnserve
PIDFile=/srv/svn/svnserve.pid
ExecStart=/usr/bin/svnserve --daemon --pid-file /srv/svn/svnserve.pid --root /srv/svn/ --listen-host 0.0.0.0
User=svn
Group=svn
KillMode=control-group
Restart=on-failure

[Install]
WantedBy=multi-user.target
This will start svn ensuring that it starts after syslog and network services, and specifying various options such as the root directory for repositories, user/group to run as, and restart behavior on failure.
Save the changes of the file and enable the service:
systemctl enable /etc/systemd/system/svnserve.serviceAfter enabling it, you just need to start the service:
systemctl start svnserveAnd voila:

You should now have a working svn server!
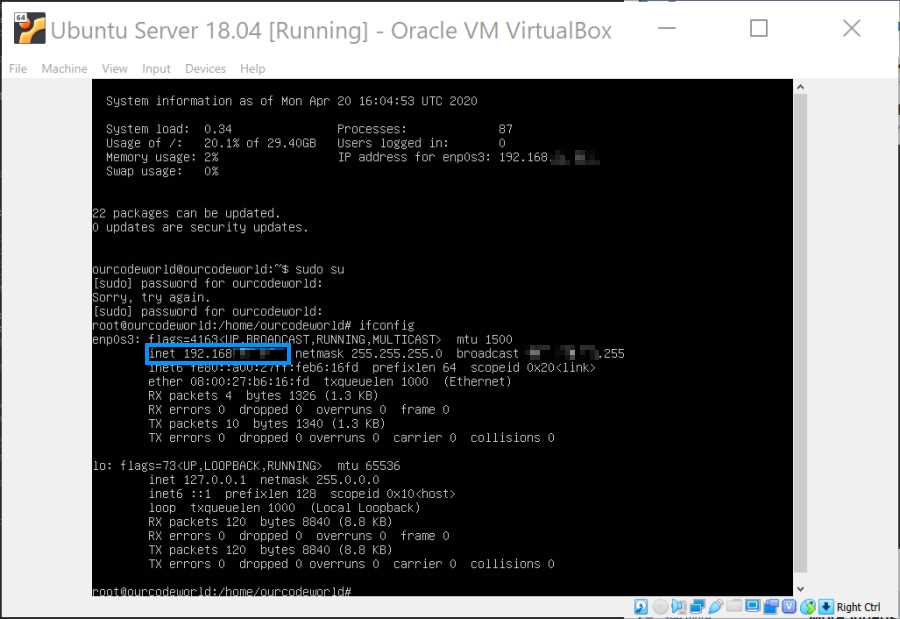
6. Connect to your svn server
You will be able to connect to your svn server through 2 protocols:
- svn: svn://your-server-ip-domain/repo1
- svn over ssh: svn+ssh://root@your-server-ip-domain/srv/svn/repo1
In my case, I use TortoiseSVN in Windows to explore my new subversion repository, which I was able to connect using my credentials configured in the passwd file:
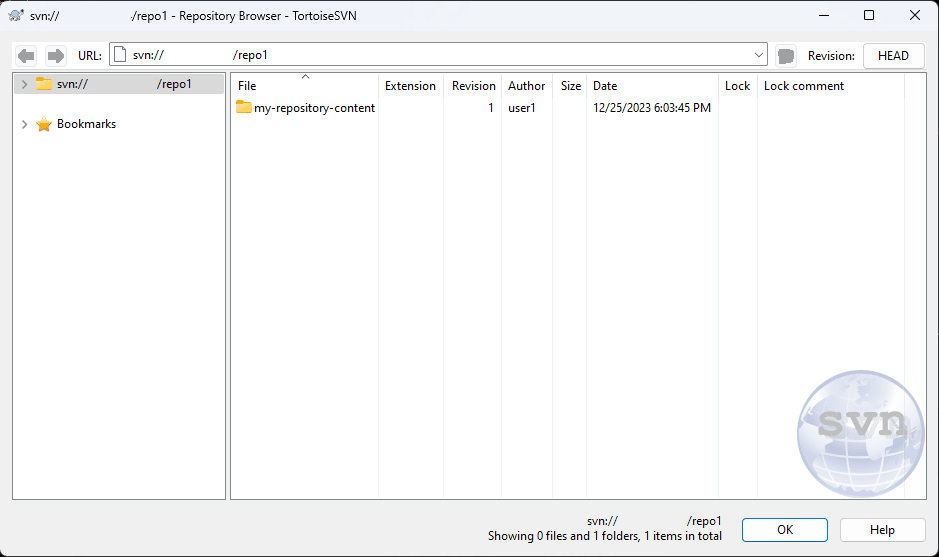
Happy coding ❤️!