
Learning is easier if you have the tool that you want to learn in your hands. If you want to learn how to work with a server, you need one. Nowadays, renting a server is quite cheap, you can find a virtual private server (VPS) so cheap as $5 USD/month with different providers, so it's easy to get a functional server fast. But, what is better than a cheap server? That's a free server right? If you know what you're doing, you can easily setup a Virtual Machine that runs Ubuntu Server in your Windows computer. You can use this server to learn more about a linux environment and related stuff locally.
In this article, we will explain you how to setup your own Ubuntu Server 18.04 in a Virtual Machine locally in Windows 10 and how to access it privately via SSH.
Note
We are not exposing the virtual machine publically. The idea is to have your own ubuntu server working locally and accessible via the SSH protocol locally on your computer.
We recommend you as well to follow the tutorial through our YouTube video that contains a detailed step by step description.
Requirements
To follow up this tutorial, you will need the following stuff already on your computer:
- Oracle VirtualBox: this program should be already installed, no special stuff or configuration needed.
- An Ubuntu 18.04 Server ISO file: you can download the ISO file of the operative system for the server version from the official website (filesize ~890MB).
And that's it, you shouldn't need anything else to get started with the configuration of your brand new local Ubuntu server.
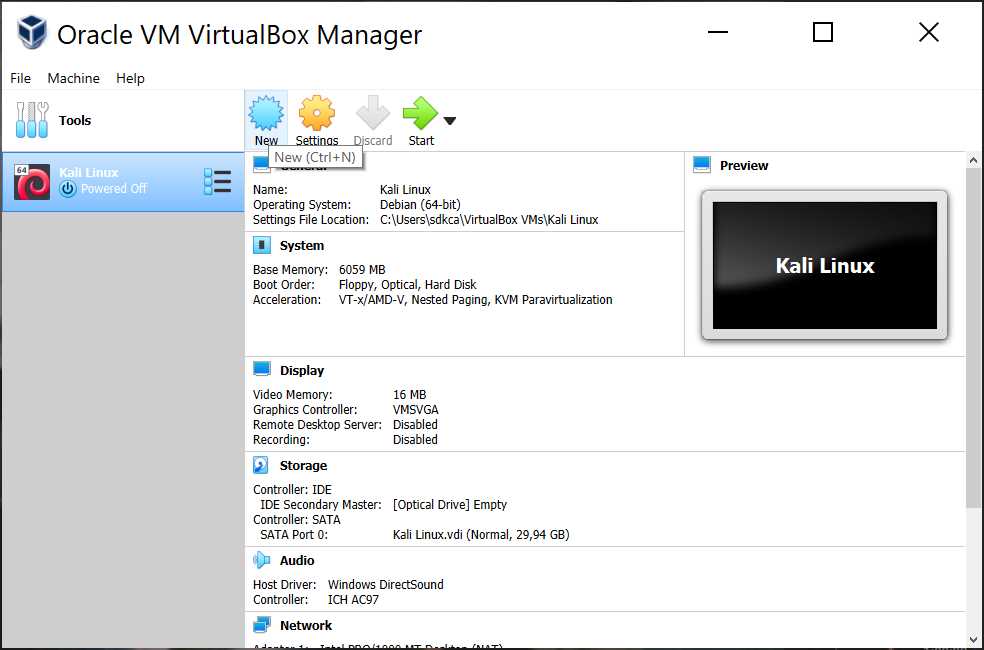
1. Create new Virtual Machine
Open VirtualBox and proceed to create your new virtual machine for ubuntu. On the top menu, select New (or press Ctrl + N):
And give a name to your virtual machine. Select as well Linux as type and Ubuntu as version (with the architecture of your ISO file, in our case is of 64 bits):
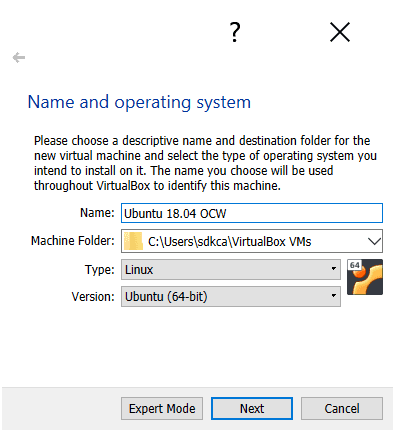
Then click on next.
2. Configure VM Hardware
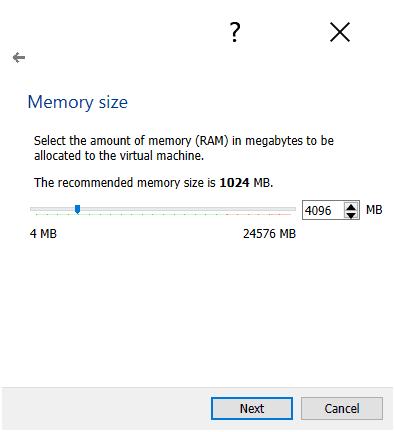
Now with the basic information of the virtual machine, we will configure the hardware in the same wizard. The first step is to define the max amount of RAM memory that will be assigned to the virtual machine. This value depends totally of what you need and according to your resources. We have 24GB of ram, so we will define this value to 4GB:
Then, you will need to create a new virtual hard disk. We will create one from scratch with the same setup:
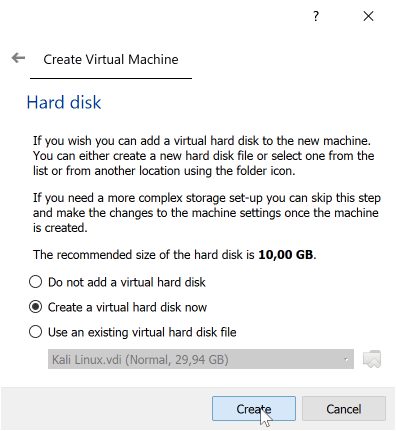
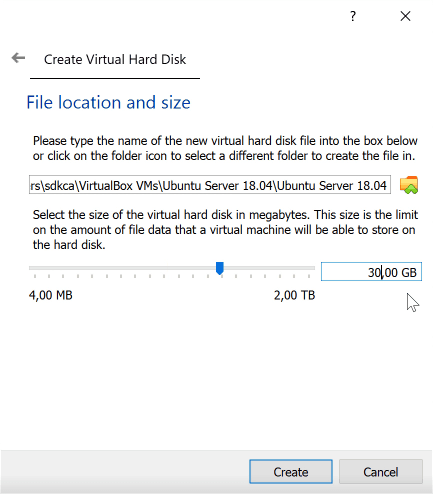
After selecting the creation of a disk, select the storage to be Dynamically allocated and you will need to specify the size of the hard disk. For Ubuntu server virtual box recommends 10GB, however according to what you need, you may want to increase the size. In this case, we will set it to 30GB:
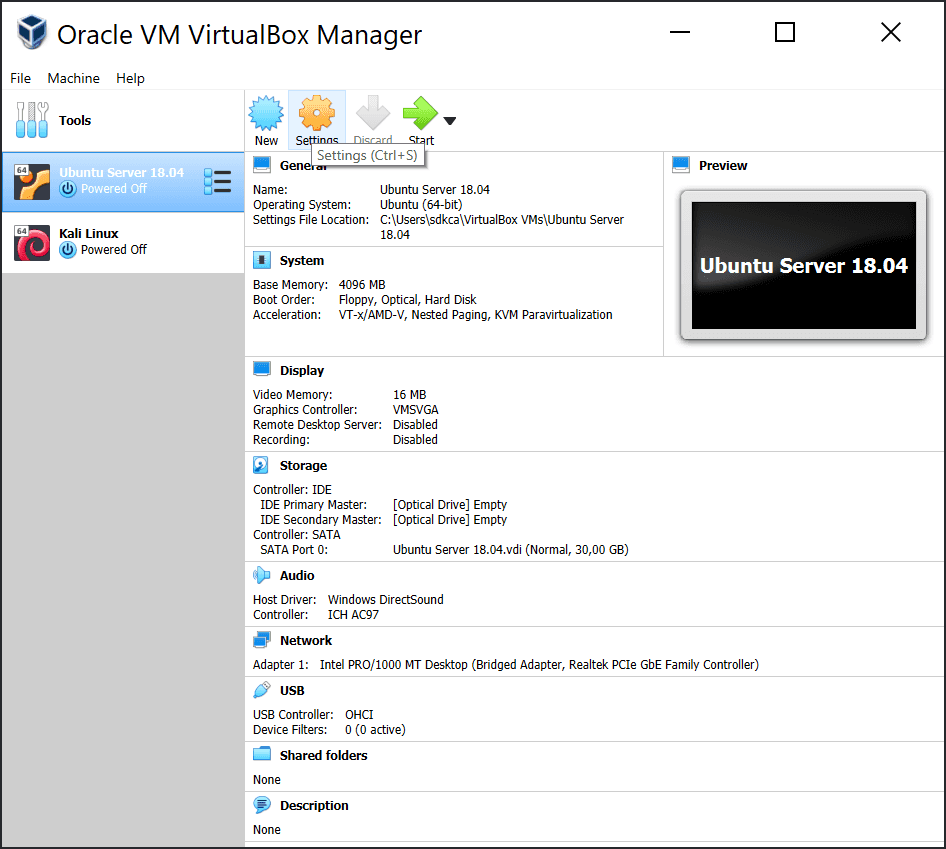
After providing this value, the wizard of the basic hardware will close. Now you need to specify the network configuration to the virtual machine, otherwise we won't have access to the internet. To do this, select the created Virtual Machine and click on Settings (or press Ctrl + S):
Then, go to the Network tab and select the Adapter 1 tab under the Network. Set the Attached to option to Bridged Adapter:
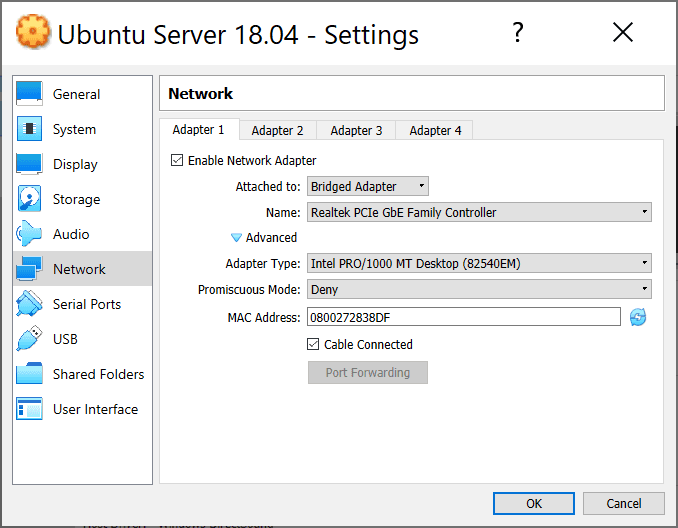
This will use an adapter to connect to the network interface of the current operating system, so the virtual machine will have access to the internet. Don't close the dialog yet.
Now go to the Storage tab and select the first disc under the Controller: IDE area. On the right side panel, look for the optical drive option and click on the disc, then select the Choose Virtual Optical Disk File option:
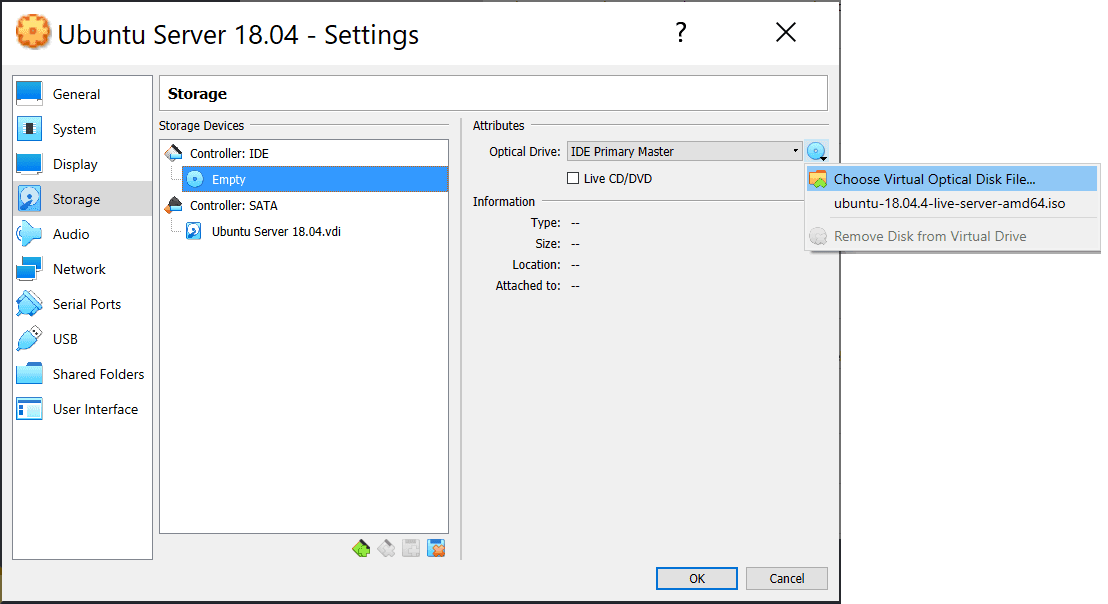
On the emergent dialog, search on your computer for the ISO file with the Ubuntu Server ISO file that you have (in our case ubuntu-18.04.4-live-server-amd64.iso).
Finally click on Ok.
3. Start VM and install Ubuntu 18.04
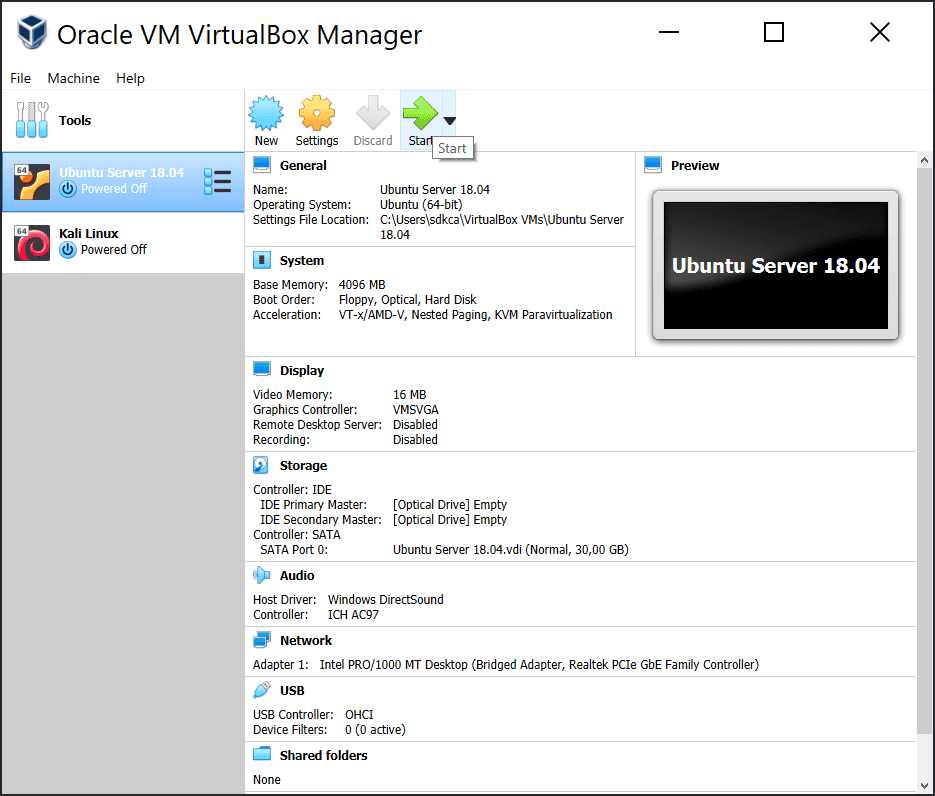
Now that we configured everything we need to start with the installation, boot your Virtual machine pressing on Start:
This will start the virtual machine and it will boot with the Ubuntu 18.04 ISO, showing you the installation setup:
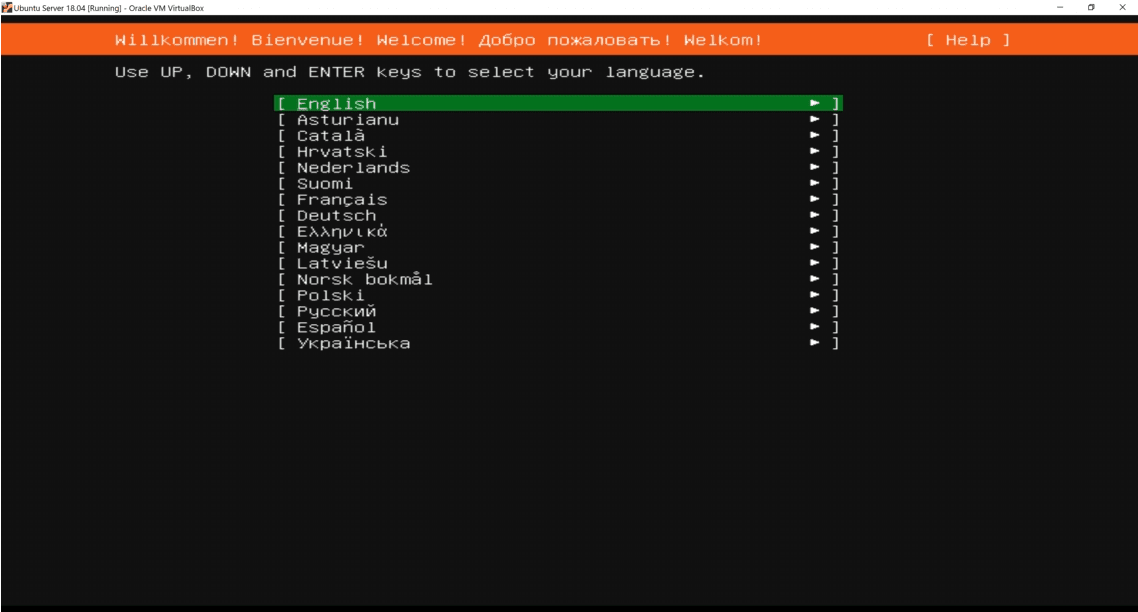
If you know how to work with installation wizards, everything should be straightforward, otherwise check the videotutorial for a step by step guide. After finishing the installation, be sure to close your virtual machine and go to the Storage tab and check that the optical drives are empty, then start the virtual machine again.
4. Access the virtual server through SSH
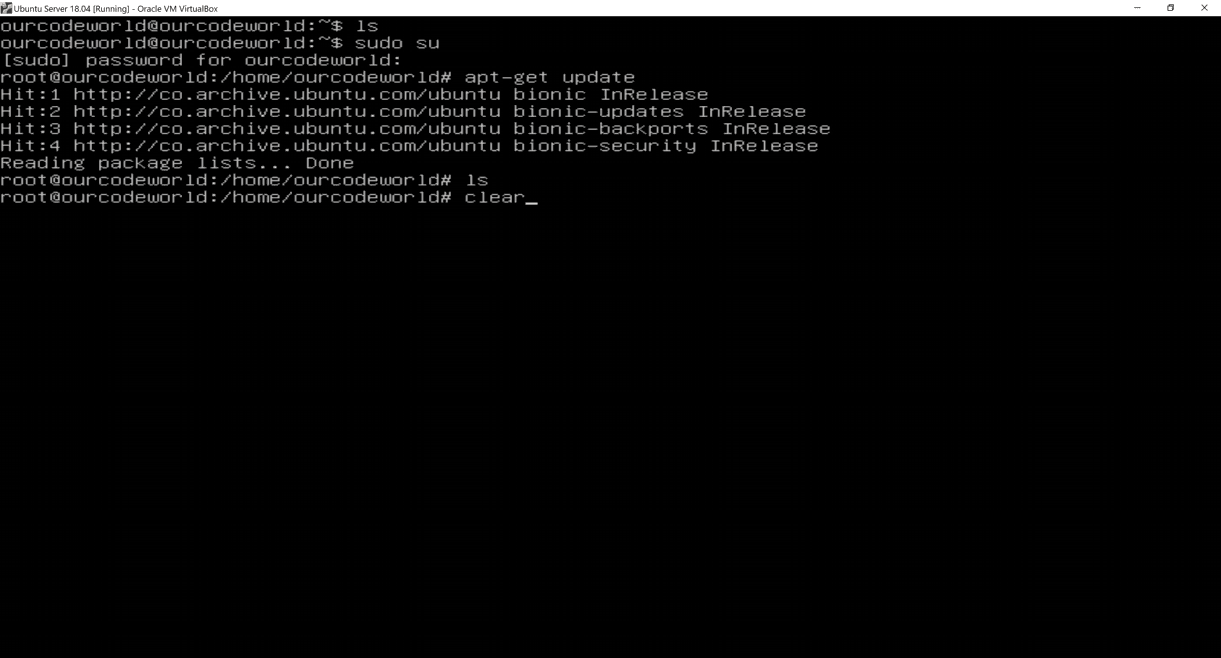
The virtual machine will give you access immediately through SSH to your server as you will be able to run commands directly from it:
However, if you want to know the address to connect to your server using another tool like PuTTY, you can simply type the ifconfig command to display the status of the network interfaces:
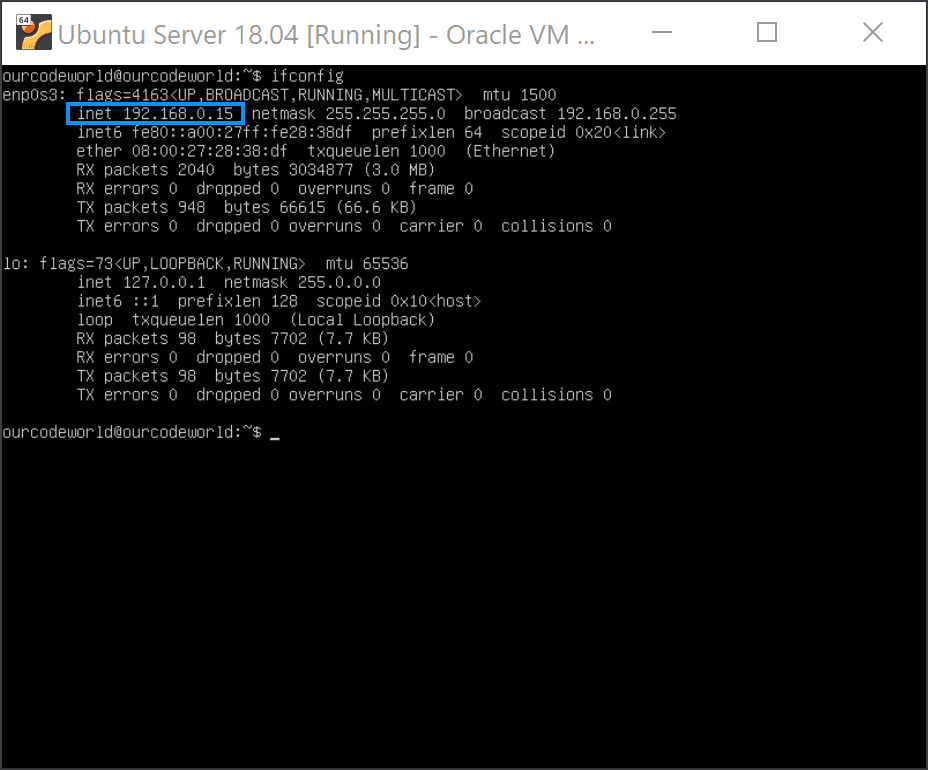
In our case, the address is, so we could connect via SSH to the mentioned address using PuTTY or other SSH client, for example with the command line: ssh [email protected].
Happy coding ❤️!

