
Through the installation of extension in VirtualBox you will be able to add new features to virtual machines, like the usage of USB 3.0, using the host Web camera and so on. In this tutorial, we will explain you how to install the official Oracle VirtualBox extension pack in VirtualBox.
1. Download Oracle VirtualBox Extension pack
Download the Oracle_VM_VirtualBox_Extension_Pack-<current-vbox-version>.vbox-extpack extension file. The size of the file is about ~10MB.
You can obtain the extension pack from the official download page here.
2. Installing
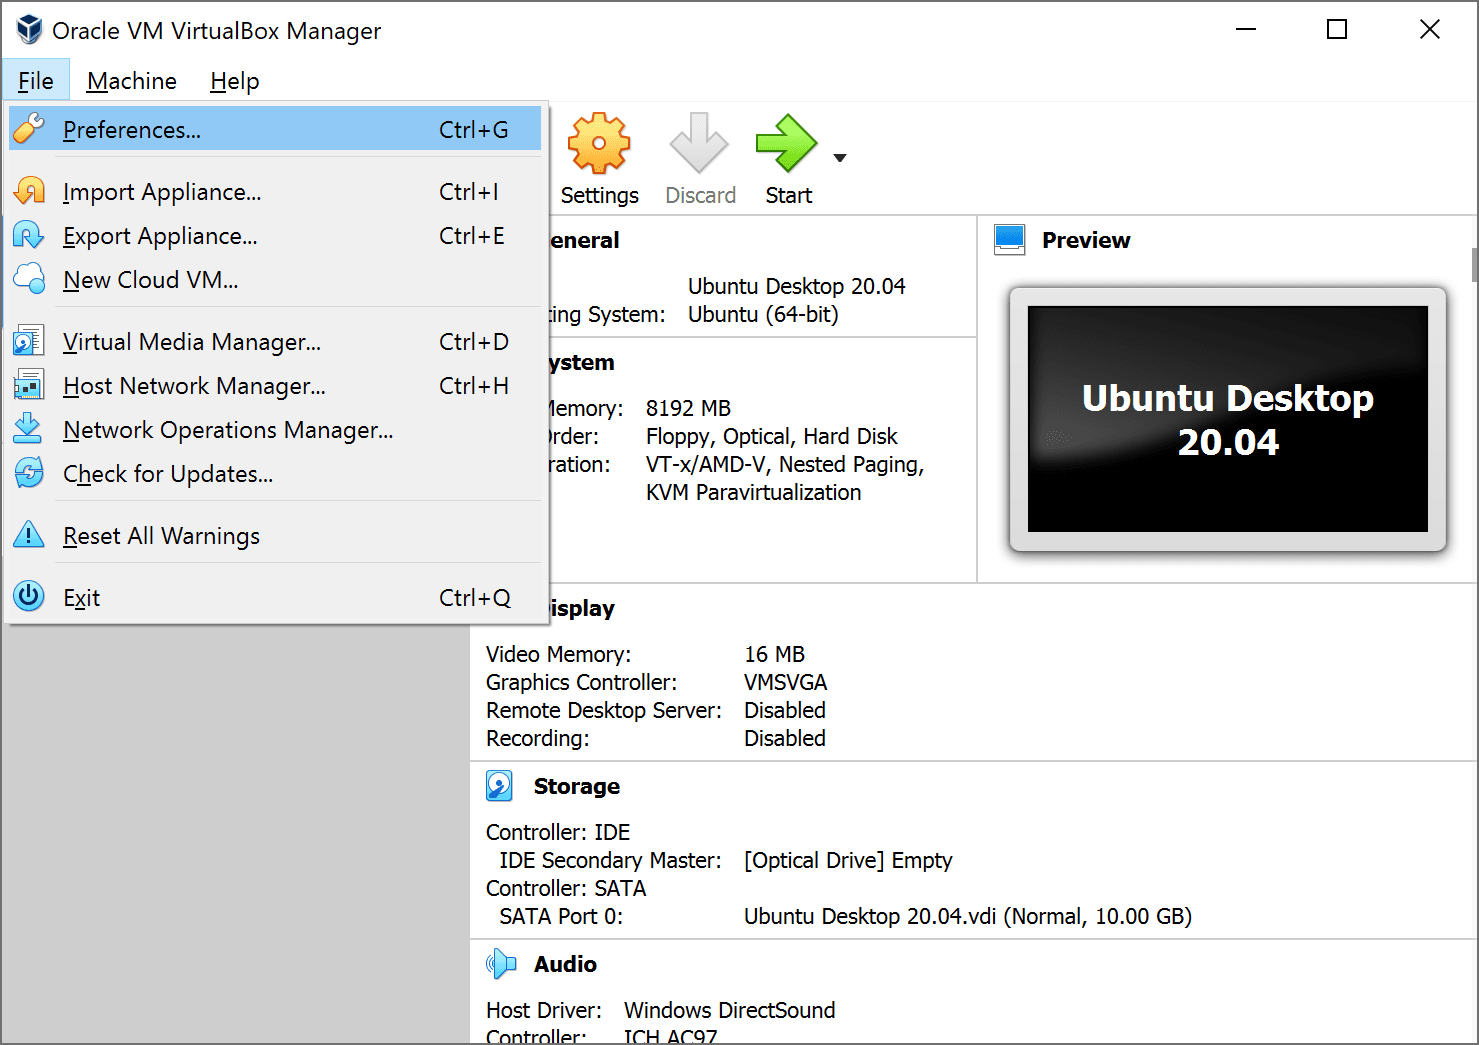
Now that you have the extension pack, you only need to install it. Start VirtualBox, go to File > Preferences:
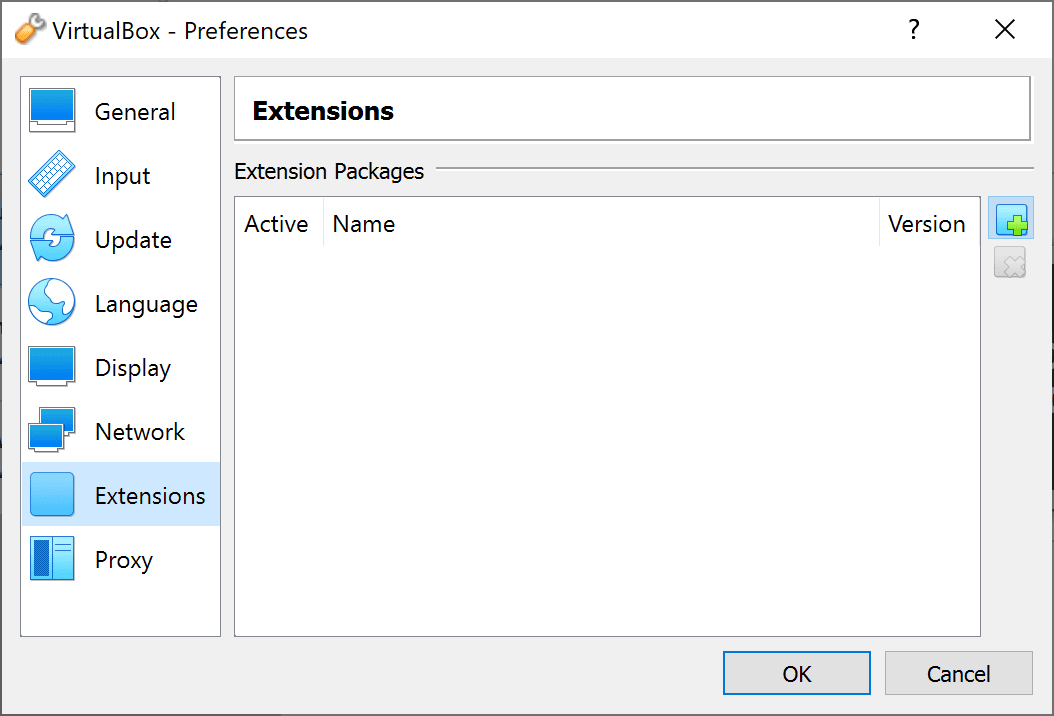
This will display the following dialog, here you will need to click on the plus icon on the right side:
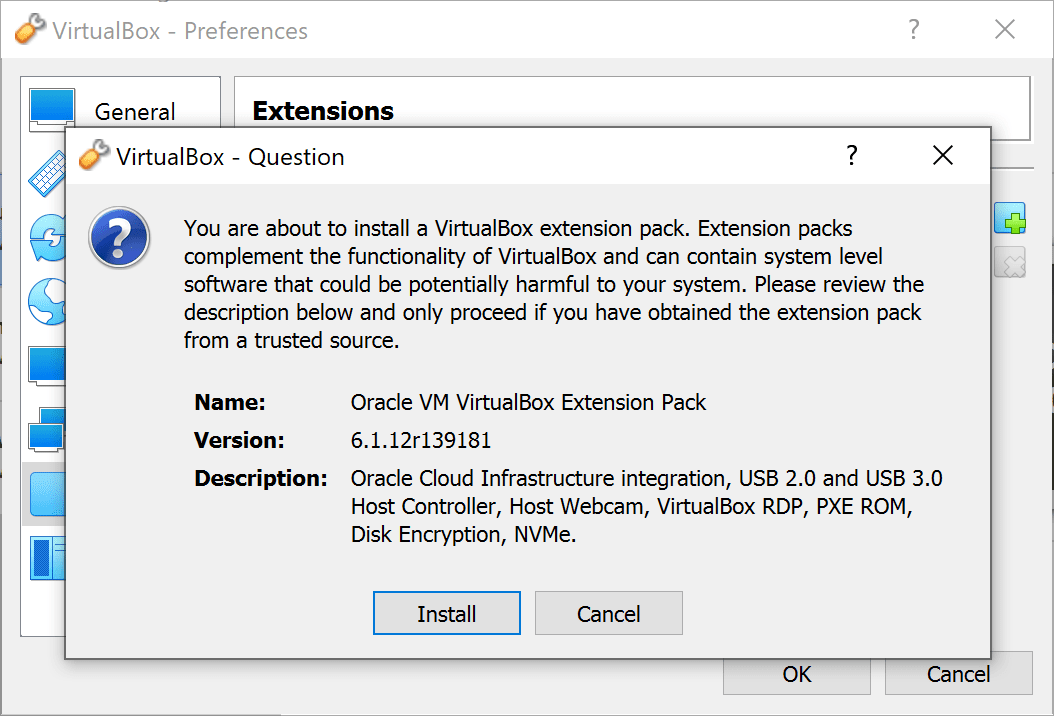
Then, search for the downloaded extension file in the filesearch dialog and install it. Before the installation you will be asked to confirm whether you want to install the extension:
Once the installation finishes, you should see now the following dialog that confirms that the extension has been installed succesfully on VirtualBox:

Happy virtualization ❤️!

