
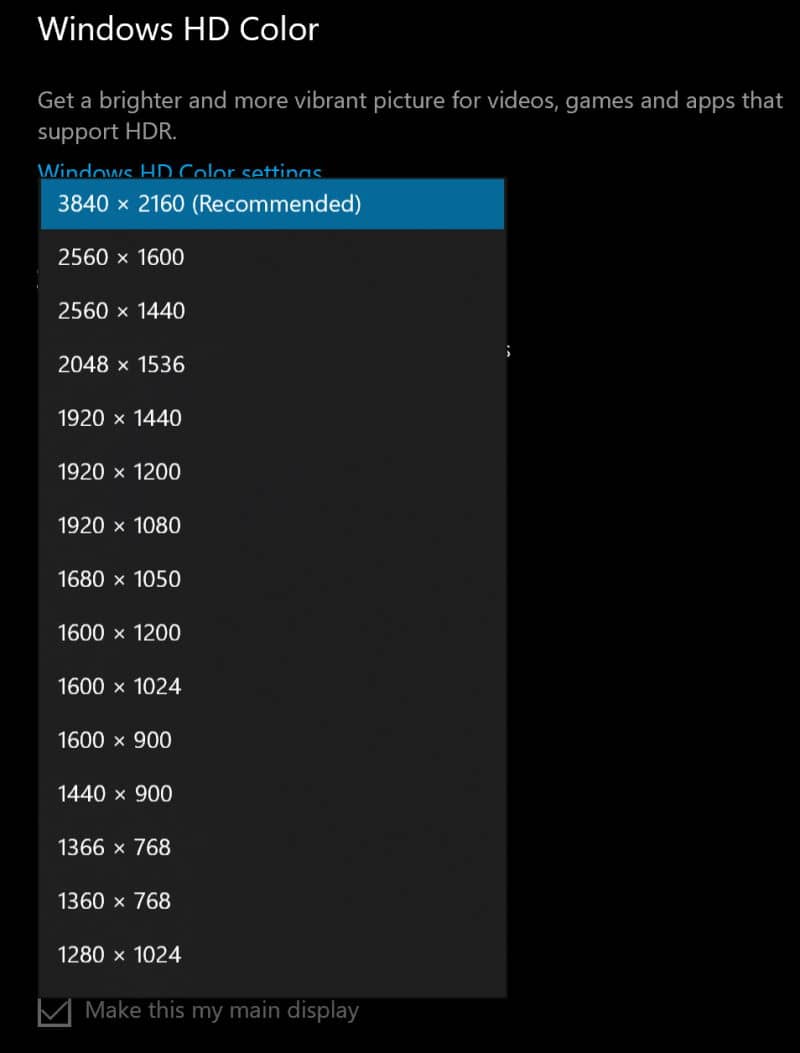
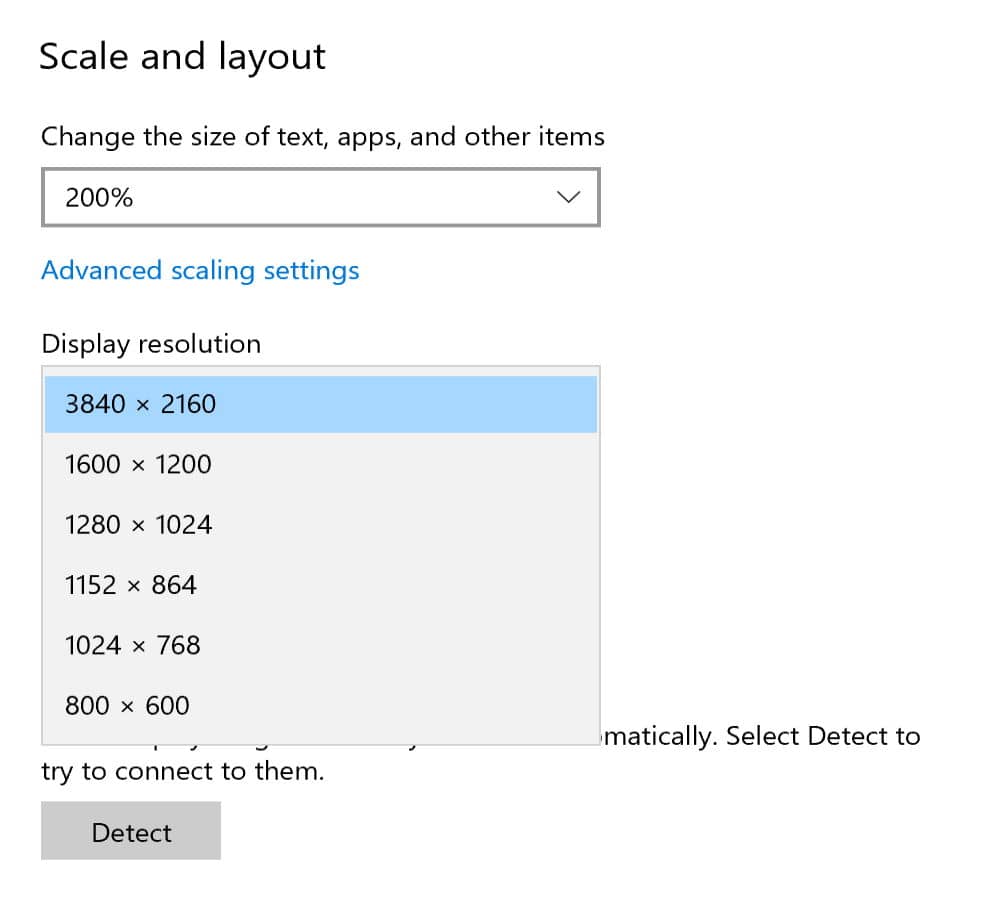
It is quite common to see in the resolutions of the virtual machine, in this case running on VirtualBox, are not the same that you have in your native system. For example, in Windows 10 installed on my computer i do have the following resolutions available:
However, with a virtual machine running Windows 10 (inside Windows 10 ð), the resolutions will be different:

The most obvious reason that may cause this problem is because in your computer, you do have a dedicated graphic hardware (your videocard), however in a virtual machine you don't have such thing unless you use a GPU passthrough, a passthrough gives the VM direct access to your GPU (you can pass through other hardware as well) so that you get almost full performance within the VM. However, this is not the case if you are using just a regular virtual machine.
In this tutorial, i will show you how to easily add a new resolution to your Windows 10 virtual machine.
1. Configure Virtual Machine Display
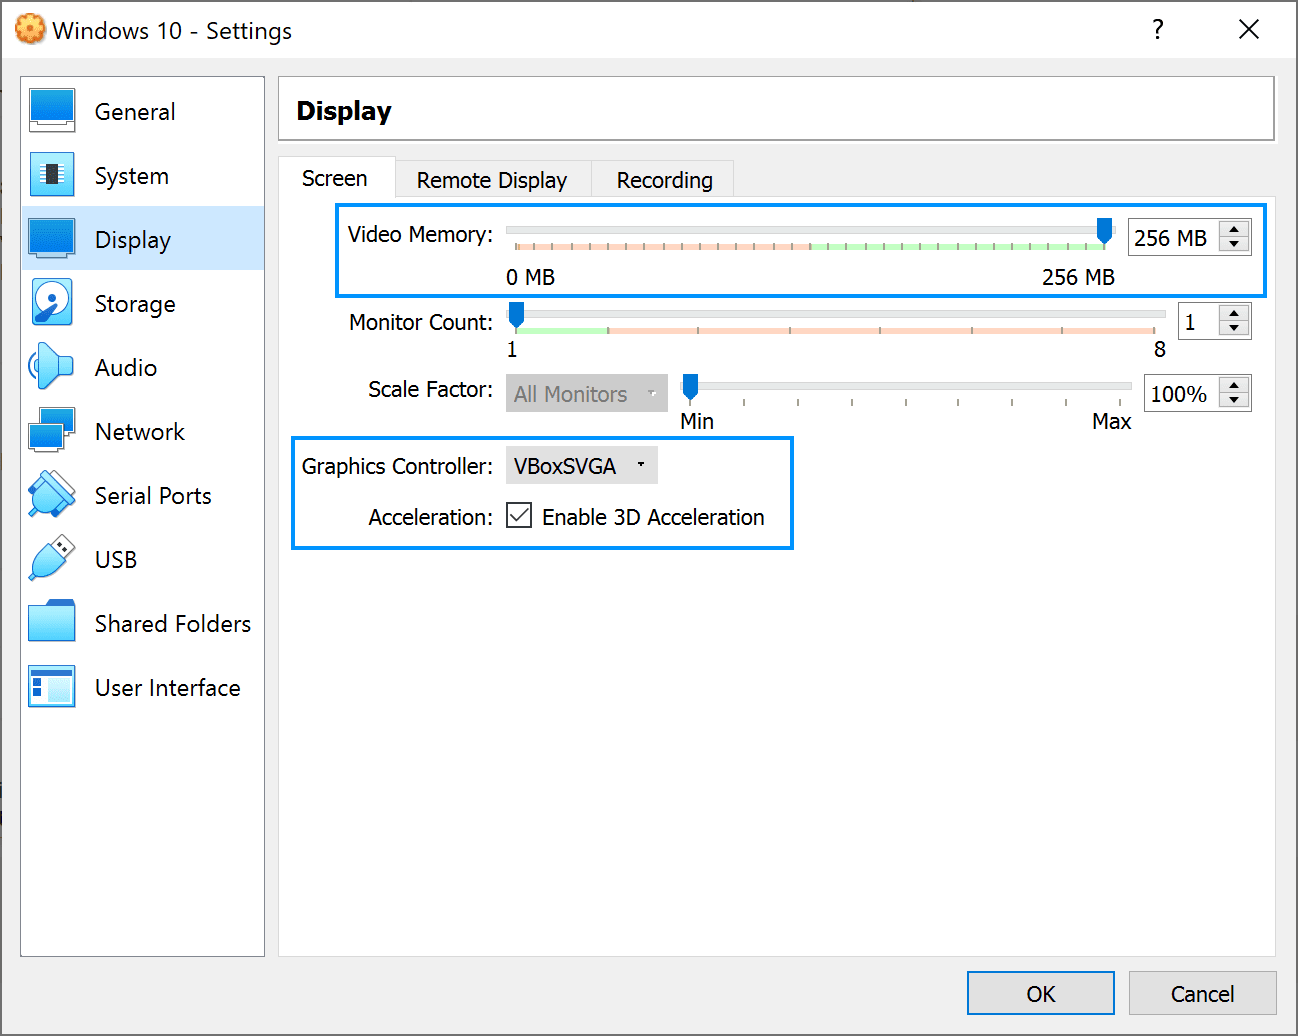
Access the settings of your Windows 10 virtual machine and go to the Display area. Here, select the Screen tab and increase the Video Memory to its highest value and select VBoxSVGA as the graphics controller and enable the 3D Acceleration:
After tweaking this, proceed with the next step.
2. Register custom video mode on your virtual machine
Open a new command prompt window and change to the directory of Virtual Box which is usually under the Program Files directory using the following command:
cd C:\Program Files\Oracle\VirtualBoxProceed to unlock globally all the max guest resolutions on all the virtual machines with the following command:
VBoxManage.exe setextradata global GUI/MaxGuestResolution anyTo register a new resolution on the virtual machine, you will need to use the following command:
VBoxManage.exe setextradata "YourMachineName" CustomVideoMode1 "WidthxHeightxBpp"In our case, we needed to provide support for a 4K monitor in our "Windows 10" virtual machine, so the proper resolution would be the following (replacing width height and bits per pixel):
VBoxManage.exe setextradata "Windows 10" CustomVideoMode1 "3840x2160x32"Then, start your virtual machine again and you will find in the display settings of the machine the new resolution that you added but that wasn't there before:
Happy virtualization ❤️!

