
In order to choose a Node.js version to work with depends totally on your audience and the environment that you have at your disposition. You should always target the stable version of Node that is quite mature and dependable as it has proven stability and commitment to keep that version as it is. If you are a developer testing new stuff, deploying stuff to production that isn't meant to be used by other persons but you, LTS is then your way to go to access those features that may be not available on the latest stable release. You will surely need to use Node.js on your server and localhost environment along with other tools so you need to choose the best way to install Node.js on your Mac.
In this article, I'll explain to you how to easily install Node.js on your Mac.
Requirements
Before proceeding with the installation of Node.js on your Mac, Since OS X 10.9, /usr/bin/git has been preset by Xcode command line tools, which means we can't properly detect if Git is installed or not. You need to manually install the Xcode command-line tools before running the install script, otherwise, it'll fail. (see #1782)
If you already installed XCode (as a developer you probably have already), proceed with this tutorial.
Install using the Node Version Manager
The recommended way to proceed with the installation of Node.js is to use the NVM tool (Node Version Manager). This tool is a fully POSIX-compliant bash script to manage multiple active Node.js versions in your system. As you will probably end up with compatibility problems with some of the projects you may want to host on your server, you should be able to switch between versions. Once your development environment is set up, you can integrate it with modern testing workflows. Solutions such as AI test case generation allow developers to automatically produce test cases for their Node.js applications, streamlining the path from setup to production-ready code.
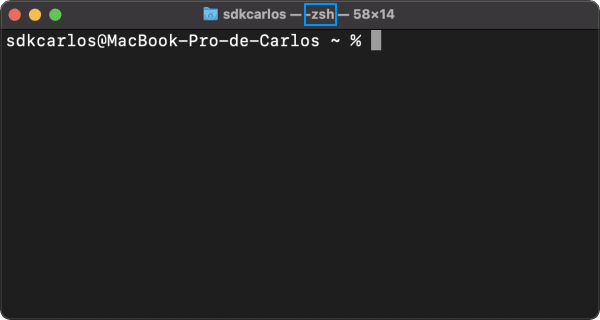
Before installing, you need to check if you have already the bash profile in your system, however, the name of the file will depend on what your default shell is, for example, as default on my Macbook Pro 2020 with BigSur, the default shell is zsh:
So depending on what your shell is, the necessary file to create will be the following one:
~/.zshrc: zsh shell.~/.bash_profileor~/.bashrc: bash shell
As mentioned, in my case the file to create would be ~/.zshrc:
touch ~/.zshrcThe file should be created and now the installation should succeed with a bash profile on your Mac. In order to use NVM, you should run this sh file that will do the trick. If you agree with the content of the script and what's going to do, you may simply download and run it directly in the terminal with the following command:
curl -o- https://raw.githubusercontent.com/nvm-sh/nvm/v0.37.2/install.sh | bashThis will initialize NVM as well on the terminal. Note that if you didn´t follow the previous step of the creation of the bash profile file, you will get the following output in the terminal (note that NVM will search on the mentioned profile files by default and will enable NVM on the first profile file that it founds so if you want to have them on more than one shell profile, paste the mentioned lines of export):
=> Compressing and cleaning up git repository

=> Profile not found. Tried ~/.bashrc, ~/.bash_profile, ~/.zshrc, and ~/.profile.
=> Create one of them and run this script again
   OR
=> Append the following lines to the correct file yourself:

export NVM_DIR="$HOME/.nvm"
[ -s "$NVM_DIR/nvm.sh" ] && \. "$NVM_DIR/nvm.sh"  # This loads nvm

=> Close and reopen your terminal to start using nvm or run the following to use it now:

export NVM_DIR="$HOME/.nvm"
[ -s "$NVM_DIR/nvm.sh" ] && \. "$NVM_DIR/nvm.sh"  # This loads nvm
And that's it, you should be able to use the NVM tool now. You may want to verify the available versions of Node.js with the following command:
nvm list-remoteThis will list absolutely all the versions available of Node.js, from the 0.1.14 to the latest version till the date 15.4.0:
...

v14.6.0
v14.7.0
v14.8.0
v14.9.0
v14.10.0
v14.10.1
v14.11.0
v14.12.0
v14.13.0
v14.13.1
v14.14.0
v14.15.0   (LTS: Fermium)
v14.15.1   (Latest LTS: Fermium)
v15.0.0
v15.0.1
v15.1.0
v15.2.0
v15.2.1
v15.3.0
v15.4.0
Now your task is to choose one of the versions that you need. For example, if I want to install a specific version (the 15.4.0) I would run the following command:
nvm install v15.4.0And wait until the installation finishes. In my case, with my Macbook with the apple silicon, probably because of the ARM architecture, Node will be compiled, so the process will take longer.
The command should generate an output similar to:
Downloading and installing node v15.4.0...
Downloading https://nodejs.org/dist/v15.4.0/node-v15.4.0-linux-x64.tar.xz...
######################## 100.0%
Computing checksum with sha256sum
Checksums matched!
Now using node v15.4.0 (npm v7.0.15)
Creating default alias: default -> v15.4.0
All the Node.js versions include NPM as well, so you won't need to install it manually. Now, as we mentioned, using this option you will be able to switch between versions of Node in your system. Now if I want to install another version, I would use the same command specifying the version that I want (e.g. nvm install 14.15.1). Note that installing a new version makes it the default one to use, so after installing the 14.15.1 version, printing the version of node with the following command:
node -vWould generate the following output:
v14.15.1Now if I want to switch to my first installed version, I would be able to list all the installed versions with the following command:
nvm listThis will print the installed versions in the system:
->     v14.15.1
        v15.4.0
default -> v15.4.0
If I want to use the v15, I just need to specify the version to the nvm use command like this:
nvm use v15.4.0And now node -v would print v15.4.0. The node package includes already npm as well, so you may want to print as the version of NPM with the following command:
npm -vFor more information about the Node Version Manager utility, please visit the official repository at Github here.
Happy coding ❤️!

