
Usually, for the Ubuntu tutorials that are written on the blog, I test them first on Virtual Machines so I can verify if they will work on the server as well. In the last days, while installing a bunch of packages and applications, the following warning appeared:

This was my bad from the beginning as I thought I had 100GB but instead, I created a virtual drive of only 10GB. As I had a lot of important stuff in there, I refused to create a new virtual machine with a bigger drive but instead, research how to make the current Virtual Drive bigger. After some research, I discovered that it wasn't so easy as I thought, so today I will share with all of you how to increase the size of a virtual drive in a virtual box.
In this case, we are going to proceed with this tutorial with Windows 10 as the host machine and Ubuntu 20.04 as a virtualized machine in VirtualBox.
Before starting
Backup your VDI file (the VM hard disk), just in case that something goes wrong. After doing the backup, you may proceed with the tutorial.
A. Trying with the Virtual Media Manager
Note: this option doesn't seem to work now, but you can give it a try anyway.
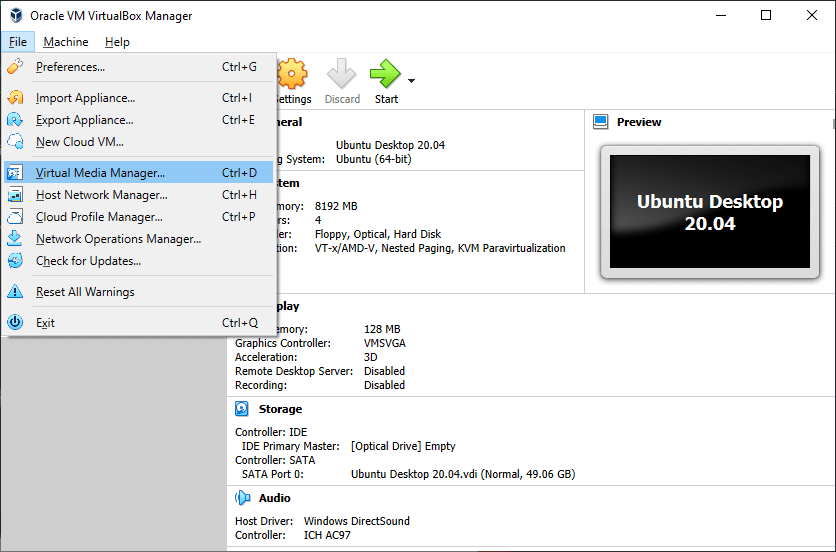
Start VirtualBox, select File in the menu, and Virtual Media Manager:
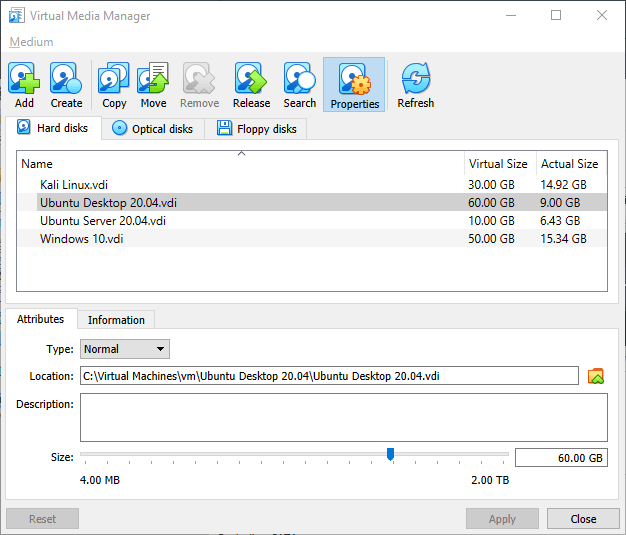
Then, on the list that appears, you will find all the VDI that have been used on the Virtual Machines that you have configured on VirtualBox. Simply select the one that you want to change and adjust its value on the bottom attributes:
Click on Apply and that's it! If after starting the virtual machine and the hard disk remains the same size, you may need to proceed with option B.
B. Resizing Disk using VirtualBox CLI and GParted
In order to resize a VDI file (Virtual Drive), you will need to follow the following steps, unfortunately, although the task isn't difficult, it's a little time-consuming. So according to your needs, it may be faster to simply build a new virtual machine with a clean installation of the operative system and keep it in another file, so when you need it, you may initialize it and that's it. If you need to expand the drive size because you have the important information there or whatever, then this tutorial is the right one for you.
B.1. Verify that the VM storage is a Virtual Dynamically Allocated Disk File
As the first step, verify that the Virtual Drive that you are using in the virtual machine belongs to the Virtual Dynamically Allocated Disk Format. Go to the properties of your Virtual Machine and select the Storage tab. You will find in the information of the attached Virtual Drives in details the type of drive, it needs to be Dynamically allocated storage:

After verifying the type, you may proceed with the next step.
B.2. Increase Disk Size
To increase the size of the disks, you need to do it through the VBoxManage binary and use the modifyhd instruction. This command expects as positional argument the path to the Virtual Drive. To increase the size of the disk, use the --resize option and provide the new size in megabytes like this:
VBoxManage modifyhd ./virtual-dynamically-allocated-Disk-file.vdi --resize NewSizeInMBFor example, as I use VirtualBox in Windows, the command to increase the size of the disk, I would type the command like this, providing the absolute path to the VBoxManage executable and the absolute path to the VDI file. In my case, I'd like the disk to have 50GB (50000 MB) of space instead of the original 10GB that I assigned at the creation of the disk:
"C:\Program Files\Oracle\VirtualBox\VBoxManage.exe" modifyhd "C:\Virtual Machines\vm\Ubuntu Desktop 20.04\Ubuntu Desktop 20.04.vdi" --resize 50240If you are under a Linux environment, the command would look like this:
VBoxManage modifyhd ./Ubuntu-Desktop-20.04.vdi --resize 50240After running the command, you will receive as output the progress of the task:
0%...10%...20%...30%...40%...50%...60%...70%...80%...90%...100%It's worth mentioning that you can’t make the virtual disk smaller using this command, only increase its size. That should be all the interaction with the command line, however, there's still some stuff to do.
B.3. Boot from GParted on your VM
Now, the problem is that if you try to launch your virtual machine, your operative system won't detect any changes as the space we added will be unusable without proper handling. By default, the new space (in this case about 40GB) will be unallocated. In order to allocate that space, is necessary to use the GParted tool. GParted is a free partition editor for graphically managing your disk partitions. With GParted you can resize, copy, and move partitions without data loss, enabling you to:
- Grow or shrink your drive
- Create space for new operating systems
- Attempt data rescue from lost partitions
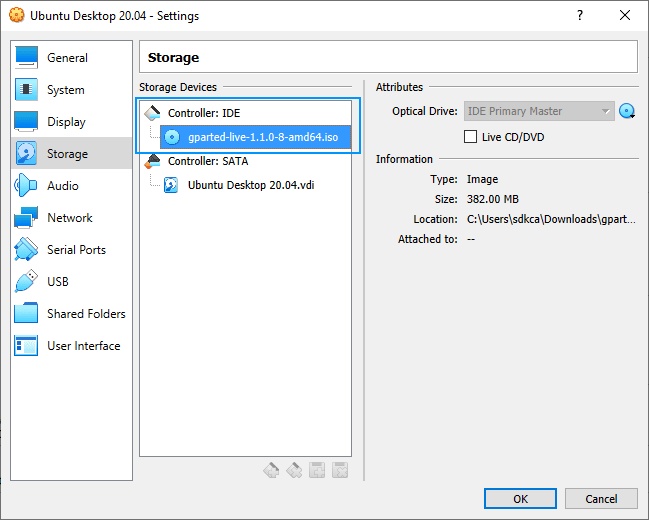
In this case, we will use it to grow the size of the drink using the newly available space provided by the first step. As first, download the GParted ISO from the official website here (I will use the gparted-live-1.1.0-8-amd64.iso). After downloading the ISO file of GParted, you need to boot from GParted in your Virtual Machine. Launch Virtualbox, open its settings, and open the storage tab and mount the optical drive with the ISO of Gparted:
Click on OK and start the VirtualMachine. Once the machine launches, use the default settings of GPart and wait until the application starts.
B.4. Allocate unused space to the system partition
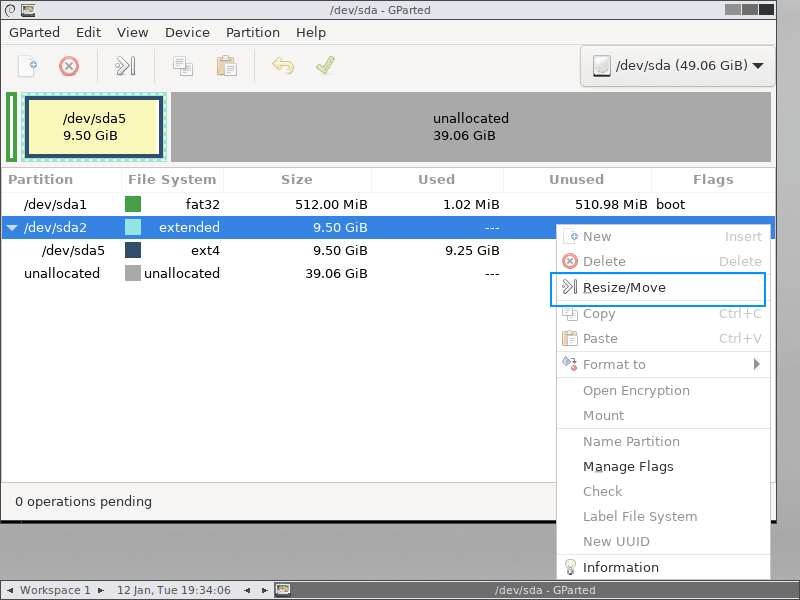
GParted will launch and will list all the partitions available on the Virtual Drives attached to the machine. In our case, the system is located in the partition /dev/sda2 that uses the extended filesystem and as you can see, there are 39.06GiB unallocated because we increased the size of the disk to 50GB and we had initially 10GB.
You need to resize the size of the partition, doing right-click over it and Clicking on Resize/Move:
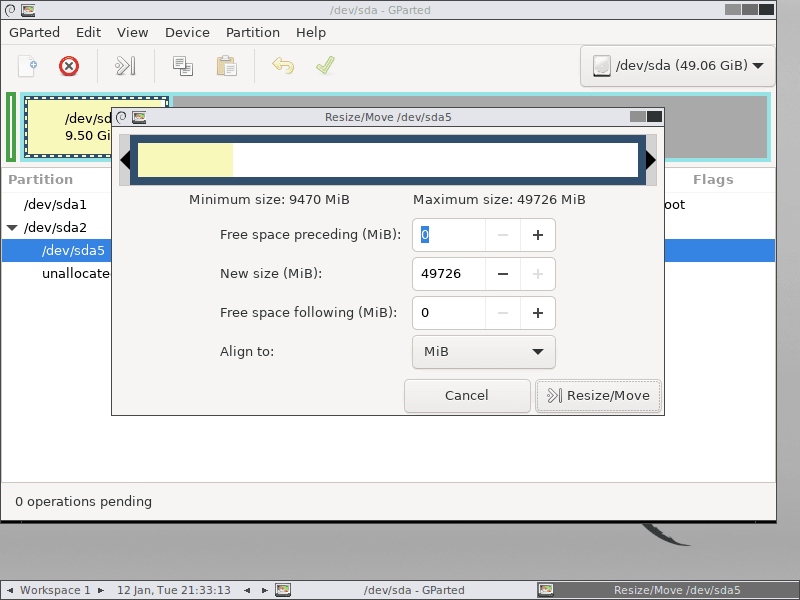
When you click on it, you will now be able to resize the partition manually, you can see that there's a minimum size that has currently the size of your disk and the Maximum size is now the capacity that you defined with the command:

Simply use the whole space using the drag and drop tool or provide the new size manually:

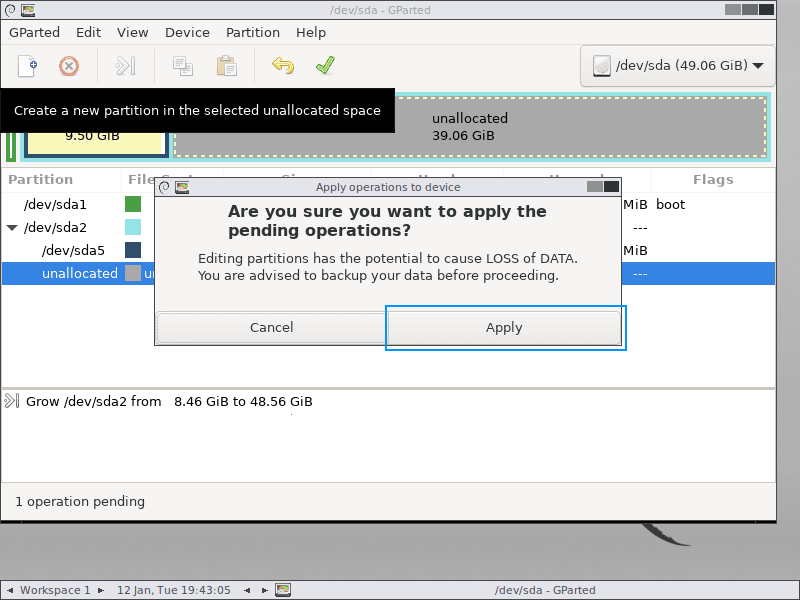
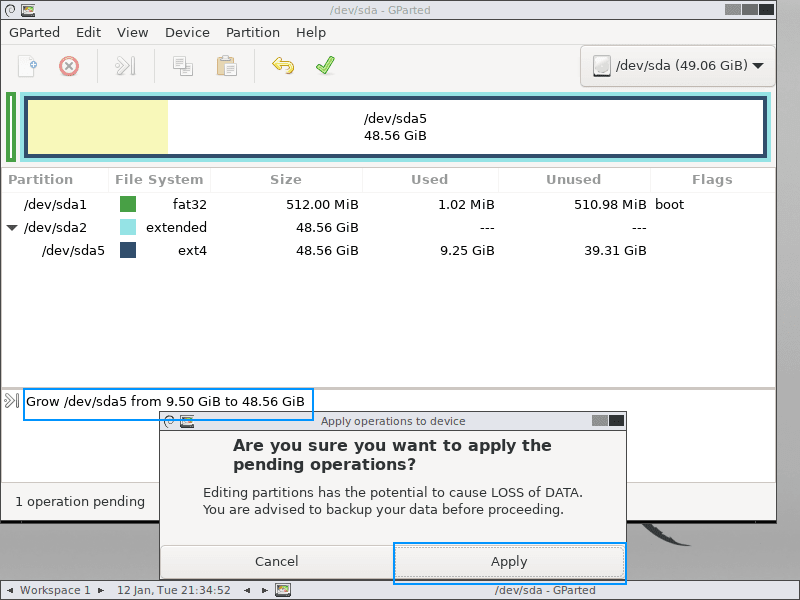
Then click on Resize/Move and this will resize the extended partition, now you need to apply the changes by clicking on the green check icon. This will ask for confirmation, you need to click on Apply:
As result, you will find that the main partition is now bigger, but the partition where the system is installed is still small:
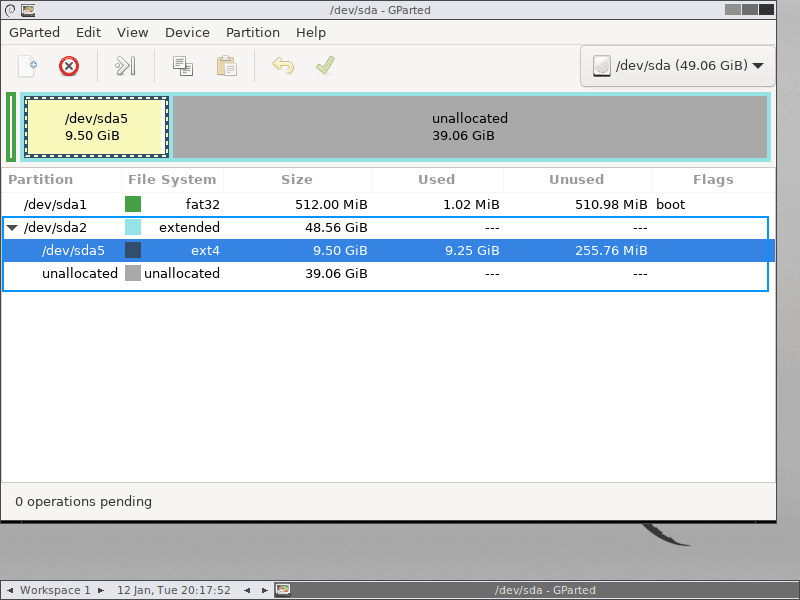
You need to do the same with the remaining partition so the system will use the new space.
B.5. Join unallocated space with the system partition
As mentioned, the main partition has now size available, so we can resize the system partition (/dev/sda5):

Follow the same steps as the previous step. First, do right click on the system partition that needs to be bigger and select Resize/Move:
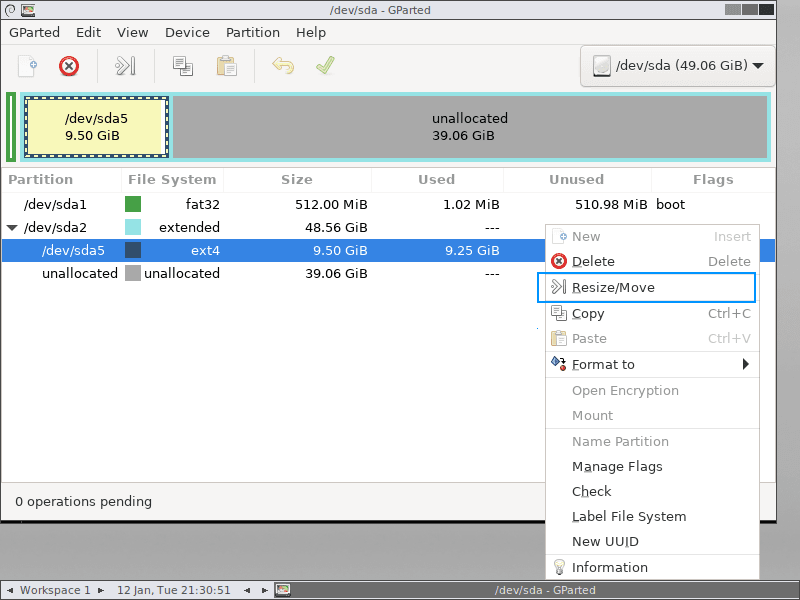
You will be able to drag and drop now the whole capacity of the disk:
Set the new size and click on Resize/Move. After clicking that, click on the green check icon on the top of the UI and apply the changes:
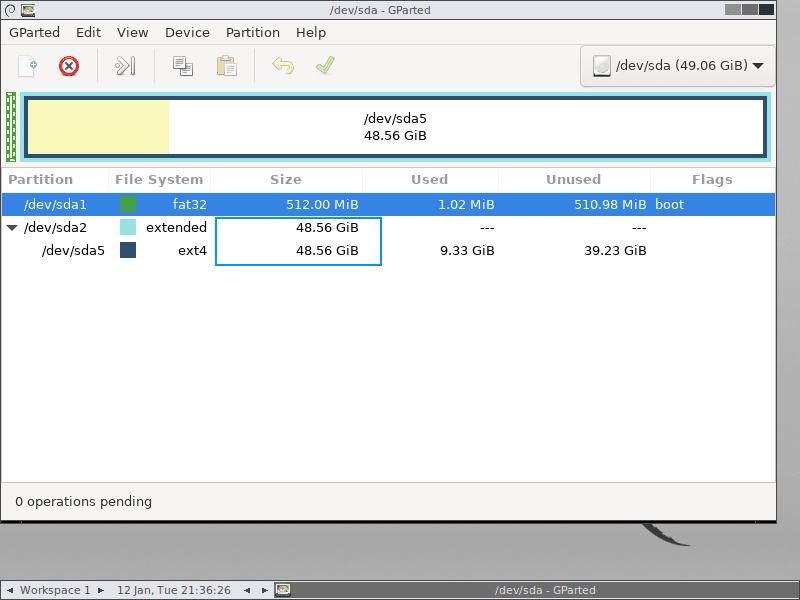
The system partition will be now bigger and will contain the original data as well:
And that's it! Restart the virtual machine and don't forget to eject the Gpart ISO.
B.6. Check that everything worked
Finally, all that you need to do is to check that the operative system of the virtual machine has now the new size. In our case, with the Ubuntu VM, we can quickly see the hard drive information with df -h:
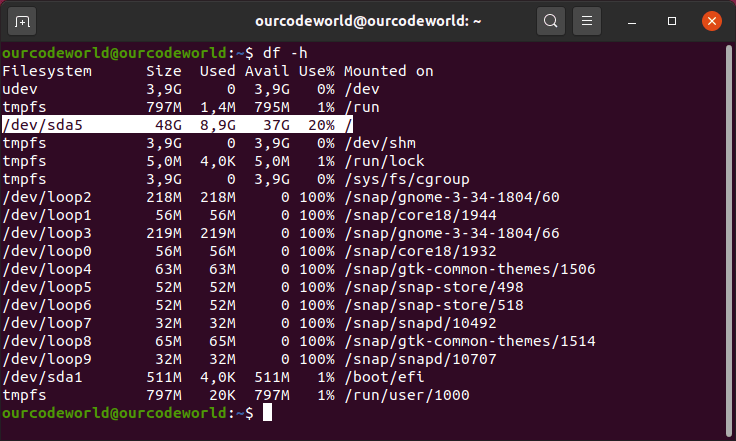
Now instead of the original 10GB available in the system, we do have now 48GB without any issue.
Happy coding ❤️!

