
Now comes one of the didactic parts of your new project, the moment where you should interact with users through SMS and check if they're really humans. One of the most important things to know at the moment of choosing which SMS API, SMS gateway you should use to send the messages that your project needs is, of course, the price. You'll never find a reliable SMS gateway that allows sending free SMS forever, most of them offer trials of course. The SMS pricing is based on the destination and type of message you’re sending, as well as the mobile carrier (1&1, Movistar, Verizon Wireless, AT&T, etc.) to which the SMS is being sent.
Most of the platforms offer the pay-as-you-go feature which is usually the best one for starter projects as you won't know immediately if you are going to have 1K users or only 50, so paying from the beginning a flat rate doesn't make sense. At the moment that the number of users of your application increases, you may then search for the bulk prices or special offers that the company may offer according to your needs so everyone can make a profit from the situation.
In this tutorial, I decided to proceed with Infobip, and nope, this isn't sponsored by them (if someone from Infobip is reading this and want to sponsor me, go ahead 😉). This because their API covers 40+ countries and their prices are affordable in almost all of the countries, as in some countries the price will vary of course, for example for an inbound SMS in Colombia you pay $0.018 USD, so compared to other platforms like Twilio ($0.05), Sendhub, etc. In our case, the Infobip services work excellent for me, depending on your target countries, another platform may be a better choice if they offer a better price.
Note
- Calls and messages in the trial period can be sent only to a mobile phone number and email address you verified during the signup process. Only if you pay you will be able to send messages to other numbers.
- The trial is valid until you spend all of your free units.
- For self-service customers, the currency can`t be changed.
In this article, I will explain to you how to easily implement the SMS-Messaging service in your Symfony 5 application using the Infobip API.
1. Create an Infobip account
In this example, I will use the trial of Infobip because, to be honest, I'm not working on any real project that requires this feature right now 😂. Visit the official page of Infobip here and create an account, you may sign in using your LinkedIn account or register from scratch using your own email.
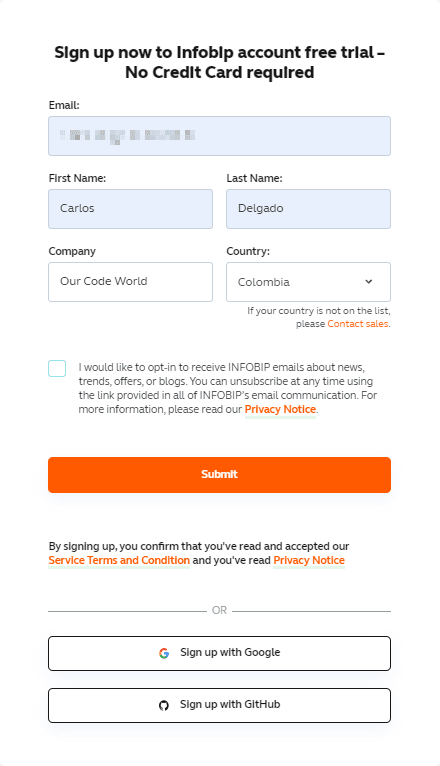
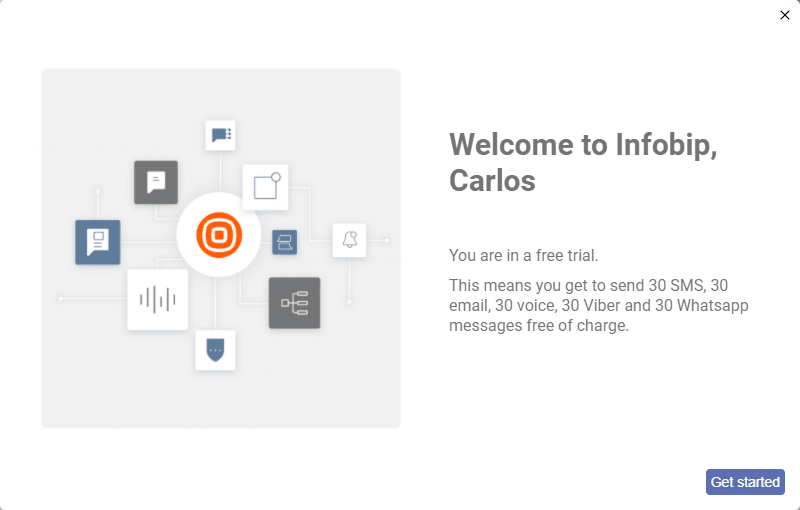
After clicking on "Submit", an email will land on your inbox to validate your account, clicking on the received link will allow you to define a username and a password for your account. You will need to validate as well your mobile telephone number to receive the free trial that will allow you to test the API. Once you validate and access the administration portal of the platform, you'll get a message with the great news:
Now that we have access, let's get started with the implementation of our Symfony project.
2. Obtain Base URL and ApiKey
Infobip allows you to interact with the SMS gateway through a RESTful API. To access it in your symfony project you will need the following properties that you can get from your Infobip dashboard:
The BaseURL
The baseURL correspond to the API endpoint to which your requests should be targetted to. You can obtain it by accessing the documentation of the API here. It's a plain string that looks like "https://<your-account-endpoint>.api.infobip.com":
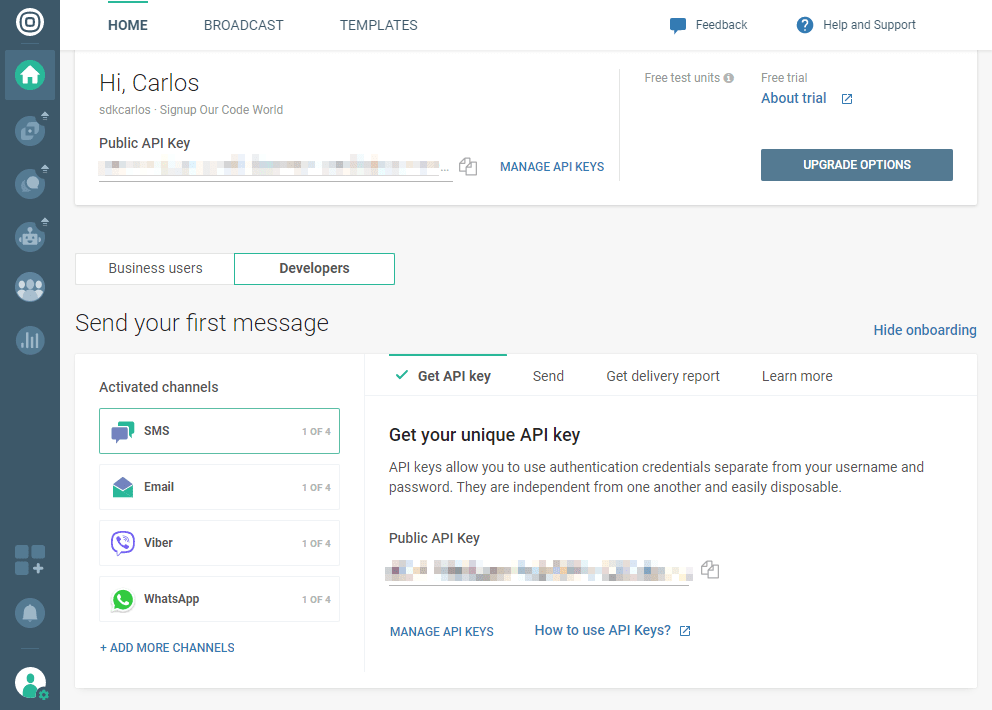
The ApiKey
The ApiKey is the token that will allow you to interact with the SMS gateway. You can see all the API Keys of your account in the dashboard here. You may use the default key that is created when you create the account or you may create a new one. The ApiKey is a long credential, you can modify it to allow access from specific IP addresses or define an expiration date.
For this example, we will assume that our ApiKey and the BaseURL will be the following ones:
- base_url=
https://ourcodeworld.api.infobip.com - apikey=
1234567890
With the credentials, we can proceed now with the implementation of the SMS messaging feature of our Symfony project.
3. Install Infopib API Client library
In order to interact with the Infopib API, is quite easier to use the PHP SDK that is available on Github instead of creating plains requests to the API endpoints (of course it's allowed, but with the client library is easier). Install the API client library with the following command:
composer require infobip/infobip-api-php-clientThe client uses the Guzzle HTTP client under the hood, so you don't need to worry about weird cURL errors or something like that.
4. Configure project level API Key and Base URL in Symfony
In order to access the API from the client, you will need authorization to proceed. With this API you will need the following parameters that can be obtained from the Infobip dashboard:
SMSGATEWAY_BASEURL: The base URL is the URL of the API where the requests should be forwarded to. You can obtain your own URL in the API docs here.SMSGATEWAY_APIKEYPREFIX: the API Key header provides the most secure authorization with the most flexibility. It is usuallyAppon every application, this is used in the Authorization header of the requests.SMSGATEWAY_APIKEY: this is the API Key of the application created in Infobip, you may use the general key for testing purposes or use the apikey of a project that you can create in the dashboard.
You can store these parameters in your current .env file like this:
# project/.env
###> symfony/mailer ###
SMSGATEWAY_BASEURL="https://ourcodeworld.api.infobip.com"
# https://www.infobip.com/docs/essentials/api-authentication#api-key-header
SMSGATEWAY_APIKEYPREFIX="App"
SMSGATEWAY_APIKEY="1234567890"
###< symfony/mailer ###
After defining them in your environment file, create the respective parameters in your services.yaml file like this:
# project/config/services.yaml
parameters:
    # Define the sms gateway parameters
    sms_gateway.baseurl: '%env(resolve:SMSGATEWAY_BASEURL)%'
    sms_gateway.apikey: '%env(resolve:SMSGATEWAY_APIKEY)%'
    sms_gateway.apikeyprefix: '%env(resolve:SMSGATEWAY_APIKEYPREFIX)%'
These will be the parameters that we'll obtain through the ContainerBagInterface later in the service or in your controllers.
5. Sending SMS from your controller
Now it's time to test the Infobip API using the client! The necessary logic to send an SMS from your PHP code is the following one:
- Obtain the credentials from our
parameters.yamlfile and store them in some variables. - Initialize a Configuration object of the client, defining the base URL, the APIKEY, and the APIKEY prefix (all of them mandatory).
- Create a Guzzle Client instance and provide it as an argument of a new instance of the SendSMSApi class and the previously created configuration object.
- Create a destination instance that will contain the number to which the SMS will be sent to. Note that the number needs to contain the List Country calling code as the prefix of the target number. For example, in Colombia, the calling code is +57, so if the number is 123 456 7890, then the string that you will use as the destination is "
571234567890". - Create a message object that will store the message that you will send, as well as the destination instances.
- Finally create an
SmsAdvancedTextualRequestinstance that will be used to send the created messages.
The following controller follows the mentioned logic, sending an SMS to an imaginary number in Colombia:
<?php

namespace App\Controller;

use Symfony\Bundle\FrameworkBundle\Controller\AbstractController;
use Symfony\Component\HttpFoundation\Response;
use Symfony\Component\Routing\Annotation\Route;

// Include Infobip classes
use Infobip\Configuration;
use Infobip\Api\SendSmsApi;
use Infobip\Model\SmsDestination;
use Infobip\Model\SmsTextualMessage;
use Infobip\Model\SmsAdvancedTextualRequest;

class PagesController extends AbstractController
{
    /**
     * @Route("/", name="app_index")
     */
    public function index(): Response
    {
        // 1. Create configuration object and client
        $baseurl = $this->getParameter("sms_gateway.baseurl");
        $apikey = $this->getParameter("sms_gateway.apikey");
        $apikeyPrefix = $this->getParameter("sms_gateway.apikeyprefix");

        $configuration = (new Configuration())
            ->setHost($baseurl)
            ->setApiKeyPrefix('Authorization', $apikeyPrefix)
            ->setApiKey('Authorization', $apikey);

        $client = new \GuzzleHttp\Client();
        $sendSmsApi = new SendSMSApi($client, $configuration);

        // 2. Create message object with destination
        $destination = (new SmsDestination())->setTo('571234567890');
        $message = (new SmsTextualMessage())
            // Alphanumeric sender ID length should be between 3 and 11 characters (Example: `CompanyName`).
            // Numeric sender ID length should be between 3 and 14 characters.
            ->setFrom('InfoSMS')
            ->setText('This is a dummy SMS message sent using infobip-api-php-client')
            ->setDestinations([$destination]);

        // 3. Create message request with all the messages that you want to send
        $request = (new SmsAdvancedTextualRequest())->setMessages([$message]);

        // 4. Send !
        try {
            $smsResponse = $sendSmsApi->sendSmsMessage($request);

            dump($smsResponse);
        } catch (\Throwable $apiException) {
            // HANDLE THE EXCEPTION
            dump($apiException);
        }

        return new Response("Success (?)");
    }
}
Considering that you are in the trial, if you use your own number as the destination, you should receive the message on your mobile device:

6. Creating an SMS Service (Optional)
As usual, is probable that you need to send SMS in multiple controllers or commands of your Symfony project. That's why it's better to create a service to make it even easier. In our case, our service will look pretty simple and will allow you to simply use the send method of the service, providing an array with arrays that contain the SMS list that you want to send:
<?php

//app/src/Service/SmsGatewayService.php
namespace App\Service;

use Symfony\Component\DependencyInjection\ParameterBag\ContainerBagInterface;
use Infobip\Configuration;
use Infobip\Api\SendSmsApi;
use Infobip\Model\SmsDestination;
use Infobip\Model\SmsTextualMessage;
use Infobip\Model\SmsAdvancedTextualRequest;
use GuzzleHttp\Client;

class SmsGatewayService
{
    private $params;

    public function __construct(ContainerBagInterface $params)
    {
        $this->params = $params;
    }

    public function send(array $messages)
    {
        $baseurl = $this->params->get("sms_gateway.baseurl");
        $apikey = $this->params->get("sms_gateway.apikey");
        $apikeyPrefix = $this->params->get("sms_gateway.apikeyprefix");

        $configuration = (new Configuration())
            ->setHost($baseurl)
            ->setApiKeyPrefix('Authorization', $apikeyPrefix)
            ->setApiKey('Authorization', $apikey);

        $client = new Client();
        $sendSmsApi = new SendSMSApi($client, $configuration);
        $_messages = [];

        foreach($messages as $message){
            $destination = (new SmsDestination())->setTo($message["to"]);
            $_messages[] = (new SmsTextualMessage())
                ->setFrom($message["from"])
                ->setText($message["message"])
                ->setDestinations([$destination])
            ;
        }

        $request = (new SmsAdvancedTextualRequest())->setMessages($_messages);

        return $sendSmsApi->sendSmsMessage($request);
    }
}
With the new service, you may simply include it in your controllers, commands, or other services with auto wiring. For example, you may send now the SMS inside a controller with the service like this:
<?php

namespace App\Controller;

use Symfony\Bundle\FrameworkBundle\Controller\AbstractController;
use Symfony\Component\HttpFoundation\Response;
use Symfony\Component\Routing\Annotation\Route;

// Include the service to send SMS
use App\Service\SmsGatewayService;

class PagesController extends AbstractController
{
    /**
     * @Route("/", name="app_index")
     */
    public function index(SmsGatewayService $smsGateway): Response
    {
        try {
            $smsResponse = $smsGateway->send([
                [
                    "to" => "571234567890",
                    "from" => "InfoSMS",
                    "message" => "Hello World! This is my first message"
                ],
                [
                    "to" => "571234567890",
                    "from" => "InfoSMS",
                    "message" => "Hello World! This is my second message"
                ]
            ]);
        } catch (\Throwable $apiException) {
            // HANDLE THE EXCEPTION
            dump($apiException);
        }

        return $this->render('pages/index.html.twig', [
            'controller_name' => 'PagesController',
        ]);

        return new Response("Success (?)");
    }
}
Happy coding ❤️!

