
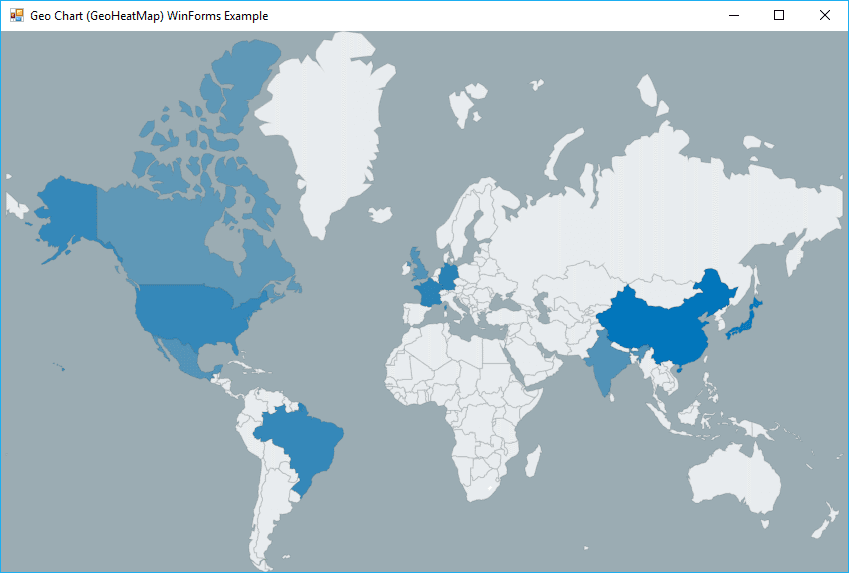
A geomap is a map of a country, continent, or region map, with colors and values assigned to specific regions, whose values are displayed as a color scale. If your application is based on some kind of dashboard that needs to display the map to show different countries or a single country with its region, your best bet is to use a library to achieve it, instead of displaying SVG manually with extra code that has been already implemented on a third party library.
In this article, we'll show you how to display a Geo Chart (GeoHeatMap) in your WinForms application with C# using the LiveCharts library.
1. Install LiveCharts
To install this package on your project in Visual Studio, go to the solution explorer and do right click on your project. From the dropdown list select the Manage NuGet Packages option:

In the Manager, go to the browse tab and search for the LiveCharts package:
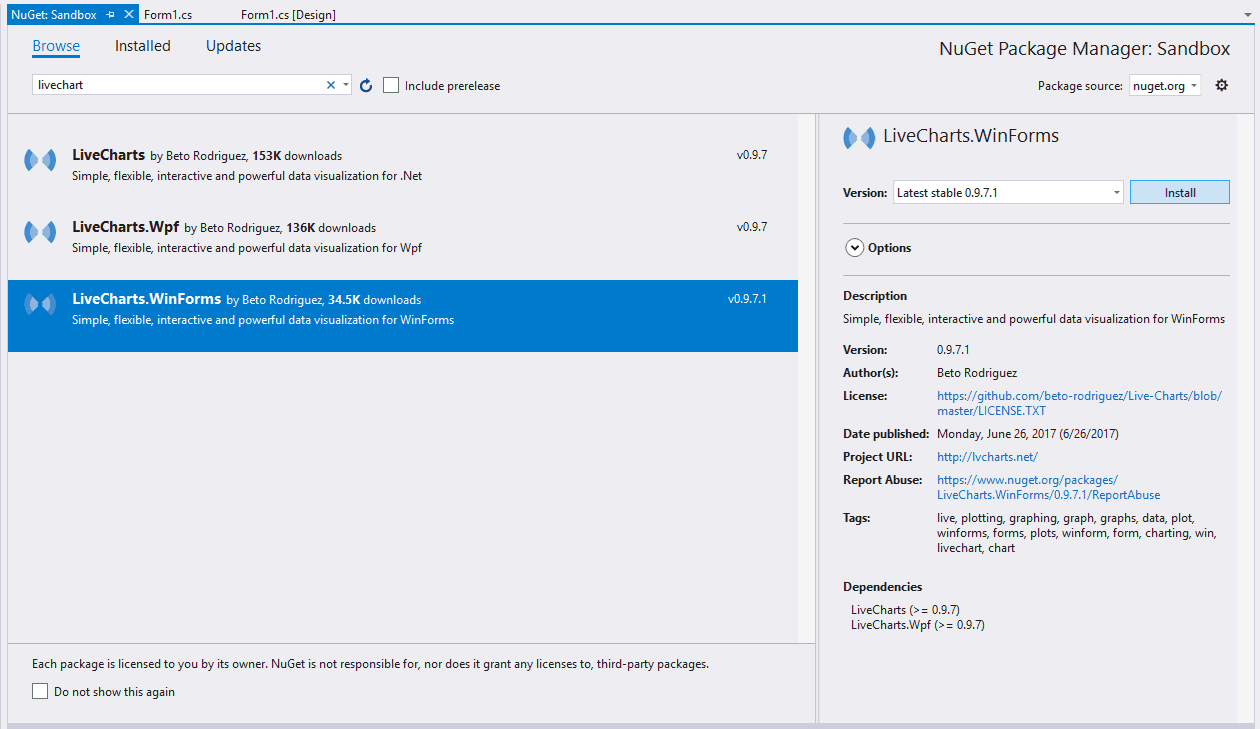
Select the WinForms package by Beto Rodriguez and install it in your project. Once the installation finishes you will be able to use the library to render charts on your code. For more information about this library, please visit the official repository at Github here.
2. Prepare Map XML file
Important
Do not drag the GeoChart from the control box, or sometimes your visual studio will crash due to an exception that is thrown by the component when you don't specify the path to the XML file of the map. That's the reason why you need to append the control dinamically with code.
You can see and download the list of all available countries of the project (or the world map) in the repository here. In our first example, we'll use the World.xml file that contains all the countries. Now that we have the file, you are free to store the file in the directory that you want as long as we specify its path later on the initialization of the chart in our code. In our case, to help you to understand that the path doesn't matter, we'll store it in the desktop specifically at C:\Users\sdkca\Desktop\World.xml. However, the recommended path is inside your project, where you can easily access the file as a resource.
3. Initialize and display GeoMap
The logic to get started with the map is the following. As first, you need to know that the GeoMap control can't be just simply dragged and dropped from the toolbox created by the library in the left side of Visual Studio, because it will throw an exception of FileNotFound and sometimes Visual Studio may crash. So to prevent this, just add the component dinamically with code during the initialization of the form (on form loaded event).
Create a variable that will contain the instance of the LiveCharts.WinForms.GeoMap class and create a dictionary that will contain the values that will appear on the GeoMap. Finally assign the values to the HeatMap property and finally define the Source property with the path to the XML file of the map that you want to display:
// 1. Create a GeoMap control
LiveCharts.WinForms.GeoMap geoMap1 = new LiveCharts.WinForms.GeoMap();

// 2. Create a dictionary that we'll fill with Random Data in this example
Random r = new Random();

// 3. Note that we define the "key" and number pattern, where the key is the
// ID of the element in the XML where you want to define the numeric value.
Dictionary<string, double> values = new Dictionary<string, double>();

// 4. Fill the specific keys of the countries with a random number
values["MX"] = r.Next(0, 100);
values["CA"] = r.Next(0, 100);
values["US"] = r.Next(0, 100);
values["IN"] = r.Next(0, 100);
values["CN"] = r.Next(0, 100);
values["JP"] = r.Next(0, 100);
values["BR"] = r.Next(0, 100);
values["DE"] = r.Next(0, 100);
values["FR"] = r.Next(0, 100);
values["GB"] = r.Next(0, 100);

// 5. Assign data and map file
geoMap1.HeatMap = values;
geoMap1.Source = @"C:\Users\sdkca\Desktop\World.xml";

// 6. Important, you can only add the control to the form after defining the source of the map,
// otherwise it will throw a File Not Found exception
this.Controls.Add(geoMap1);
// 7. Set the style of the control to fill it's container, in this example will fill the entire form
geoMap1.Dock = DockStyle.Fill;
If you checkout the content of the XML data of the maps, you will find the Id block that specifies 2 characters:
<Shapes>
    <MapShape>
      <Id>AF</Id>
      <Name>Afghanistan</Name>
      <Path>EXAMPLE DATA</Path>
    </MapShape>
    <MapShape>
      <Id>AO</Id>
      <Name>Angola</Name>
      <Path>EXAMPLE DATA</Path>
    </MapShape>
    <MapShape>
....
Using the identifier, you can set the data of the element in your code, for example:
// Define data
Dictionary<string, double> values = new Dictionary<string, double>();
values["MX"] = 3251;
values["CA"] = 321;
values["US"] = 123;
values["IN"] = 12;
values["CN"] = 123123;
values["JP"] = 9345;
values["BR"] = 3457;
values["DE"] = 7889;
values["FR"] = 321;
values["GB"] = 1234;

// Asign data to HeatMap
geoMap1.HeatMap = values;
The following full example will display the same map shown at the beginning of the article:
using System;
using System.Windows.Forms;
using System.Collections.Generic;
using System.Drawing;
// Include the required namespace of LiveCharts
using LiveCharts;
using LiveCharts.Wpf;
using LiveCharts.WinForms;

namespace Sandbox
{
    public partial class Form1 : Form
    {
        public Form1()
        {
            InitializeComponent();
        }

        private void Form1_Load(object sender, EventArgs e)
        {
            // Create a GeoMap control
            LiveCharts.WinForms.GeoMap geoMap1 = new LiveCharts.WinForms.GeoMap();

            // Create a dictionary that we'll fill with Random Data in this example
            Random r = new Random();

            // Note that we define the "key" and number pattern, where the key is the
            // ID of the element in the XML where you want to define the numeric value.
            Dictionary<string, double> values = new Dictionary<string, double>();

            // Fill the specific keys of the countries with a random number
            values["MX"] = r.Next(0, 100);
            values["CA"] = r.Next(0, 100);
            values["US"] = r.Next(0, 100);
            values["IN"] = r.Next(0, 100);
            values["CN"] = r.Next(0, 100);
            values["JP"] = r.Next(0, 100);
            values["BR"] = r.Next(0, 100);
            values["DE"] = r.Next(0, 100);
            values["FR"] = r.Next(0, 100);
            values["GB"] = r.Next(0, 100);

            geoMap1.HeatMap = values;
            geoMap1.Source = @"C:\Users\sdkca\Desktop\World.xml";

            // Important, you can only add the control to the form after defining the source of the map,
            // otherwise it will throw a File Not Found exception
            this.Controls.Add(geoMap1);
            // Set the style of the control to fill it's container, in this example will fill the entire form
            geoMap1.Dock = DockStyle.Fill;
        }
    }
}
4. Attaching a click event listener
Finally, the feature that almost everyone needs, is the possibility of knowing which element on the map was clicked. This can be done through the LandClick event of the map, so you can simply attach the listener:
private void Form1_Load(object sender, EventArgs e)
{
    // Add the on click listener
    geoMap1.LandClick += GeoMap1_LandClick;
}

private void GeoMap1_LandClick(object arg1, LiveCharts.Maps.MapData arg2)
{
    // Display the ID of the clicked element in the map
    // e.g "FR", "DE"
    Console.WriteLine(arg2.Id);
}
So when the user clicks on some item of the map, you will see in the console the ID of the clicked element. According to this, you can do whatever you need to do with the data later.
Happy coding !

