
A DNS cache or a DNS resolver cache is a temporary mini database, maintained by the operative system of a device that contains basically multiple records of all the recent visits to websites and other internet domains. As a full-stack developer, I must usually migrate projects from one server to another when the application requires such a thing. The problem with this is that the user, due to the DNS cache on the devices that they use, will keep the old IP of the server where the application was located, however, it is now in another server with another IP. This leads to the unavailability of the website but only on the user's device, due to the DNS cache.
You need to know as well how to flush this cache on every device where your user can have trouble with it. Even, this method is very effective in fixing one of the most popular and common network errors "DNS_probe_finished_nxdomain". Running a DNS leak test can also help verify whether your system is resolving domains through the correct servers after clearing the cache.
In this article, we'll share with you how to clear the DNS cache of Google Chrome on your Android Device.
Flush DNS Cache in Google Chrome
To clear the DNS Cache from Google Chrome for Android, you will need to access the chrome://net-internals/#dns URL. This will open the Net Internals of Chrome in the DNS tab. Net-internals is a visualizer for the NetLog event stream. It can be used both in real-time, and also to load up post-mortem NetLog dumps.
After accessing the previously mentioned URL, you will see a single button namely "Clear Host Cache":
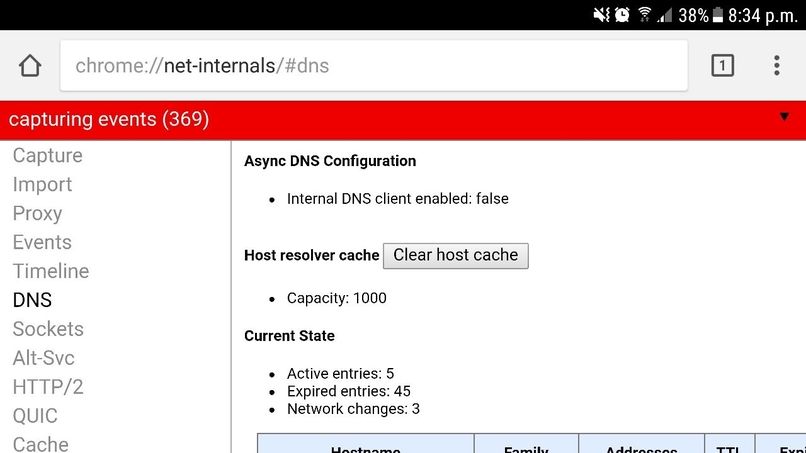
Just click the button and the entries should be cleared, now if the user accesses the same domain, the address of the new server will be resolved and the user will be able to access your website from the mobile device.

