

For a lot of audio creators, generating a visual way to represent some audio can be an awesome way to promote content online. If you are working in some product for a musician or related jobs, your application should be able to generate easily such asset. NAudio is a great way to start as you will need to obtain the peaks from the audio that you want to obtain the audio waves.
In this article, we'll share with you a very simple way to create such wave audio images with the help of the NAudio library and the system drawing classes.
Requirements
You will need to install the NAudio library in your project using the NuGet package manager. Open your Winforms C# project and open the NuGet package manager in the solution explorer:

Go to the Browse tab and search for NAudio:
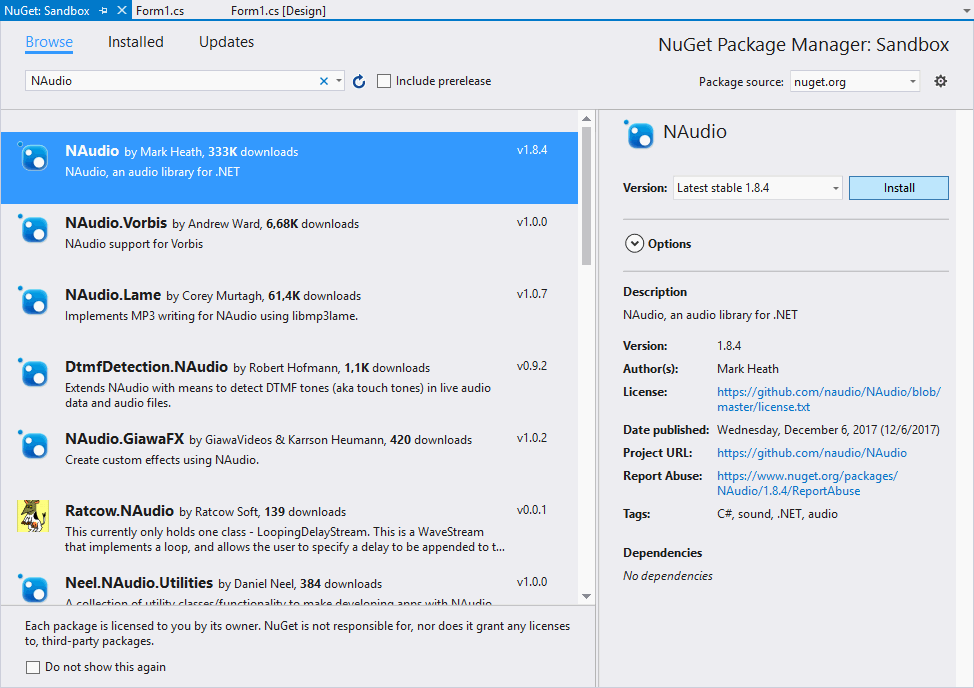
From the list, select the NAudio package by Mark Heath and install it simply clicking on the Install button. Once the installation finishes you will be able to import the Wave namespace of NAudio in the class where you want to use it like this:
using NAudio.Wave;If you already have NAudio installed, then proceed with the implementation of the code.
1. Register the NAudio.WaveFormRenderer classes in your project
The NAudio library by itself doesn't offer any kind of rendering API, instead you will need to rely on some custom classes (published however by the NAudio team) in your project. These classes aren't registered on NuGet though, so you will need to add them manually in your project.
You can retrieve the mentioned files from the official repository of NAudio.WaveFormRenderer, specifically in the WaveFormRendererLib directory. You can clone the entire project for example with Git:
# Clone the WaveFormRenderer project in some directory of your system to obtain the
# classes that you need from this project to create the audio wave images
git clone https://github.com/naudio/NAudio.WaveFormRenderer.git
The easiest way to include the classes of the WaveFormRendererLib directory in your project is to add the existing classes with the solution explorer of Visual Studio. Just do right click on your project, select the Add option and from the dropdown select the Existing Item option:

This will open a new file browser, now navigate to the folder of the cloned WaveFormRenderer project and include the classes from the WaveFormRendererLib directory of the cloned project:
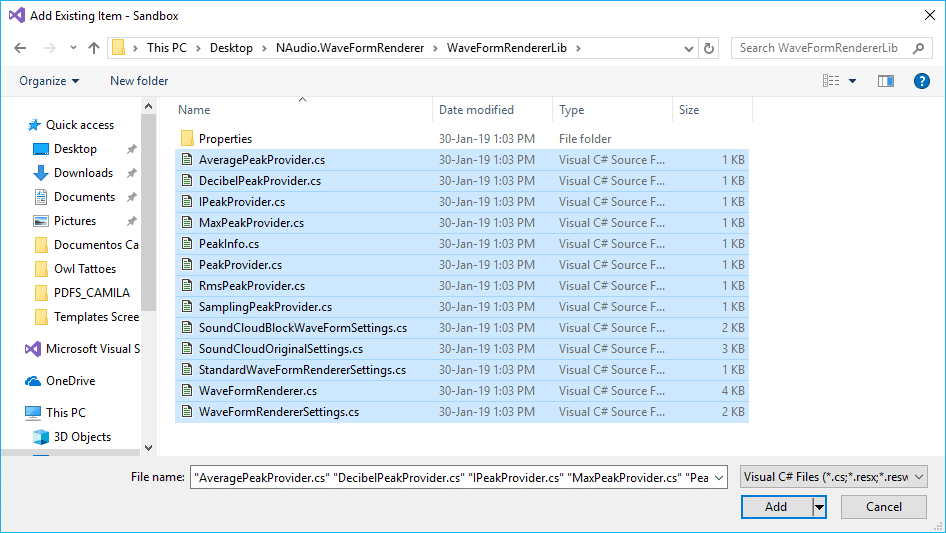
This will add a copy of the classes in your project and will expose them in the WaveFormRenderer namespace automatically.
2. Generating the audio wave representation image
The logic to create the audio waves image is pretty simple with the help of the previous added classes. As first, include all the namespaces that we'll need and those are the classes from the WaveFormRendererLib and the System Drawing Classes. Then, configure the RMS (Root-Mean-Square) and the Peak providers. As next step, customize your image with colors, background images and size using the StandardWaveFormRendererSettings (you can use the autocomplete of Visual Studio to know all the customizable parameters).
Finally, using an instance of the WaveFormRenderer class, provide the previously configured parameters as arguments casting the Render method. This method will return an Image instance of System Drawing, so you can now store it on your system easily with the Save method, the advantage of this approach is that you can save it with any format, however the PNG format is recommended as you may have transparency in the configuration of style of the chart:
// Include WaveFormRendererLib, the namespace will be available
// once you include the files of the project from the first step
using WaveFormRendererLib;

// Include the System Drawing classes
using System.Drawing.Imaging;
using System.Drawing;

// 1. Configure Providers
MaxPeakProvider maxPeakProvider = new MaxPeakProvider();
RmsPeakProvider rmsPeakProvider = new RmsPeakProvider(200); // e.g. 200
SamplingPeakProvider samplingPeakProvider = new SamplingPeakProvider(200); // e.g. 200
AveragePeakProvider averagePeakProvider = new AveragePeakProvider(4); // e.g. 4

// 2. Configure the style of the audio wave image
StandardWaveFormRendererSettings myRendererSettings = new StandardWaveFormRendererSettings();
myRendererSettings.Width = 1080;
myRendererSettings.TopHeight = 64;
myRendererSettings.BottomHeight = 64;

// 3. Define the audio file from which the audio wave will be created and define the providers and settings
WaveFormRenderer renderer = new WaveFormRenderer();
String audioFilePath = @"C:\Users\sdkca\Desktop\when_the_sun_goes_down_arctic_monkeys.mp3";
Image image = renderer.Render(audioFilePath, averagePeakProvider, myRendererSettings);

// 4. Store the image
image.Save(@"C:\Users\sdkca\Desktop\myfile.png", ImageFormat.Png);
// Or jpeg, however PNG is recommended if your audio wave needs transparency
// image.Save(@"C:\Users\sdkca\Desktop\myfile.jpg", ImageFormat.Jpeg);
Customizing chart
As mentioned previously, you can play with the customization of the peaks in the StandardWaveFormRendererSettings, for example customizing the colors:
StandardWaveFormRendererSettings myRendererSettings = new StandardWaveFormRendererSettings();
myRendererSettings.Width = 1080;
myRendererSettings.TopHeight = 64;
myRendererSettings.BottomHeight = 64;

// Set background of the chart as transparent
myRendererSettings.BackgroundColor = Color.Transparent;

// Change the color of the peaks
myRendererSettings.TopPeakPen = new Pen(Color.DarkGreen);
myRendererSettings.BottomPeakPen = new Pen(Color.Green);
This would plot a chart like:

Full example
In this little snippet of a Windows Form, you will have a simple button that will trigger the logic to generate the image when it's clicked:
using System;
using System.Windows.Forms;

// Include WaveFormRendererLib
using WaveFormRendererLib;
using System.Drawing.Imaging;
using System.Drawing;

namespace Sandbox
{
    public partial class Form1 : Form
    {
        public Form1()
        {
            InitializeComponent();
        }

        private void button1_Click(object sender, EventArgs e)
        {
            MaxPeakProvider maxPeakProvider = new MaxPeakProvider();
            RmsPeakProvider rmsPeakProvider = new RmsPeakProvider(200); // e.g. 200
            SamplingPeakProvider samplingPeakProvider = new SamplingPeakProvider(200); // e.g. 200
            AveragePeakProvider averagePeakProvider = new AveragePeakProvider(4); // e.g. 4

            StandardWaveFormRendererSettings myRendererSettings = new StandardWaveFormRendererSettings();
            myRendererSettings.Width = 1080;
            myRendererSettings.TopHeight = 64;
            myRendererSettings.BottomHeight = 64;

            WaveFormRenderer renderer = new WaveFormRenderer();
            String audioFilePath = @"C:\Users\sdkca\Desktop\when_the_sun_goes_down_arctic_monkeys.mp3";
            Image image = renderer.Render(audioFilePath, averagePeakProvider, myRendererSettings);

            image.Save(@"C:\Users\sdkca\Desktop\mywave.png", ImageFormat.Png);
        }
    }
}
The execution of the previous code and when the button is clicked, it will generate the following image:

Happy coding !

