

MongoDB is a widely known open source database that uses a document-oriented data model. It stores data in flexible, JSON-like documents, this means that fields can vary from document to document and data structure can be changed over time easily, making data easy to work with.
For some open source applications or even yours, you will obviously need installed on your server MongoDB Community Server to store and serve databases. In Ubuntu 16.04 this task is pretty straightforward to achieve and we'll show you how to do it in this article.
1. Register MongoDB Repository
On most ubuntu distributions, if you try to install MongoDB directly with the command mentioned on the step 2, the execution will probably fail due to the missing MongoDB repository. A default package of MongoDB is already availalbe in the Ubuntu package repositories, however the official MongoDB repository provides most up-to-date version and is the recommended way of installing this software. Ubuntu ensures the authenticity of software packages by verifying that they are signed with GPG keys, so we first have to import they key for the official MongoDB repository using the following command:
sudo apt-key adv --keyserver hkp://keyserver.ubuntu.com:80 --recv EA312927After importing the GPG key into your system, create a list of the repository with the following command:
echo "deb http://repo.mongodb.org/apt/ubuntu xenial/mongodb-org/3.2 multiverse" | sudo tee /etc/apt/sources.list.d/mongodb-org-3.2.listAnd then, after adding the repository details, you only need to update the packages list with:
sudo apt-get updateNow finally you will be able to install the mongodb community server with the mentioned command in the following step.
2. Install MongoDB
To install MongoDB Community Server, run the following command from your terminal:
sudo apt-get install mongodb-orgIt will install several packages that contain the latest stable version of MongoDB along with helpful management tools for the MongoDB server. Once the installation finishes, the service won't start until you do it with a command (mentioned on the next step).
3. Start MongoDB Service
To start the MongoDB Server, run the following command:
sudo systemctl start mongodNow your applications will have access to Mongo and will be able to create and access the stored databases. You can verify the status of the mongodb server service with the following command:
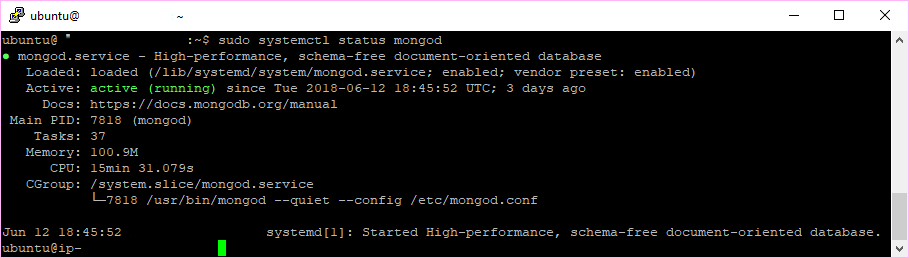
sudo systemctl status mongodThis would generate an output similar to the following in your terminal:
4. Enable MongoDB on startup
Finally but not less important, you need to enable the MongoDB server to start automatically on every startup of your server with the following command:
sudo systemctl enable mongodSo when you reboot or start the server, this service will start along and your apps will work automatically as well.
Happy coding !

