
If you are working on some application that works with a database or something related to storing data, probably you will need to store a picture of something, a person or a product. The user won't have always the picture of it as a file, instead, he may want to take a picture immediately and preferably inside the same application that he's using. Taking pictures inside a WinForms application is possible with the right tool. The easiest way to achieve this is through the OpenCVSharp library, which will allow you to display the video from the webcam inside a Picture Box element.
In this article, we'll explain you how to use the OpenCVSharp library to take snapshots from your webcamera inside a WinForms application easily.
1. Install OpenCVSharp
OpenCVSharp is a Cross platform wrapper of OpenCV for .NET Framework. OpenCV (Open Source Computer Vision Library) is an open source computer vision and machine learning software library. OpenCV was built to provide a common infrastructure for computer vision applications and to accelerate the use of machine perception in the commercial products. Being a BSD-licensed product, OpenCV makes it easy for businesses to utilize and modify the code. The wrapper features:
- OpenCvSharp is modeled on the native OpenCV C/C++ API style as much as possible.
- Many classes of OpenCvSharp implement IDisposable. There is no need to manage unsafe resources.
- OpenCvSharp does not force object-oriented programming style on you. You can also call native-style OpenCV functions.
- OpenCvSharp provides functions for converting from Mat/IplImage into Bitmap(GDI+) or WriteableBitmap(WPF).
- OpenCvSharp can work on Mono. It can run on any platform which Mono supports (e.g. Linux).
To get started with the installation of this library in your project using the NuGet package manager. Open your Winforms C# project and open the NuGet package manager in the solution explorer:

Go to the Browse tab and search for OpenCVSharp3:

Just click on install for the first package, namely OpenCVSharp3-AnyCpu by shimat. For more information about this wrapper, please visit the official repository at Github here. After installing the library, you will be able to get the image from the webcamera easily.
2. Capturing a single snapshot
For our approach, we will do something pretty basic, we'll allow the user to preview the image received from the camera and he will abe able to take a snapshot of the current picture. As first step, you need to design a basic form that contains 3 elements:
- A Picture box (
pictureBox1) - A button to start the camera (
button1) - A button to take the snapshot (
button2)
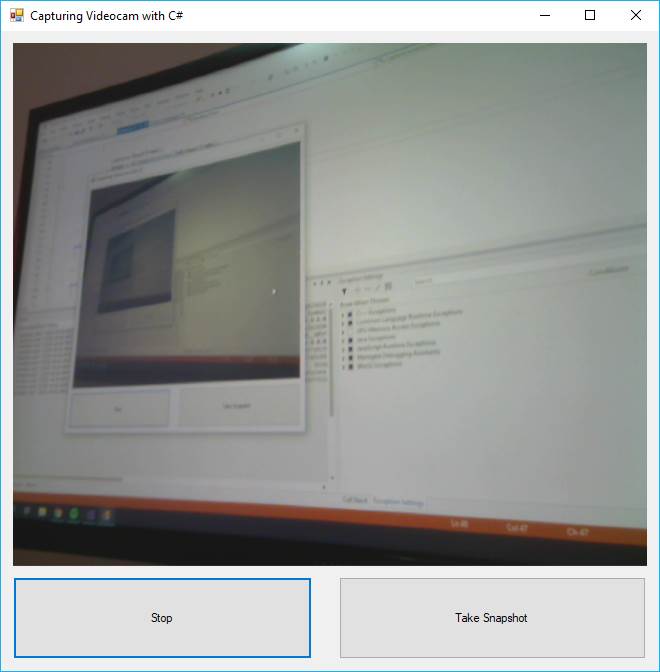
The form will look like this:

Additionally, if you want a responsive design, so the picture box resizes as well when you resize the window, you may want to add as well 2 panels, placing the first panel in the same position of the picture box but with the picture box inside and in the bottom, a panel that contains the 2 buttons:

The pictureBox1 will need to have the Dock property set to fill, to take the same size of the panel1 that contains it. The anchor of the panel1 needs to be set to "Top, Bottom, Left, Right". The anchor of the panel2 needs to be set to "Bottom, Left, Right" and the buttons inside the panel, will have the dock property set to its side e.g button1 dock will be set to left and the button2 dock will be set to right. You can either set the mentioned properties through the Properties box of Visual Studio or with code during the initialization of the components. The idea is basically to start the camera when the user clicks on Start and take the snapshot.
The code logic works like this: include the namespace of the OpenCvSharp library and its extensions. In the class of your form, declare 5 variables without initialization of the following types:
- VideoCapture
- Mat
- Bitmap
- Thread
- Boolean
These variables will be used to store the instance of the recorder and some flags to know wheter the recorder is active or not. Create 2 methods namely the CaptureCamera and the CaptureCameraCallback. The callback process runs on another thread so your application won't freeze during its execution. In the start/stop button verify with the flag if you should either start the instance or if it should stop. In the capture snapshot button, just access the Image property of the picture box, which is updated constantly and store it in a Bitmap, then save the bitmap with your preferred format and that's it:
using System;
using System.Drawing;
using System.Drawing.Imaging;
using System.Threading;
using System.Windows.Forms;

// Important: include the opencvsharp library in your code
using OpenCvSharp;
using OpenCvSharp.Extensions;

namespace Sandbox
{
    public partial class Form1 : Form
    {
        // Create class-level accesible variables
        VideoCapture capture;
        Mat frame;
        Bitmap image;
        private Thread camera;
        bool isCameraRunning = false;


        // Declare required methods
        private void CaptureCamera()
        {
            camera = new Thread(new ThreadStart(CaptureCameraCallback));
            camera.Start();
        }

        private void CaptureCameraCallback()
        {

            frame = new Mat();
            capture = new VideoCapture(0);
            capture.Open(0);

            if (capture.IsOpened())
            {
                while (isCameraRunning)
                {

                    capture.Read(frame);
                    image = BitmapConverter.ToBitmap(frame);
                    if (pictureBox1.Image != null)
                    {
                        pictureBox1.Image.Dispose();
                    }
                    pictureBox1.Image = image;
                }
            }
        }

        public Form1()
        {
            InitializeComponent();
        }

        private void Form1_Load(object sender, EventArgs e)
        {

        }

        // When the user clicks on the start/stop button, start or release the camera and setup flags
        private void button1_Click(object sender, EventArgs e)
        {
            if (button1.Text.Equals("Start"))
            {
                CaptureCamera();
                button1.Text = "Stop";
                isCameraRunning = true;
            }
            else
            {
                capture.Release();
                button1.Text = "Start";
                isCameraRunning = false;
            }
        }

        // When the user clicks on take snapshot, the image that is displayed in the pictureBox will be saved in your computer
        private void button2_Click(object sender, EventArgs e)
        {
            if (isCameraRunning)
            {
                // Take snapshot of the current image generate by OpenCV in the Picture Box
                Bitmap snapshot = new Bitmap(pictureBox1.Image);

                // Save in some directory
                // in this example, we'll generate a random filename e.g 47059681-95ed-4e95-9b50-320092a3d652.png
                // snapshot.Save(@"C:\Users\sdkca\Desktop\mysnapshot.png", ImageFormat.Png);
                snapshot.Save(string.Format(@"C:\Users\sdkca\Desktop\{0}.png", Guid.NewGuid()), ImageFormat.Png);
            }
            else
            {
                Console.WriteLine("Cannot take picture if the camera isn't capturing image!");
            }
        }
    }
}
In our example, we store the generated screenshot in the Desktop directory of our machine, so you will need to change it to a known location of your PC.
Happy coding !

