
With the introduction of Symfony 4, a lot of stuff changed, most of it for good. However, when you work in a enterprise where you are constantly working on the same things (logic), you will have a bad time discovering how the things work on new frameworks. That's the case of Symfony 4, where the user system got even easier to implement. However, if you are in love with the ease that the FOSUserBundle provides, you may want to know that is still possible to implement it on Symfony 4 as well.
In this article, we'll show you how to install the traditional FOSUserBundle in your new Symfony 4 project.
1. Create a traditional web application
In order to implement FOSUserBundle on a symfony 4 based project, you will need to work with the traditional web application version of Symfony (version that installs the required dependencies to create a web applciation e.g Doctrine, Twig, SwiftMailer, Monolog etc). So as first step, create your new symfony project using this version:
composer create-project symfony/website-skeleton project_nameThis will create a project that has a couple of dependencies as shown in the following composer.json file:
{
    "type": "project",
    "license": "proprietary",
    "require": {
        "php": "^7.1.3",
        "ext-iconv": "*",
        "sensio/framework-extra-bundle": "^5.1",
        "symfony/apache-pack": "^1.0",
        "symfony/asset": "^4.1",
        "symfony/console": "^4.1",
        "symfony/expression-language": "^4.1",
        "symfony/flex": "^1.0",
        "symfony/form": "^4.1",
        "symfony/framework-bundle": "^4.1",
        "symfony/lts": "^4@dev",
        "symfony/monolog-bundle": "^3.1",
        "symfony/orm-pack": "*",
        "symfony/process": "^4.1",
        "symfony/security-bundle": "^4.1",
        "symfony/serializer-pack": "*",
        "symfony/swiftmailer-bundle": "^3.1",
        "symfony/twig-bundle": "^4.1",
        "symfony/validator": "^4.1",
        "symfony/web-link": "^4.1",
        "symfony/yaml": "^4.1"
    },
    "require-dev": {
        "symfony/debug-pack": "*",
        "symfony/dotenv": "^4.1",
        "symfony/maker-bundle": "^1.0",
        "symfony/profiler-pack": "*",
        "symfony/test-pack": "^1.0",
        "symfony/web-server-bundle": "^4.1"
    },
    "config": {
        "preferred-install": {
            "*": "dist"
        },
        "sort-packages": true
    },
    "autoload": {
        "psr-4": {
            "App\\": "src/"
        }
    },
    "autoload-dev": {
        "psr-4": {
            "App\\Tests\\": "tests/"
        }
    },
    "replace": {
        "symfony/polyfill-iconv": "*",
        "symfony/polyfill-php71": "*",
        "symfony/polyfill-php70": "*",
        "symfony/polyfill-php56": "*"
    },
    "scripts": {
        "auto-scripts": {
            "cache:clear": "symfony-cmd",
            "assets:install %PUBLIC_DIR%": "symfony-cmd"
        },
        "post-install-cmd": [
            "@auto-scripts"
        ],
        "post-update-cmd": [
            "@auto-scripts"
        ]
    },
    "conflict": {
        "symfony/symfony": "*"
    },
    "extra": {
        "symfony": {
            "allow-contrib": false
        }
    }
}
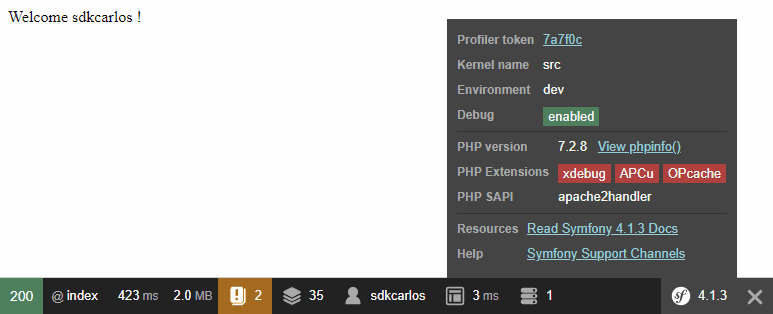
Prepare your project and get it running, once you get at least the welcome page:

Once done, proceed with the next step.
2. Install FOSUserBundle
After creating your project, proceed to install FOSUserBundle with composer with the following command:
composer require friendsofsymfony/user-bundle "~2.0"This will start with the installation and you won't need to configure anything in the kernel or something like that, you will find however an error message once the process finishes:
The child node "db_driver" at path "fos_user" must be configured.
Ignore this and proceed with the next step.
3. Create User Class
As next, you will need to create the User entity in your project, the class object that handles the user object. As we are working with FOSUserBundle, the class has the following structure, so be sure to create the file in the /project/src/Entity directory with the name User.php and the following content:
<?php
// src/Entity/User.php

namespace App\Entity;

use FOS\UserBundle\Model\User as BaseUser;
use Doctrine\ORM\Mapping as ORM;

/**
 * @ORM\Entity
 * @ORM\Table(name="fos_user")
 */
class User extends BaseUser
{
    /**
     * @ORM\Id
     * @ORM\Column(type="integer")
     * @ORM\GeneratedValue(strategy="AUTO")
     */
    protected $id;

    public function __construct()
    {
        parent::__construct();
        // your own logic
    }
}
4. Update Security Configuration File
After creating the user entity, you need to change the security configuration, setting the FOSUserBundle encoder as default defining it as the security provider.
Edit the /project/config/packages/security.yaml file and change its content with the following instead:
# config/packages/security.yaml
security:
    encoders:
        FOS\UserBundle\Model\UserInterface: bcrypt

    role_hierarchy:
        ROLE_ADMIN:       ROLE_USER
        ROLE_SUPER_ADMIN: ROLE_ADMIN

    # https://symfony.com/doc/current/security.html#where-do-users-come-from-user-providers
    providers:
        fos_userbundle:
            id: fos_user.user_provider.username_email

    firewalls:
        dev:
            pattern: ^/(_(profiler|wdt)|css|images|js)/
            security: false
        main:
            pattern: ^/
            form_login:
                provider: fos_userbundle
                csrf_token_generator: security.csrf.token_manager

            logout:       true
            anonymous:    true

    # Easy way to control access for large sections of your site
    # Note: Only the *first* access control that matches will be used
    access_control:
        - { path: ^/login$, role: IS_AUTHENTICATED_ANONYMOUSLY }
        - { path: ^/register, role: IS_AUTHENTICATED_ANONYMOUSLY }
        - { path: ^/resetting, role: IS_AUTHENTICATED_ANONYMOUSLY }
        - { path: ^/admin/, role: ROLE_ADMIN }
5. Create FOSUserBundle Configuration File
Once FOSUserBundle has been defined as the default user provider, you need to define its configuration. In Symfony 4 this can be done through a new yaml file /project/config/packages/fos_user.yaml that will have the default configuration of this bundle:
# config/packages/fos_user.yaml
fos_user:
    db_driver: orm # other valid values are 'mongodb' and 'couchdb'
    firewall_name: main
    user_class: App\Entity\User
    from_email:
        address: "[email protected]"
        sender_name: "[email protected]"
6. Allow PHP and Twig templating and enable routing
As required by FOSUserBundle the PHP and Twig templating engines must be enabled, so be sure to enable it in the /project/config/packages/framework.yaml file:
framework:
    templating:
        engines: ['twig', 'php']
You need to enable the FOSUserBundle routes as well, so create the routes file for FOSUserBundle with the file /project/config/routes/fos_user.yaml and add the following content:
fos_user:
    resource: "@FOSUserBundle/Resources/config/routing/all.xml"
This will register the default routes of FOSUserBundle like the login, logout, register etc.
7. Update your database schema
As last step, you only need to update the schema of your database with the following command:
php bin/console doctrine:schema:update --forceThis will create the fos_user table in your database and you will be able to register users. With this step, the installation and setup of FOSUserBundle finishes.
8. Test user system
As last step, you can test FOSUserBundle in your project accesing the web project, for example at the register route e.g http://yourproject/register, where you will find the form of FOSUserBundle:
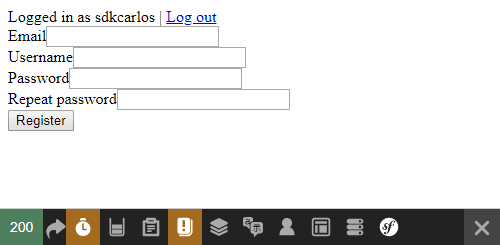
Happy coding !

