
Some system admins tend to use third party tools to list directories as they look better, offer more features etc. That's the case of exa, a modern replacement for the command-line program ls that ships with Unix and Linux operating systems, with more features and better defaults. It uses colours to distinguish file types and metadata. It knows about symlinks, extended attributes, and Git. And it’s small, fast, and just one single binary. This tool has been written in Rust.
In this article, we'll show you how to install Exa in Ubuntu 16.04 from the binaries release.
1. Install Rust Compiler
As first requirement to run Exa is to have a ready to work Rust Environment. The easiest way to do it in Linux/Ubuntu is through Rustup, an installer for the systems programming language Rust. Rust is a compiled blazingly fast and memory-efficient programming language with no runtime or garbage collector, so it can power performance-critical services, run on embedded devices, and easily integrate with other languages. You will need rustc version 1.17.0 or higher in order to use exa.
Run the following command (assuming you have curl installedo on your system) to get started with the installation of Rust in your ubuntu based server/pc:
curl https://sh.rustup.rs -sSf | shAfter downloading, the Rust Compiler setup will start and will ask for confirmation to get started with the installation (choose the first option):
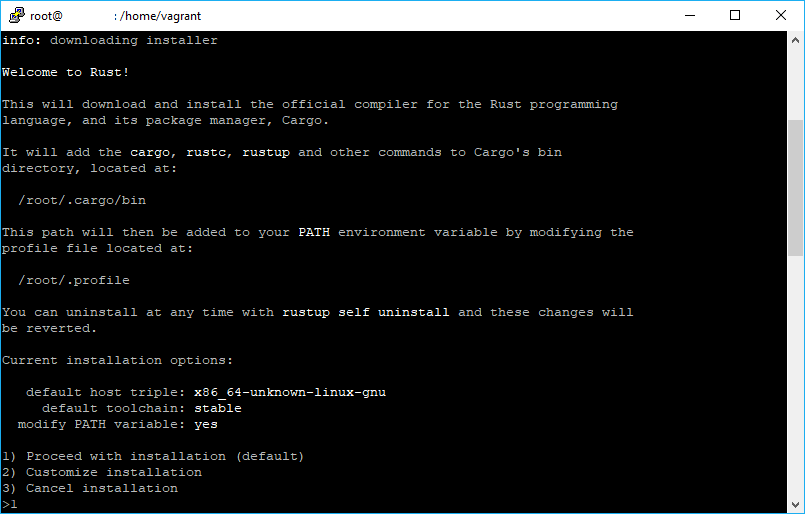
After finishing the installation you will be able to download now Exa and run the binaries.
2. Download latest Exa binary for linux
As next step, proceed to download the latest binary of Exa for Linux environments. You can get the latest release in the official repository at Github here, specifically in the Releases tab where you can see all the listed versions, just copy the download link and download the zip using wget, for example with the v0.8.0 you can download the binary with the following command (you can switch to a temporary directory and download the zip in there):
# Till the date of publication of this article, the latest available download version is the 0.8.0
wget -c https://github.com/ogham/exa/releases/download/v0.8.0/exa-linux-x86_64-0.8.0.zip
Then, unzip the binary:
unzip exa-linux-x86_64-0.8.0.zipThe zip contains a single file, namely the binary exa-linux-x86_64. So the last step is to move it to the bin directory of the local user so it will be accesible later in the cli as exa with the following instruction:
# Move the unziped binary with the name "exa-linux-x86_64" to "/usr/local/bin/" with the exa name
sudo mv exa-linux-x86_64 /usr/local/bin/exa
Now you will be able to use exa from the cli as a replacement (not literal as the ls command needs to be available as well) of the ls command of Unix. For more information about Exa, please visit the official repository at Github here.
3. Start using it
Now comes the funniest part ! Exa is really pretty easy to use (personally i prefer it over the ls command as i won't remember every single argument for the command to display data as i really want), just call the method and provide some argument according to your preference:
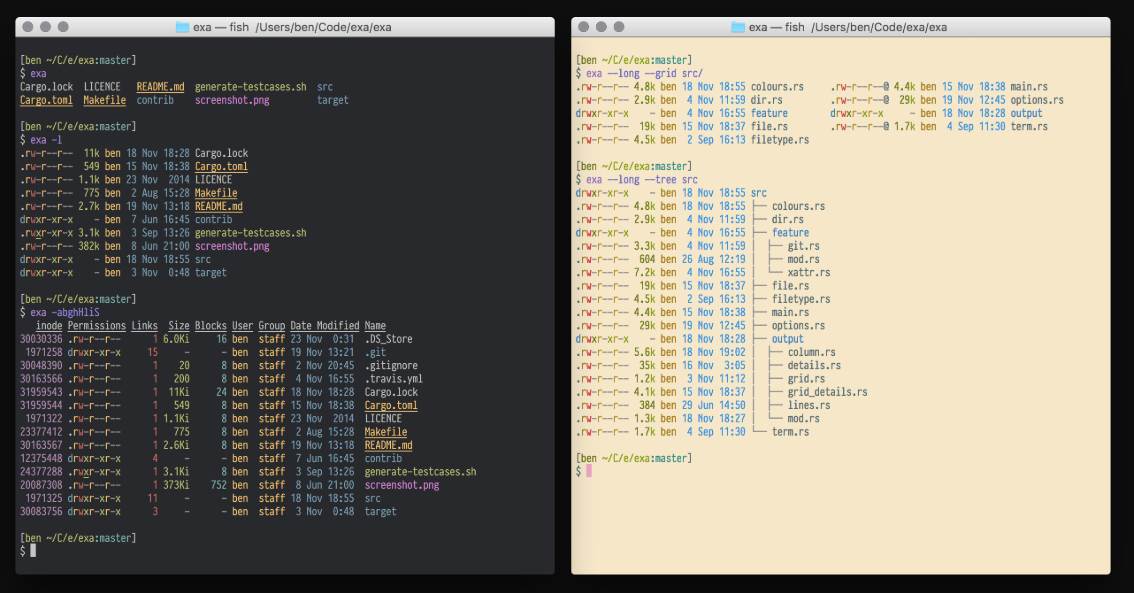
exaThe default command will list the current directory as a grid (the same as exa -g):

However you can get structured views providing more arguments to display the data in some different way or even filter, sort, show only directories, files etc:
Display Options
- -1, --oneline: display one entry per line
- -G, --grid: display entries as a grid (default)
- -l, --long: display extended details and attributes
- -R, --recurse: recurse into directories
- -T, --tree: recurse into directories as a tree
- -x, --across: sort the grid across, rather than downwards
- --colo[u]r: when to use terminal colours
- --colo[u]r-scale: highlight levels of file sizes distinctly
Filtering Options
- -a, --all: show hidden and 'dot' files
- -d, --list-dirs: list directories like regular files
- -L, --level=(depth): limit the depth of recursion
- -r, --reverse: reverse the sort order
- -s, --sort=(field): which field to sort by
- --group-directories-first: list directories before other files
- -D, --only-dirs: list only directories
- --git-ignore: ignore files mentioned in
.gitignore - -I, --ignore-glob=(globs): glob patterns (pipe-separated) of files to ignore
Pass the --all option twice to also show the . and .. directories.
Long View Options
These options are available when running with --long (-l):
-
-b, --binary: list file sizes with binary prefixes
-
-B, --bytes: list file sizes in bytes, without any prefixes
-
-g, --group: list each file's group
-
-h, --header: add a header row to each column
-
-H, --links: list each file's number of hard links
-
-i, --inode: list each file's inode number
-
-m, --modified: use the modified timestamp field
-
-S, --blocks: list each file's number of file system blocks
-
-t, --time=(field): which timestamp field to use
-
-u, --accessed: use the accessed timestamp field
-
-U, --created: use the created timestamp field
-
-@, --extended: list each file's extended attributes and sizes
-
--git: list each file's Git status, if tracked or ignored
-
--time-style: how to format timestamps
-
Valid --color options are always, automatic, and never.
-
Valid sort fields are accessed, created, extension, Extension, inode, modified, name, Name, size, type, and none. Fields starting with a capital letter sort uppercase before lowercase. The modified field has the aliases date, time, and newest, while its reverse has the aliases age and oldest.
-
Valid time fields are modified, accessed, and created.
-
Valid time styles are default, iso, long-iso, and full-iso.
Happy coding !

