Today, as always after updating some CSS and JS in the website, i decided to monitor the loading times and page size with Chrome. I do always have the gzip compression enabled on my local server (with xampp), so i would expect a similar transfer file size on my production server, because i would assume btw, that Plesk already offers such an important feature as the gzip compression nowadays. Incredibly, it wasn't, or at least, it wasn't correctly configured as i thought it would.
I learned as well some things that i would be important to explain as well before proceeding with the tutorial.
Plesk website working with Apache & Nginx
When someone sends a request to your website (ourcodeworld.com) under this modality, the following stuff happens:
- The client request comes to the "frontend" in Nginx requesting a resource (.html page, .php page, image, javascript, etc). Nginx in Plesk works on TCP ports: 80 - http, 443 - https.
- Nginx checks if it has the resource already in its cache.
- If the resource is cached, Nginx returns the cached content.
- If the resource is not cached or if it's about a dynamic page (e.g. index.php), Nginx proxies (forwards) the request to back end server - Apache. Apache in Plesk works on TCP ports: 7080 - http, 7081 - https. Then Nginx caches static content - html, images, js, css.
I didn't knew that the website was using both technologies at all, so following the default tutorials of Plesk of how to enable gzip compression on apache or nginx only didn't do the trick for me, the requests always received non gzipped data.
In this tutorial, i will explain you how i got this to work properly to serve all of my content compressed with gzip.
Enable nginx gzip compression
As i started with the implementation of the compression with gzip, the CSS files of my server for example generated the following information on the network tab of Google Chrome:
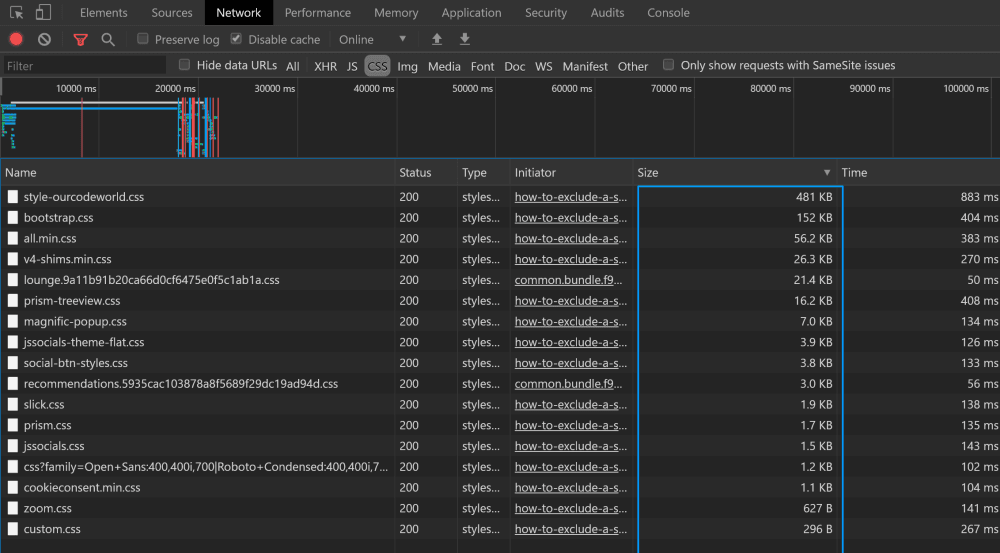
For example, the filesize of the main stylesheet of the blog was about 481KB, quite large.
Get started by opening Plesk and access the list of domains that you have on the server and look for the one you're trying to enable the gzip compression, in this case, the domain will be ourcodeworld.com, then select the Hosting & DNS tab and select Apache & nginx Settings:
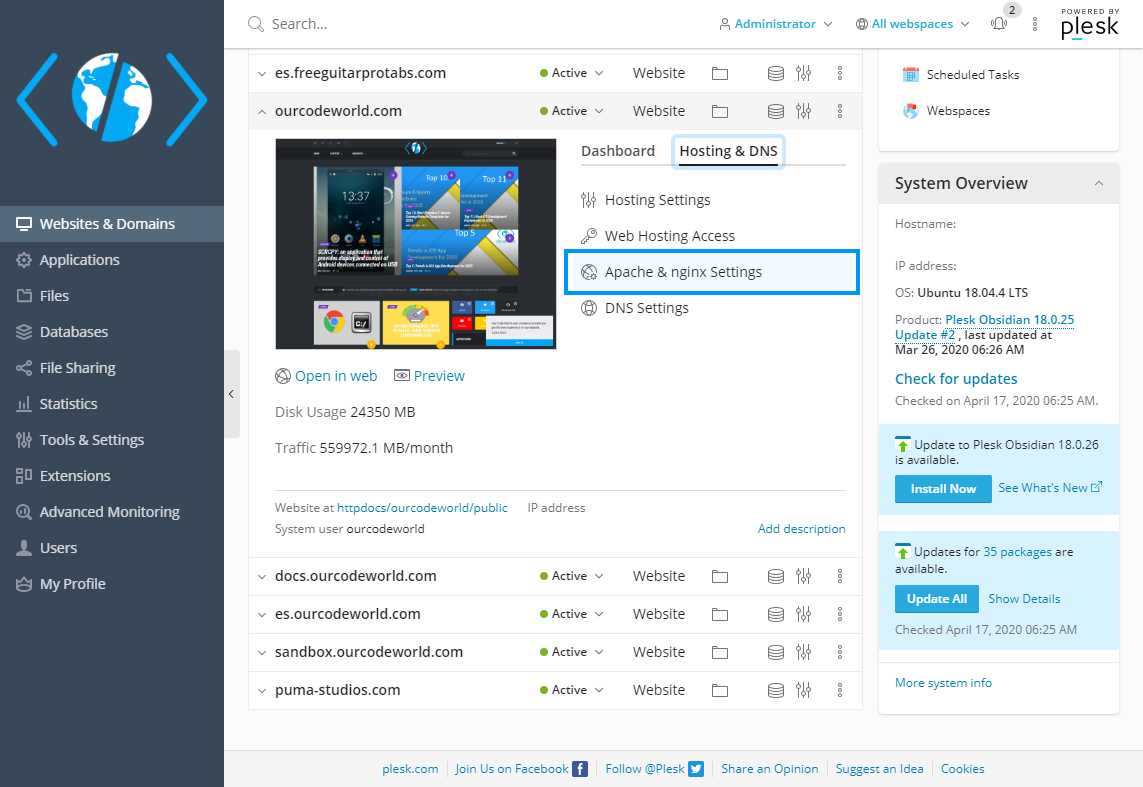
In this new area that will appear scroll down to the Additional nginx directives and add the following ones:
gzip on;
gzip_disable "MSIE [1-6]\\.(?!.*SV1)";
gzip_proxied any;
gzip_comp_level 5;
gzip_types text/plain text/css application/javascript application/x-javascript text/xml application/xml application/rss+xml text/javascript image/x-icon image/bmp image/svg+xml;
gzip_vary on;
This will enable the gzip compression for the most used types of transfer (HTML, CSS, JavaScript and XML), but you can add more if you want (see the list of supported types at /etc/nginx/mime.types):
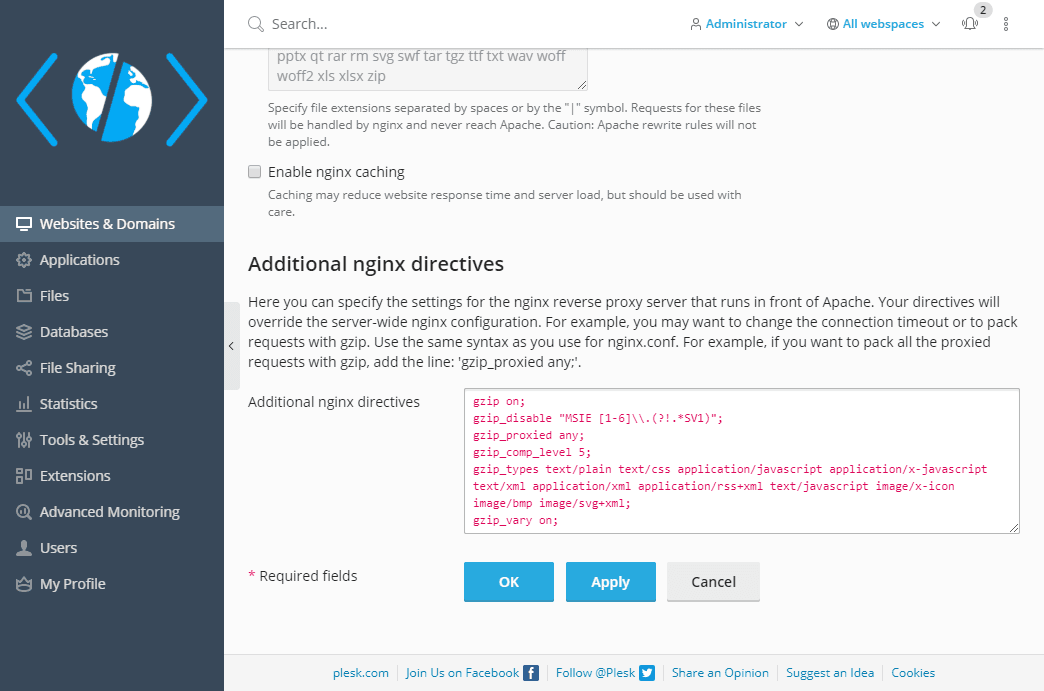
Finally click on apply and test again how the content size behaves in the browser. In our case, the optimization was the following one:
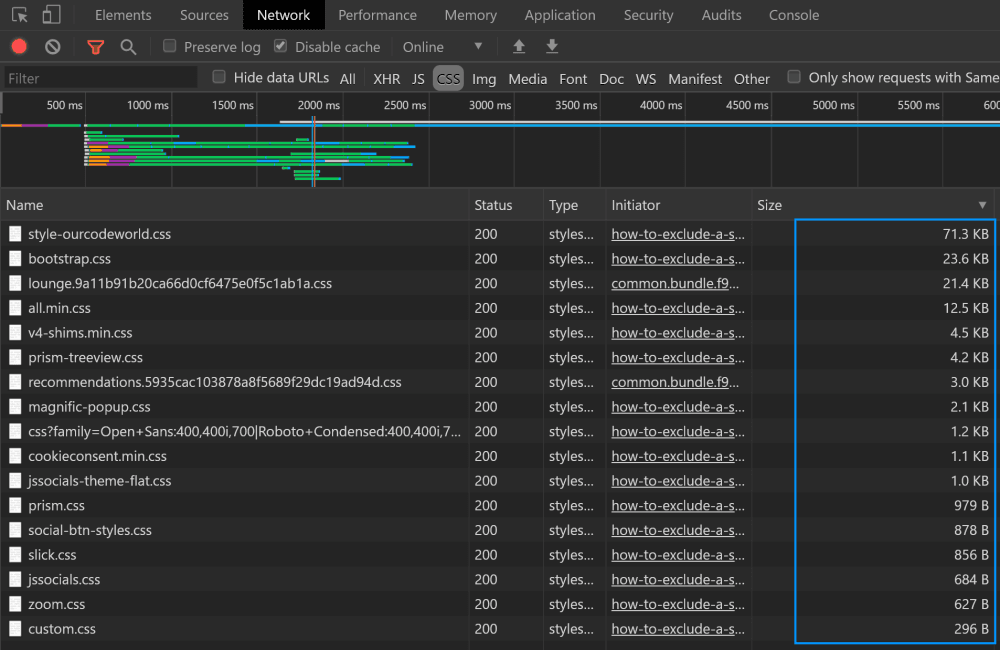
As you can see, in our implementation it worked perfectly decreasing dramatically the transfer size of the static resources of the website (in the case of the main stylesheet from 481KB to 71KB).
Happy coding ❤️!


