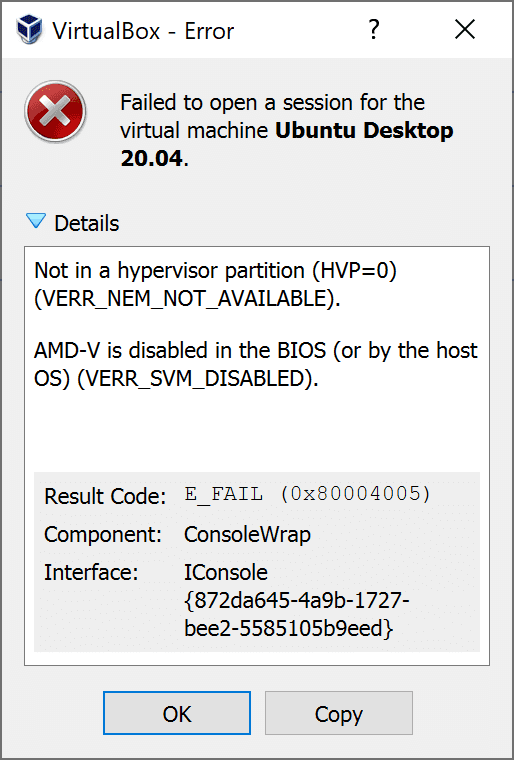
With virtual machines you will face regular problems on new computers. For example, recently i switched from an Intel Core i7 to an AMD Ryzen 9 3950x. Everything worked exceptionally until i tried to boot some virtual machines using Virtual Box:r
Not in a hypervisor partition (HVP=0) (VERR_NEM_NOT_AVAILABLE).
AMD-V is disabled in the BIOS (or by the host OS) (VERR_SVM_DISABLED).

Result Code:
E_FAIL (0x80004005)
Component:
ConsoleWrap
Interface:
IConsole {872da645-4a9b-1727-bee2-5585105b9eed}
This problem usually appears because of the following reasons:
- Virtualization (AMD-V) is disabled from BIOS settings.
- If Microsoft Hyper-V is enabled, it automatically means that the built-in virtualization technology was turned off.
- BIOS version doesn't support many CPU cores. If – As it turns out, the issue might get thrown by VM VirtualBox if the software is forced to create a virtual machine with more than 1 CPU core. In order to do this, it requires hardware virtualizations and will throw the error if the feature is disabled or unavailable.
A. Enable Secure Virtual Machine Mode on the BIOS
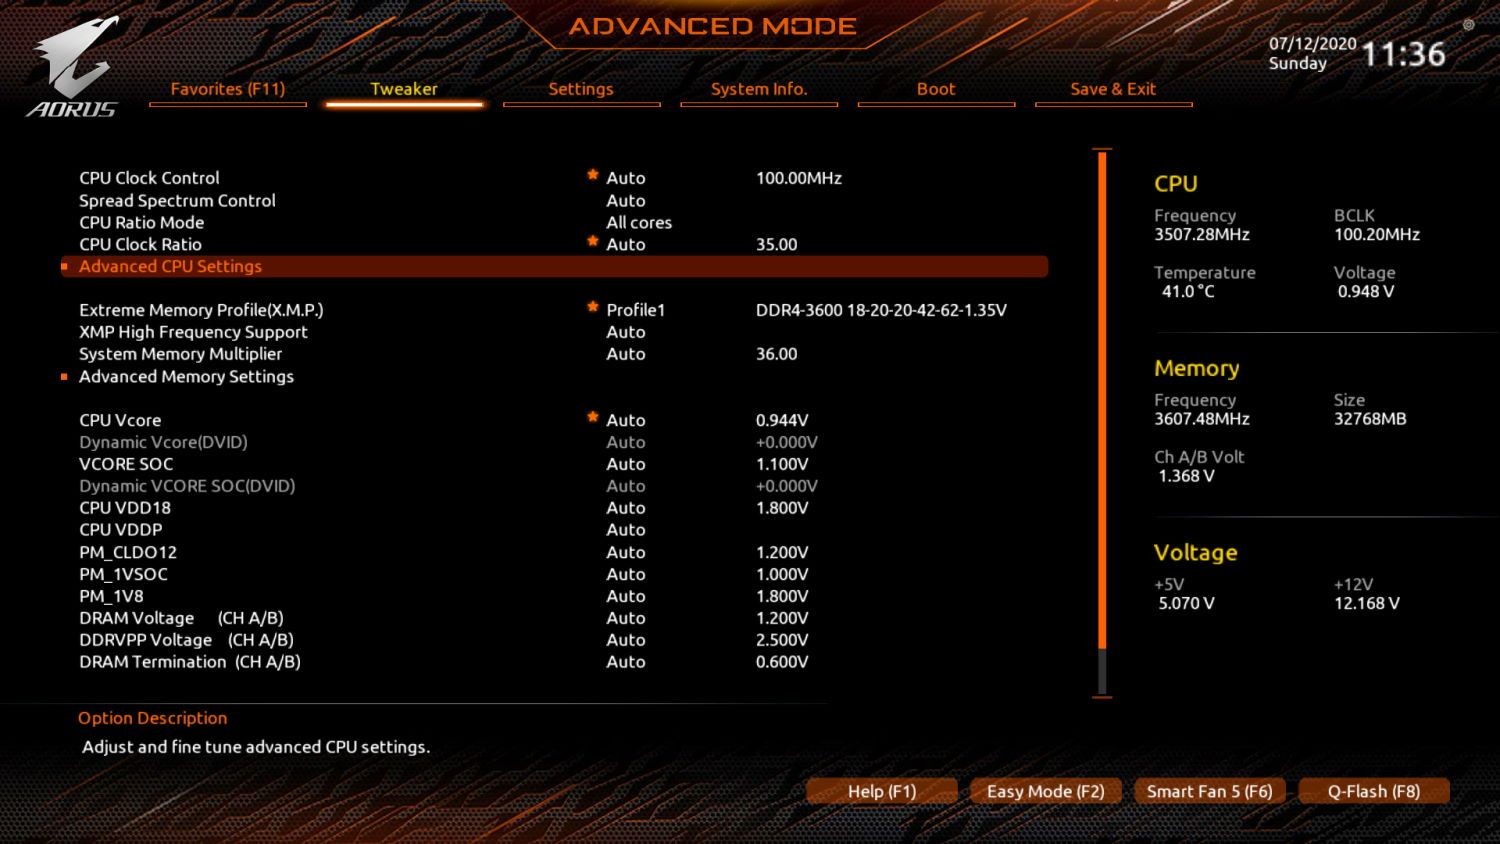
Basically the VERR_SVM_DISABLE error code is telling you that your PC does support AMD-V, but it's disabled on the BIOS. You may simply boot your computer and start the bios. In board that support AMD processors, you will find this option as Secure Virtual Machine Mode. For example, in our AORUS x570 board we may find this option on the advanced mode, under the Tweak tab, search for the Advanced CPU settings:
And then search for the Secure Virtual Machine Mode option and enable it:
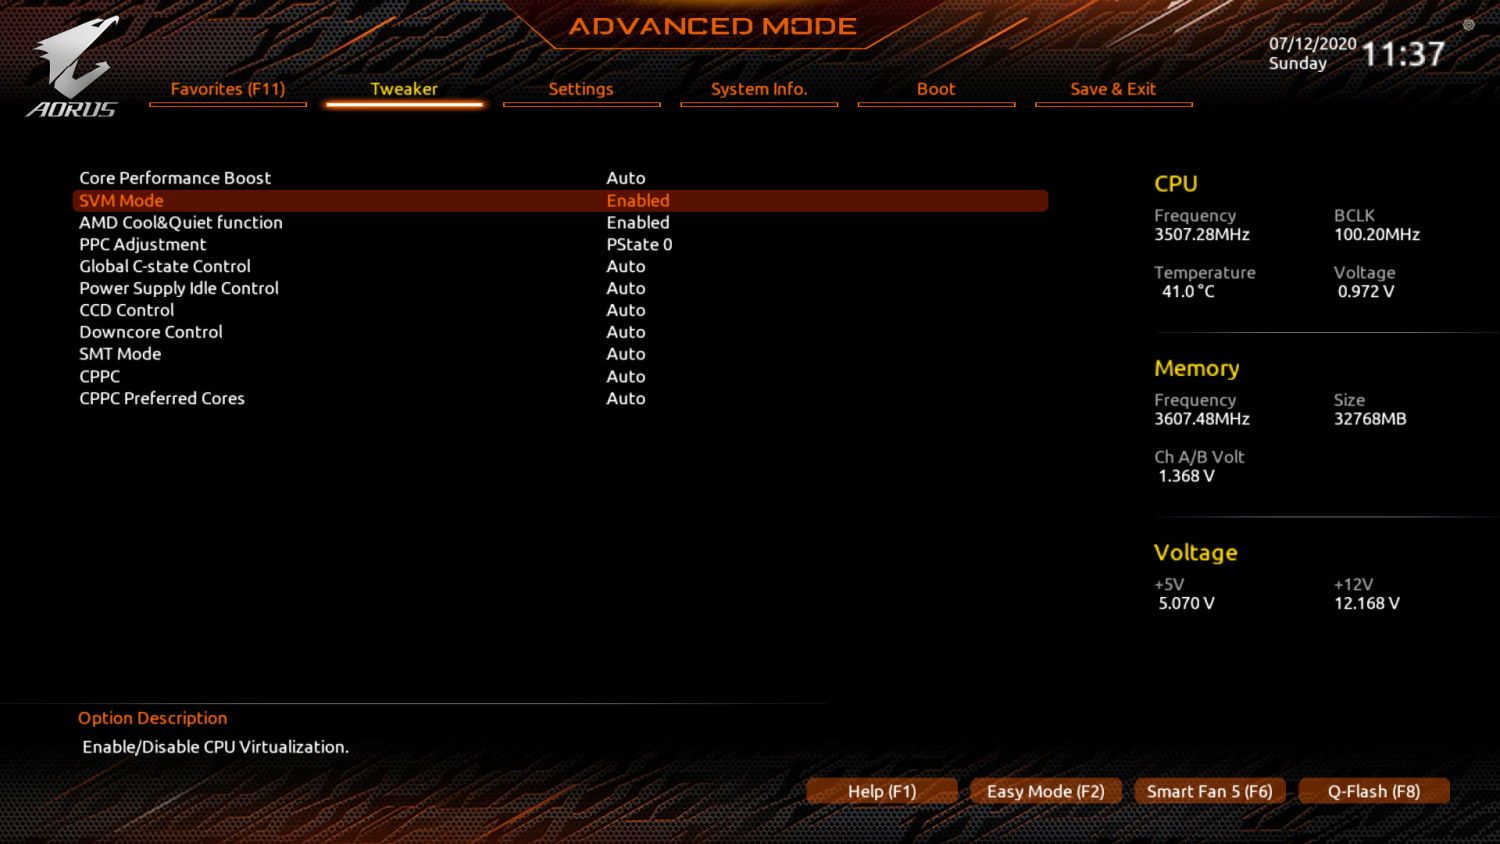
Save changes and reboot the computer, in most of the cases, the virtualization will work immediately, specially on brand new computers. If you try to start your virtual machine and it still fails, proceed with the next possible solution.
B. Disable Windows Hyper-V
Many users found the solution of this problem by simply disabling the Microsoft Hyper V Feature of Windows 10. To do this, you will have to open the appwiz.cpl executable through the run dialog box (Windows key + R):

Then click on Turn Windows Features on or off on the left side of the control panel home:
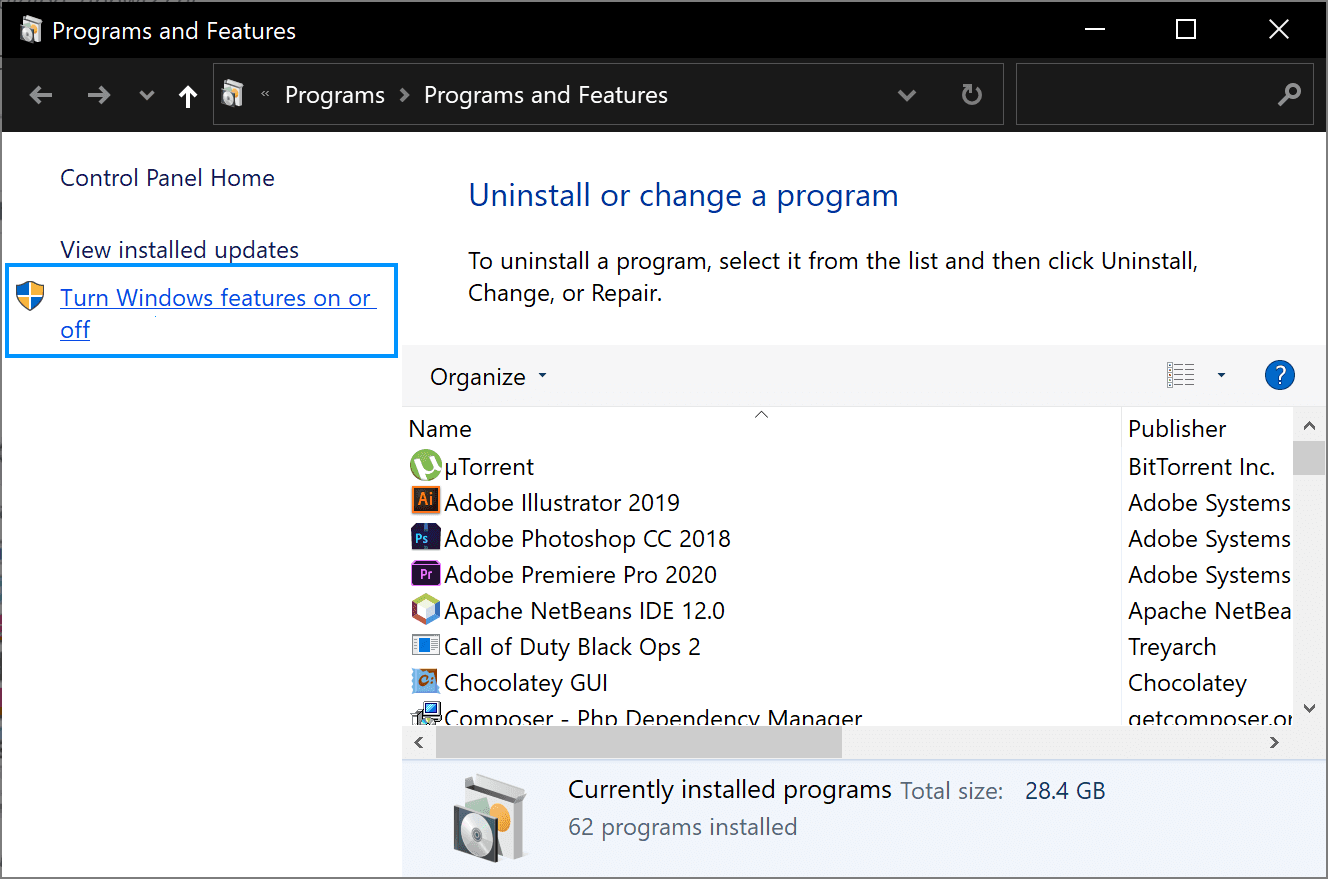
Finally search for Hyper-V on the list:

Click on OK and restart your computer, this should solve the problem when you try to start the machine again. If it doesn't work, you can continue with the next option.
C. Change number of CPU cores to 1
If after both of the mentioned solutions, the virtualization still fails, is very likely that the AMD-V technology is not supported by the current configuration of your virtual machine. Many users report that, when the software assigns more than 1 CPU in the System settings, which forces the system to use hardware virtualization in order to start the virtual host, this exception appears. Therefore, you will have to limit the amount of processors. Go to the settings of the virtual machine:
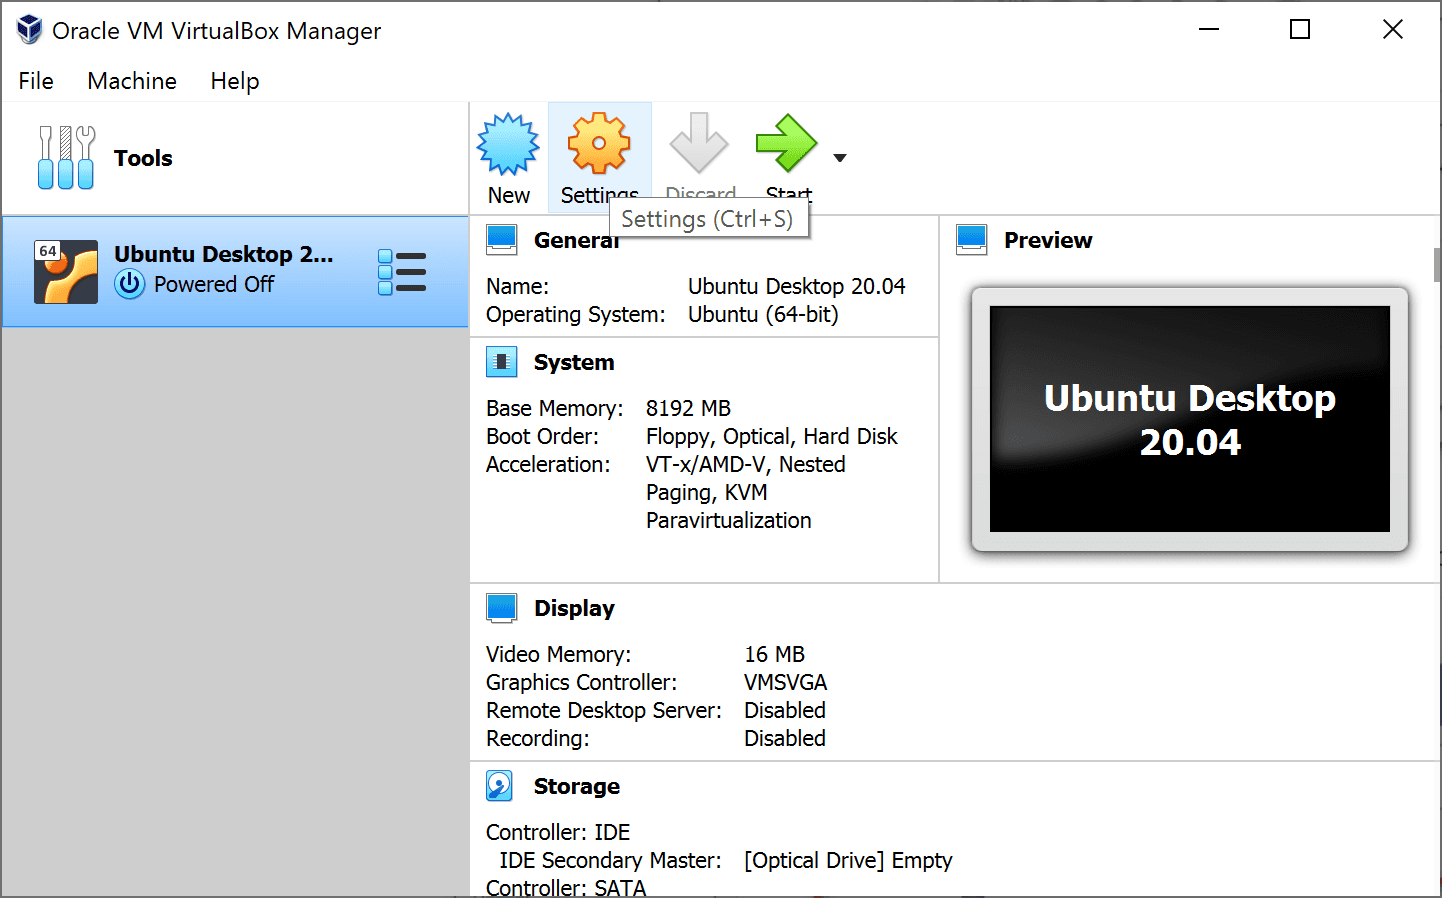
And decrease the number of processors to 1:
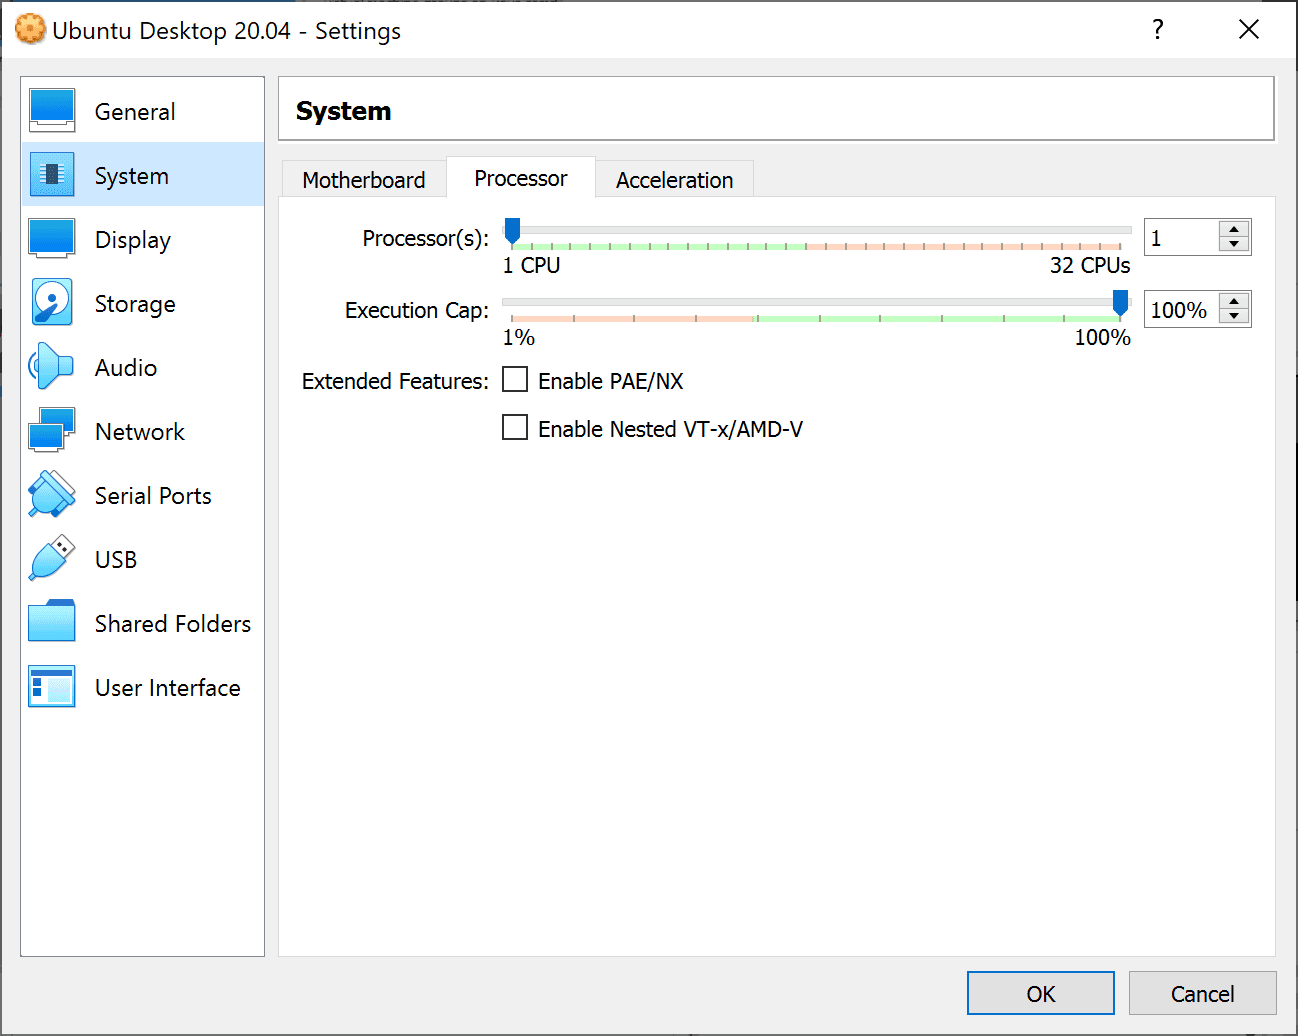
Close the settings and restart your virtual machine. It should boot up without the AMD-V is disabled in the BIOS.
Happy virtualization ❤️!


