
Does anyone remember those key generators that you used to activate those genuine programs for free? They always included the signature or name of the group with ASCII art like this:
.__.         __      .     .  .      .  .  .__       .      |
|  |. .._.  /  ` _  _| _   |  | _ ._.| _|  [__) _  _.;_/ __ |
|__|(_|[    \__.(_)(_](/,  |/\|(_)[  |(_]  |  \(_)(_.| \_)  *
Normally you would imagine that they generated this manually, however, there are a lot of tools that allow you to generate automatically the ASCII art from plain text. In this article, I will explain to you how to easily install and use Figlet on your Ubuntu 18.04 server or desktop.
1. Install Figlet
FIGlet prints its input using large characters (called ``FIGcharacters'') made up of ordinary screen characters (called ``sub-characters''). FIGlet output is generally reminiscent of the sort of ``signatures'' many people like to put at the end of e-mail and UseNet messages. It is also reminiscent of the output of some banner programs, although it is oriented normally, not sideways. The Figlet package is available directly from the APT repositories of Ubuntu. Run the following command in the terminal:
sudo apt-get install figletAfter the installation, the figlet tool will be available from the command line. The tool accepts the following options:
-f fontfile: Select the font. The .flf suffix may be left off of fontfile, in which case FIGlet automatically appends it. FIGlet looks for the file first in the default font directory and then in the current directory, or, if fontfile was given as a full pathname, in the given directory. If the -f option is not specified, FIGlet uses the font that was specified when it was compiled. To find out which font this is, use the -I3 option.-d fontdirectory: Change the default font directory. FIGlet looks for fonts first in the default directory and then in the current directory. If the -d option is not specified, FIGlet uses the directory that was specified when it was compiled. To find out which directory this is, use the -I2 option.-c, -l, -r, -x: These options handle the justification of FIGlet output. -c centers the output horizontally. -l makes the output flush-left. -r makes it flush-right. -x (default) sets the justification according to whether left-to-right or right-to- left text is selected. Left-to-right text will be flush-left, while right-to-left text will be flush-right. (Left-to-right versus right-to-left text is controlled by -L, -R and -X.)-t, -w outputwidth: These options control the outputwidth, or the screen width FIGlet assumes when formatting its output. FIGlet uses the outputwidth to determine when to break lines and how to center the output. Normally, FIGlet assumes 80 columns so that people with wide terminals won't annoy the people they e-mail FIGlet output to. -t sets the outputwidth to the terminal width. If the terminal width cannot be determined, the previous outputwidth is retained. -w sets the outputwidth to the given integer. An outputwidth of 1 is a special value that tells FIGlet to print each non-space FIGcharacter, in its entirety, on a separate line, no matter how wide it is.-p, -n: These options control how FIGlet handles newlines. -p puts FIGlet into ``paragraph mode'', which eliminates some unnecessary line breaks when piping a multi-line file through FIGlet. In paragraph mode, FIGlet treats line breaks within a paragraph as if they were merely blanks between words. (Specifically, -p causes FIGlet to convert any newline which is not preceded by a newline and not followed by a space character into a blank.) -n (default) puts FIGlet back to normal, in which every newline FIGlet reads causes it to produce a line break.-D -E, -D switches to the German (ISO 646-DE) character set. Turns `[', `\' and `]' into umlauted A, O and U, respectively. `{', `|' and `}' turn into the respective lower case versions of these. `~' turns into s-z. -E turns off -D processing. These options are deprecated, which means they probably will not appear in the next version of FIGlet.-C controlfile -N: These options deal with FIGlet controlfiles. A controlfile is a file containing a list of commands that FIGlet executes each time it reads a character. These commands can map certain input characters to other characters, similar to the Unix tr command or the FIGlet -D option. FIGlet maintains a list of controlfiles, which is empty when FIGlet starts up. -C adds the given controlfile to the list. -N clears the controlfile list, cancelling the effect of any previous -C. FIGlet executes the commands in all controlfiles in the list. See the file figfont.txt, provided with FIGlet, for details on how to write a controlfile.-s -S -k -W -o: These options control how FIGlet spaces the FIGcharacters that it outputs. -s (default) and -S cause ``smushing''. The FIGcharacters are displayed as close together as possible, and overlapping sub-characters are removed. Exactly which sub-characters count as ``overlapping'' depends on the font's layoutmode, which is defined by the font's author. -k causes ``kerning''. As many blanks as possible are removed between FIGcharacters, so that they touch, but the FIGcharacters are not smushed. -W makes FIGlet display all FIGcharacters at their full width, which may be fixed or variable, depending on the font. The difference between -s and -S is that -s will not smush a font whose author specified kerning or full width as the default layoutmode, whereas -S will attempt to do so. If there is no information in the font about how to smush, or if the -o option is specified, then the FIGcharacters are ``overlapped''. This means that after kerning, the first subcharacter of each FIGcharacter is removed. (This is not done if a FIGcharacter contains only one subcharacter.)-m layoutmode: Specifies an explicit layoutmode between 1 and 63. Smushmodes are explained in figfont.txt, which also provides complete information on the format of a FIGlet font. For the sake of backward compatibility with versions of FIGlet before 2.2, -m0 is equivalent to -k, -m-1 is equivalent to -W, and -m-2 is equivalent to -s. The -m switch is normally used only by font designers testing the various layoutmodes with a new font.-v -I infocode: These options print various information about FIGlet, then exit. If several of these options are given on the command line, only the last is executed, and only after all other command-line options have been dealt with. -v prints version and copyright information, as well as a ``Usage: ...'' line. -I prints the information corresponding to the given infocode in a consistent, reliable (i.e., guaranteed to be the same in future releases) format. -I is primarily intended to be used by programs that use FIGlet. infocode can be any of the following.-
-1: Normal operation (default). This infocode indicates that FIGlet should operate normally, not giving any informational printout, printing its input in the selected font.
-
0: Version and copyright. This is identical to -v.
-
1: Version (integer). This will print the version of your copy of FIGlet as a decimal integer. The main version number is multiplied by 10000, the sub-version number is multiplied by 100, and the sub-sub-version number is multiplied by 1. These are added together, and the result is printed out. For example, FIGlet 2.2 will print ``20200'' , version 2.2.1 will print ``20201''. Similarly, ascending, with later versions having higher numbers. Note that the first major release of FIGlet, version 2.0, did not have the -I option.
-
2: Default font directory. This will print the default font directory. It is affected by the -d option.
-
3: Font: . This will print the name of the font FIGlet would use. It is affected by the -f option. This is not a filename; the ``.flf'' suffix is not printed.
-
4: Output width. This will print the value FIGlet would use for outputwidth, the number of columns wide FIGlet assumes the screen is. It is affected by the -w and -t options.
-
5: Supported font formats. This will list font formats supported by FIGlet . Possible formats are ``flf2'' for FIGfont Version 2 .flf files and ``tlf2'' for TOIlet .tlf files. If infocode is any other positive value, FIGlet will simply exit without printing anything.
-
-L -R -X: These options control whether FIGlet prints left-to-right or right-to-left. -L selects left-to-right printing. -R selects right-to-left printing. -X (default) makes FIGlet use whichever is specified in the font file. Once the options are read, if there are any remaining words on the command line, they are used instead of standard input as the source of text. This feature allows shell scripts to generate large letters without having to dummy up standard input files. An empty argument, obtained by two sequential quotes, results in a line break.
2. Using Figlet
Figlet it's really easy to use, simply pass as positional argument the text that you want to convert to its ASCII art version and that's it:
figlet "Our Code World Rocks!"3. Implementing Custom Fonts
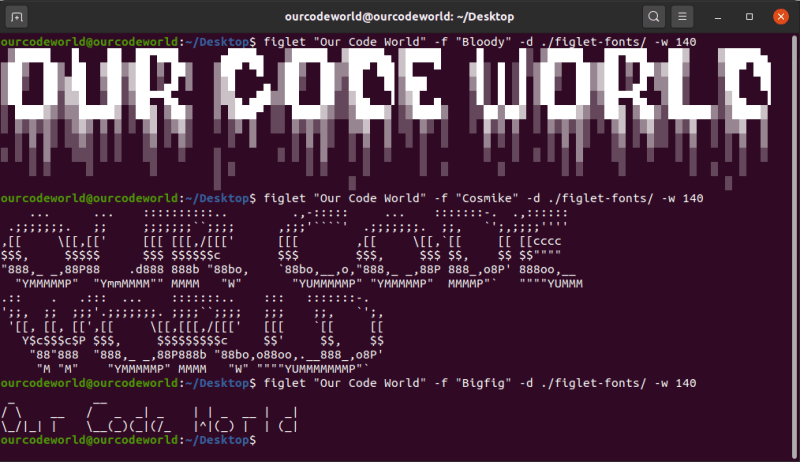
You need to use custom figlet fonts (.flf) to print text in ASCII characters with custom styles. In this Github repository, you can find multiple fonts that you can use with Figlet. Simply download the repository with git in your server/computer:
git clone https://github.com/xero/figlet-fonts.gitThen run the figlet commands as usual, however, add the 2 extra parameters to specify the new directory of the fonts and the name of the font that you want to use:
-d: specify the path to the directory that contains the figlet fonts.-f: specify the font name that you want to use (filename without extension).
The command goes like this:
figlet "text" -f <font-name> -d <path-to-fonts-directory>In our case, we will print the "Our Code World Rocks!" with the 3D Diagonal.flf font downloaded from the mentioned repository:
figlet "Our Code World Rocks!" -f "3D Diagonal" -d ./figlet-fonts/The command in the terminal would output the following text:

4. Printing Figlet content to a file
If instead of printing it to the terminal, you want to save the output into a file, simply pipe the output to the file that you want. For example, to save the content into a plain text file:
figlet "Our Code World Rocks!" -f "3D Diagonal" -d ./figlet-fonts/ > ./output-file.txtHappy coding ❤️!

