
In our previous article, we explained how easily it was to create your own user entity from scratch with your own fields. Structurally, that was the most important part to implement your own user system, now we need to implement a simple way in which the user can simply register himself on the website. On this part, we will explain you how to easily implement an user registration form using the User entity created in the first part of this serie.
1. Create RegistrationFormType
As first step, our form will be created using the Symfony Fomrs component. Create a new form type namely RegistrationFormType, with the following content in the /app/src/Form/ directory of your application:
<?php

// app/src/Form/RegistrationFormType.php
namespace App\Form;

use App\Entity\User;
use Symfony\Component\Form\AbstractType;
use Symfony\Component\Form\Extension\Core\Type\PasswordType;
use Symfony\Component\Form\Extension\Core\Type\CheckboxType;
use Symfony\Component\Form\Extension\Core\Type\RepeatedType;
use Symfony\Component\Form\FormBuilderInterface;
use Symfony\Component\OptionsResolver\OptionsResolver;
use Symfony\Component\Validator\Constraints\NotBlank;
use Symfony\Component\Validator\Constraints\Length;
use Symfony\Component\Validator\Constraints\IsTrue;

class RegistrationFormType extends AbstractType
{
    public function buildForm(FormBuilderInterface $builder, array $options)
    {
        $builder
            ->add('firstName')
            ->add('lastName')
            ->add('email')
            ->add('plainPassword', RepeatedType::class, [
                'type' => PasswordType::class,
                'invalid_message' => 'The password fields must match.',
                'required' => true,
                'first_options'  => ['label' => 'Password'],
                'second_options' => ['label' => 'Repeat Password'],
                // instead of being set onto the object directly,
                // this is read and encoded in the controller
                'mapped' => false,
                'constraints' => [
                    new NotBlank([
                        'message' => 'Please enter a password',
                    ]),
                    new Length([
                        'min' => 6,
                        'minMessage' => 'Your password should be at least {{ limit }} characters',
                        // max length allowed by Symfony for security reasons
                        'max' => 4096,
                    ]),
                ],
            ])
            ->add('agreeTerms', CheckboxType::class, [
                'mapped' => false,
                'constraints' => [
                    new IsTrue([
                        'message' => 'You should agree to our terms.',
                    ]),
                ],
            ])
        ;
    }

    public function configureOptions(OptionsResolver $resolver)
    {
        $resolver->setDefaults([
            'data_class' => User::class,
        ]);
    }
}
In the configureOptions method of the class, we will bind the User class (created in the first part of the series) as the data_class of the form. The form will have 5 fields, 4 of them requesting the user basic information to register a new user, the first and last name, the email and the password.
2. Create RegistrationController
As seconds step, we will have to dispose some route to the user, where he can register himself. We will expose a controller specifically for the registration and it will be available at mywebsite.com/register. In this controller, we will have a single action that will render the registration view and will process as well through a conditional if the form has been submitted with the required information to register the user. The register method will receive through Dependency Injection the UserPasswordEncoderInterface, that will be used to encode the plain text password sent through the form:
<?php

// app/src/Controller/RegistrationController.php
namespace App\Controller;

use App\Entity\User;
use App\Form\RegistrationFormType;
use Symfony\Bundle\FrameworkBundle\Controller\AbstractController;
use Symfony\Component\HttpFoundation\Request;
use Symfony\Component\HttpFoundation\Response;
use Symfony\Component\Routing\Annotation\Route;
use Symfony\Component\Security\Core\Encoder\UserPasswordEncoderInterface;

class RegistrationController extends AbstractController
{
    /**
     * @Route("/register", name="app_register")
     */
    public function register(Request $request, UserPasswordEncoderInterface $passwordEncoder): Response
    {
        $user = new User();
        $form = $this->createForm(RegistrationFormType::class, $user);
        $form->handleRequest($request);

        if ($form->isSubmitted() && $form->isValid()) {
            // encode the plain password
            $user->setPassword(
                $passwordEncoder->encodePassword(
                    $user,
                    $form->get('plainPassword')->getData()
                )
            );

            $entityManager = $this->getDoctrine()->getManager();
            $entityManager->persist($user);
            $entityManager->flush();


            // do anything else you need here, like send an email
            // in this example, we are just redirecting to the homepage
            return $this->redirectToRoute('app_index');
        }

        return $this->render('registration/register.html.twig', [
            'registrationForm' => $form->createView(),
        ]);
    }
}
The action renders a Twig view with the form and the mentioned logic will happen when the form is submitted.
3. Create Registration View in Twig
Finally, we just need to create the view that we send as response on the controller. This view, created in the /app/templates/registration/ directory, namely register.html.twig and will have the following content:
{# /app/templates/registration/register.html.twig #}
{% extends 'base.html.twig' %}

{% block title %}Register{% endblock %}

{% block body %}
    <h1>Register</h1>

    {# If there are any errors on the form, display them #}
    {% set formErrors = registrationForm.vars.errors.form.getErrors(true) %}
    {% if formErrors|length %}
        <div class="alert alert-danger">
            <ul>
                {% for error in formErrors %}
                    <li>{{ error.message }}</li>
                {% endfor %}
            </ul>
        </div>
    {% endif %}

    {# Render the Form #}
    {{ form_start(registrationForm) }}
        {{ form_row(registrationForm.firstName) }}
        {{ form_row(registrationForm.lastName) }}
        {{ form_row(registrationForm.email) }}
        {{ form_row(registrationForm.plainPassword) }}
        {{ form_row(registrationForm.agreeTerms) }}

        <button class="btn">Register</button>
    {{ form_end(registrationForm) }}
{% endblock %}
Initially, we will check if there are any errors stored on the form, so the user knows if the given information is enough to register himself. Then, we will render the form manually using the form_start, form_row and form_end tags.
4. Test Form
Lastly, you can test the register route in your website and fill the form:
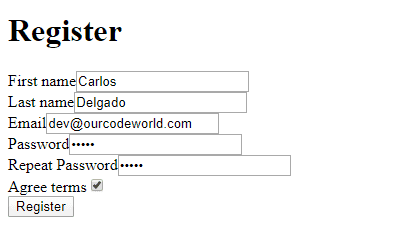
The user will be able to register himself easily.
READ ALL THE PARTS OF THE TUTORIAL "HOW TO IMPLEMENT YOUR OWN USER AUTHENTICATION SYSTEM IN SYMFONY 4.3"
- Part 1: Creating a Custom User Class.
- Part 2: Creating an User Registration Form.
- Part 3: Creating a Login Form and Logout Route.
LINKS OF INTEREST FOR THIS TUTORIAL
Happy coding !

