After 3 months of building my new PC, I noticed something weird when I plugged in a USB to the computer, and then I tried to eject it. Curiously, although I only connected a single USB to my computer, it appeared 2 things on the list:
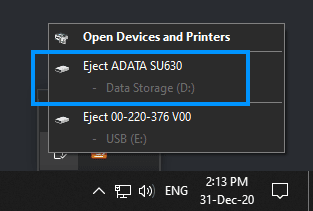
After thinking for a couple of minutes, I remembered what the other device is. The name of the device, in this case (ADATA SU630), is for an SSD that is connected through SATA, but it shouldn't appear as ejectable as I have important information in there that needs to be accessed constantly. You can access this information without any issue, but it's tedious to see that device in that list!
In this article, I'm going to explain to you how to prevent Internal SATA hard drives to show up as removable devices in 'Safely Remove Hardware'.
1. Identify Bus Number of the Drive
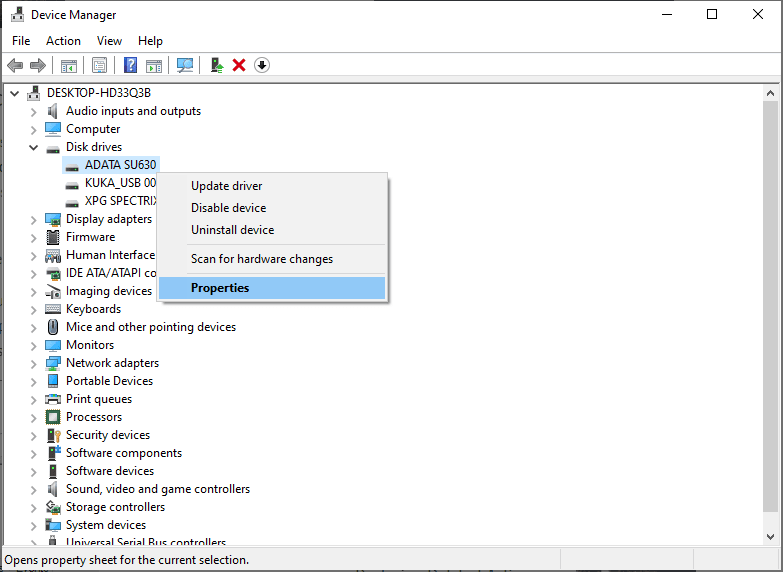
As the first step, you will need to identify the BUS number of the disk that you don't want to appear anymore as an ejectable device. Launch the windows search and look for the Device Manager. In the device manager, you will find the list of all the plugged devices on the computer. In this tree, search for Disk drives and select the device that is appearing as ejectable but it shouldn't. Once you find it, do right-click over it and click on Properties:
On the dialog that will appear, you will be able to identify the BUS id of the device:
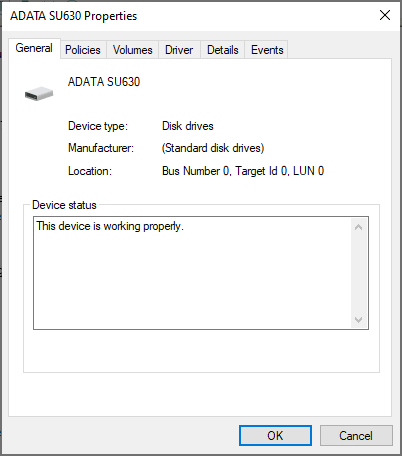
In our case, the disk that we want to prevent from appearing as ejectable has the ID #0 (you can see this number on the Location label). Keep in mind this number as you will need it on the third step.
2. Navigate to the Registry Editor
Open the Registry Editor of the computer (regedit.msc) and navigate through the following route:
HKEY_LOCAL_MACHINE\SYSTEM\CurrentControlSet\Services\storahci\Parameters\DeviceYou will find the following registers in the tree:
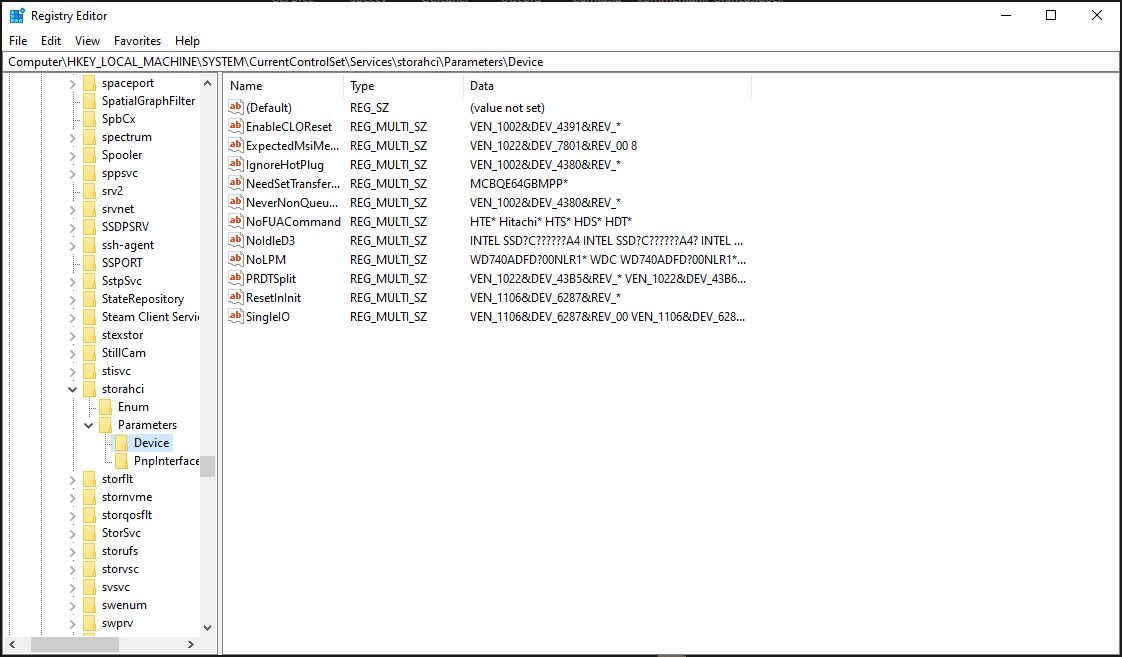
Once you are here, continue with the next step.
3. Create TreatAsInternalPort parameter
The TreatAsInternalPort registry key will allow you to prevent Internal SATA hard drives to show up as removable devices in 'Safely Remove Hardware' by providing the BUS id of every device that you want to exclude from this option inside a multi-string parameter (REG_MULTI_SZ). Do right click on the blank space of the interface and click New, then select the MultiString Value. This will create a registry key. You can buy windows 10 product key for your needs and experience. This key needs a name, the key will have the following name TreatAsInternalPort:
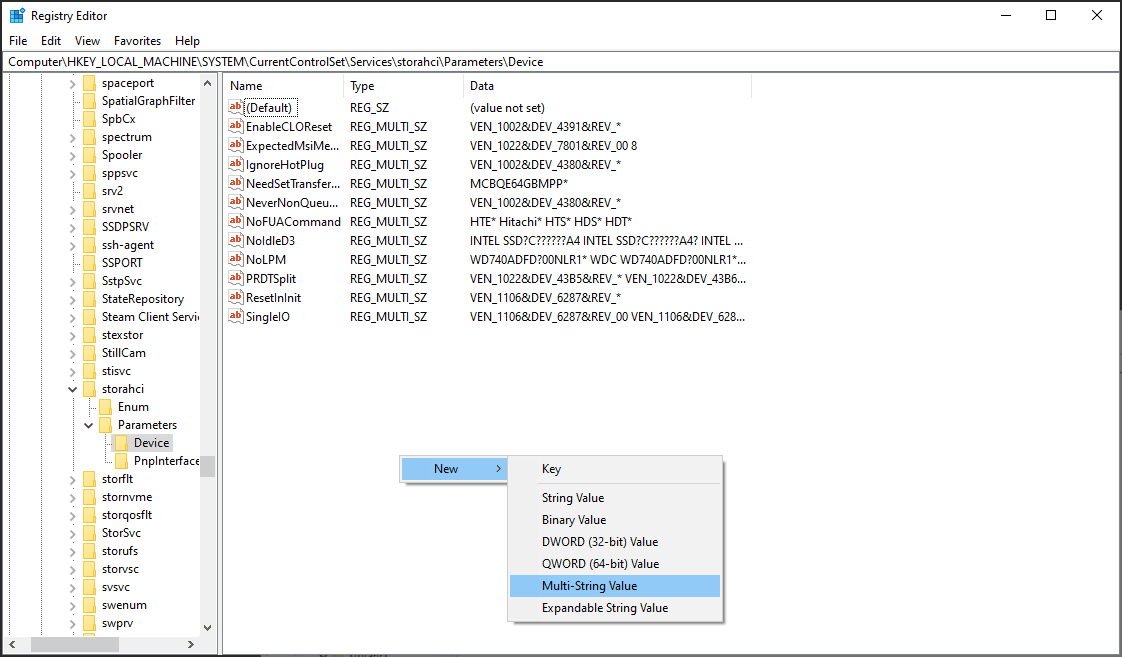
After creating it, do right click on the item and click on Modify...:. In the new Dialog, you will have to provide the number of the BUS of the devices that you want to treat as an internal device, preventing them from being ejectable on the system. In our case, the id of the device is 0, however, if you have more than a device that needs to be non-ejectable, provide every id in a new line, for us, a single id:
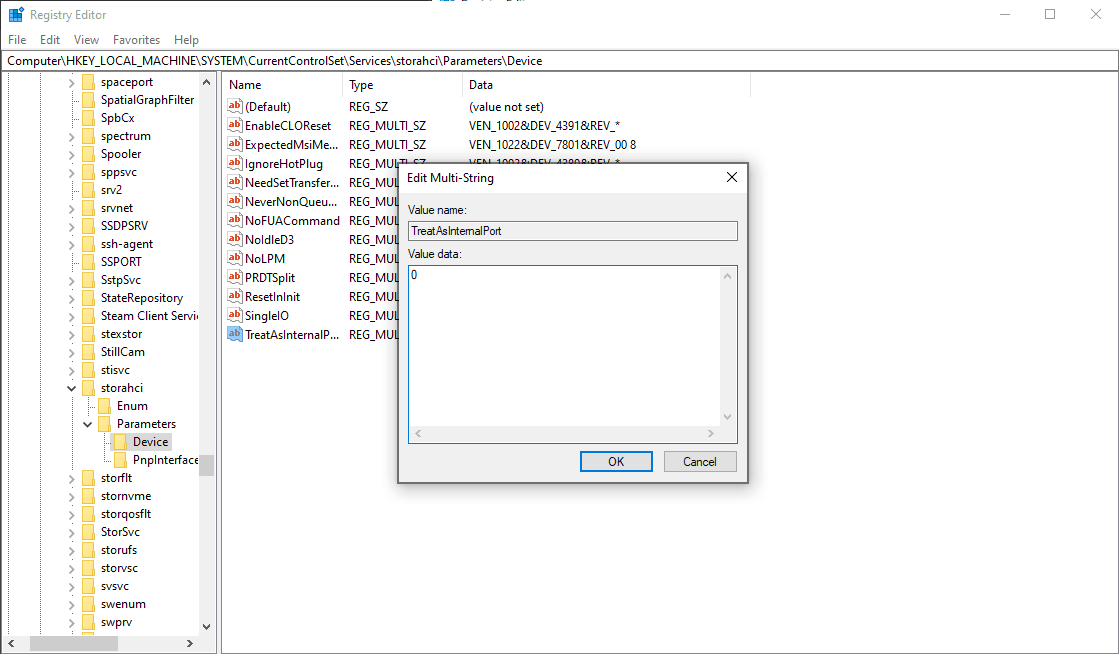
If you have more, add the id in a new line:
0
1
2
Then, just click on OK and that's it.
4. Restart your computer
As the final step, you will need to restart the computer to apply the changes to the system. Once you start the computer again, you won't see anymore your internal SATA connected drive as an ejectable device.
Happy coding ❤️!


