

When you work with Git either with Github or Gitlab, you will need often to authenticate yourself using your username and password. The SSH Keys are an alternative to identify yourself without providing the mentioned credentials every time you interact with your repositories. While getting your amazon aws certification, you will definitely do this as first step in all of the tutorials you follow. You will only need to share your public key with the service and the private key will remain stored in your computer, so when the keys match, you have full access to your stuff.
For example, if you try to clone one of your repositories through SSH like this:
git clone [email protected]:username-or-organization/repository.gitIn Windows, if you don't have any SSH key configured properly, the following message will appear:
Cloning into 'your-git-repo'...
[email protected]: Permission denied (publickey,keyboard-interactive).
fatal: Could not read from remote repository.

Please make sure you have the correct access rights
and the repository exists.
In this article, I will explain to you how to easily generate your own SSH key to identify your device.
1. Install PuTTYGen
The first thing you gotta do to work with the SSH authentication with your repositories is to install PuTTYGen in the system. This application comes included in the installation setup of PuTTY on the official website here. However, you can download the puttygen.exe file as well if you don't want the entire PuTTy bundle.
PuTTYGen is an RSA and DSA key generation utility that will be used to create our SSH key in the Windows environment.
2. Generate your SSH Key
Launch the PuttyGen binary and start creating the SSH key by clicking on "Generate", after that, you will be asked to move the mouse over the blank space to generate some randomness in your key:
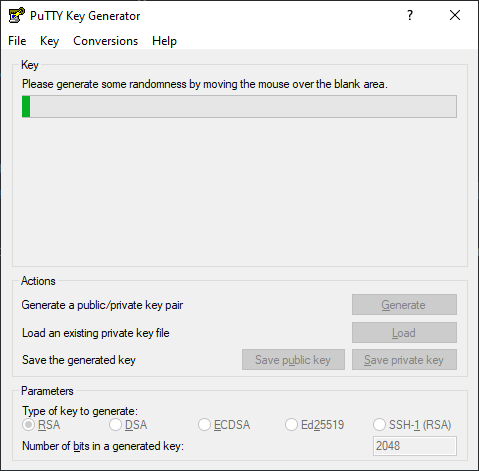
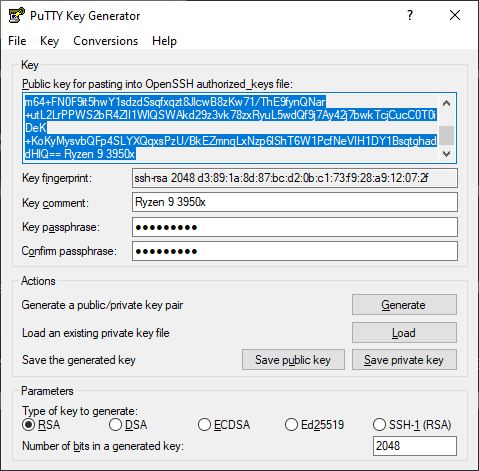
After moving the mouse at this point, the SSH key will be generated and you will have to fill the following fields:
- Key comment: the name to use for this key, usually the name of the computer that you are working on right now.
- Key passphrase: this will be the password that you will need to provide to unlock the key every time you need it.
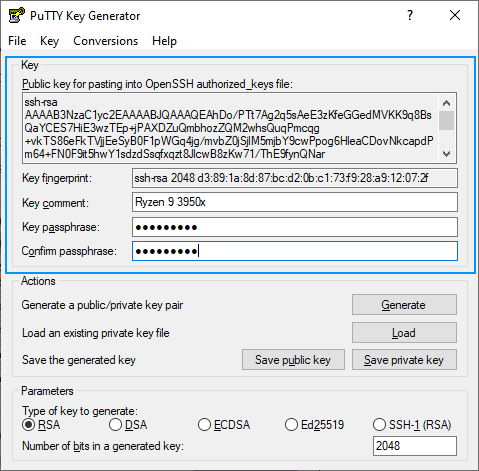
Now that we have the password of the SSH key and a name for it, you can now proceed to save in the required formats for Windows.
3. Create the .ssh folder in your user directory
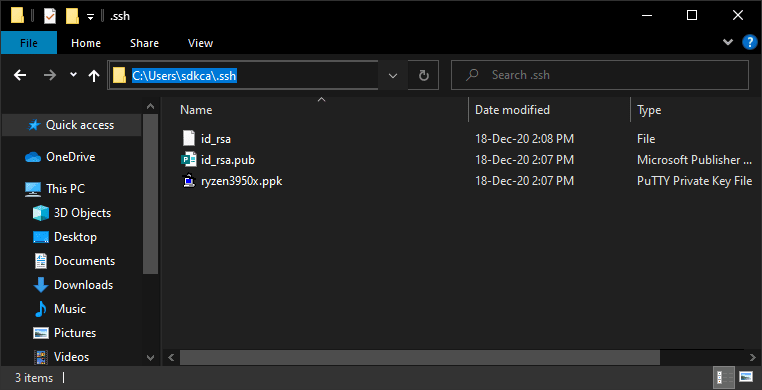
Create the .ssh folder in the current user's directory. For example, on my computer, it is located at C:/Users/sdkca. So I created the .ssh folder in there (you can obtain the directory with the environment variable %USERPROFILE%):
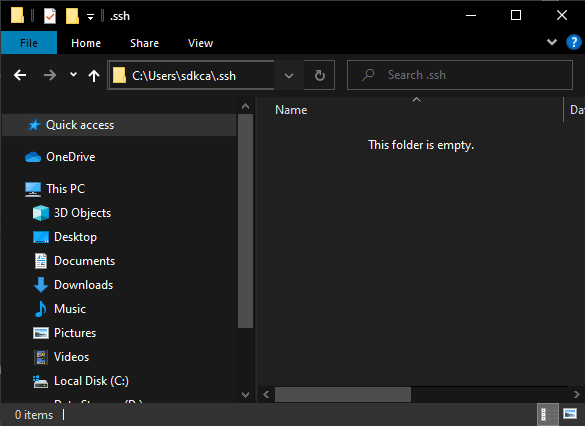
You will store all the created files in the mentioned directory.
4. Store PuTTY Private Key (PPK File)
The first file to generate from our now generated SSH key is the file with .ppk extension that you can generate by clicking on "Save private key":
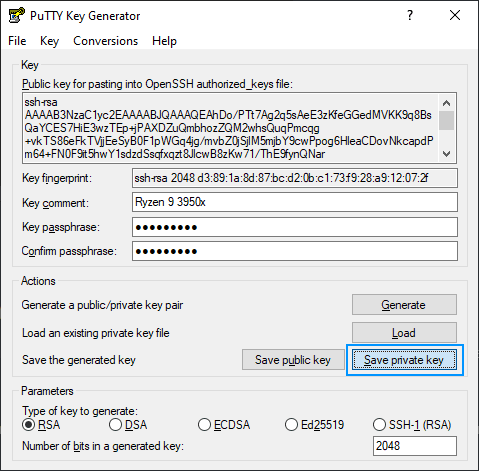
You can provide a custom name, in our case we will use the same name as the comment "ryzen93950x.ppk" and will be stored in the .ssh directory created in step #3. The content of the .ppk file looks something like this:
PuTTY-User-Key-File-2: ssh-rsa
Encryption: aes256-cbc
Comment: Ryzen 9 3950x
Public-Lines: 6
AAAAB3NzaC1yc2EAAAABJQAAAQEAhDo/PTt7Ag2q5sAeE3zKfeGGedMVKK9q8BsQ
aYCES7HiE3wzTEp+jPAXDZuQmbhozZQM2whsQuqPmcqg+vkTS86eFkTVjjEeSyB0
F1pWGq4jg/mvbZ0jSjlM5mjbY9cwPpog6HleaCDovNkcapdPm64+FN0F9it5hwY1
sdzdSsqfxqzt8JlcwB8zKw71/ThE9fynQNar+utL2LrPPWS2bR4ZlI1WlQSWAkd2
9z3vk78zxRyuL5wdQf9j7Ay42j7bwkTcjCucC0T0iDeK+KoKyMysvbQFp4SLYXQq
xsPzU/BkEZmnqLxNzp6lShT6W1PcfNeVIH1DY1BsqtghaddHlQ==
Private-Lines: 14
ksW4kvFIMD4OqwgDYbEkhiB0l1uNsfj2uXw/lch/mHmaUSS08+2RHojc4GNDD2VG
....
.....
5. Store OpenSSH Public Key for authorized keys (id_rsa.pub File)
Now you need to create the file id_rsa.pub that will contain the string in the middle of the PuTTYGen application (Public key). The string is used on the authorized_keys file of the servers so you can access them:
Copy the content and paste it into the mentioned id_rsa.pub file in the .ssh directory created in step #3. The file content will look something like this:
ssh-rsa AAAAB3NzaC1yc2EAAAABJQAAAQEAhDo/PTt7Ag2q5sAeE3zKfeGGedMVKK9q8BsQaYCES7HiE3wzTEp+jPAXDZuQmbhozZQM2whsQuqPmcqg+vkTS86eFkTVjjEeSyB0F1pWGq4jg/mvbZ0jSjlM5mjbY9cwPpog6HleaCDovTROLOLOLOLO-DONTUSETHISKEY-USEYOUROWNKEYJlcwB8zKw71/ThE9fynQNar+utL2LrPPWS2bR4ZlI1WlQSWAkd29z3vk78zxRyuL5wdQf9j7Ay42j7bwkTcjCucC0T0iDeK+KoKyMysvbQFp4SLYXQqxsPzU/BkEZmnqLxNzp6lShT6W1PcfNeVIH1DY1BsqtghaddHlQ== Ryzen 9 3950x6. Store OpenSSH Key (id_rsa File)
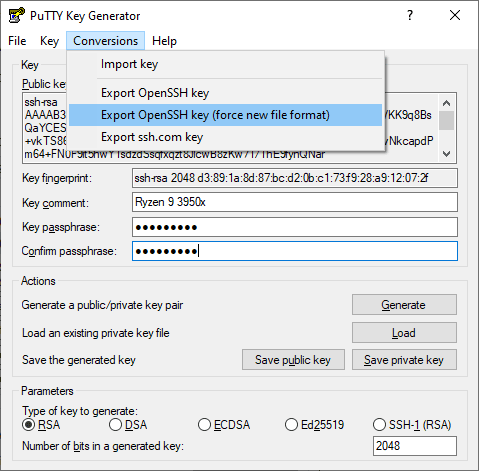
Finally, the third file will be your identity file that will be your SSH Key in Open SSH format. You will need to convert your key to this format as it's the one you require on tools like Github and Gitlab. You can easily do this by clicking on the Conversions tab of PuTTYGen and then clicking on Export OpenSSH Key (force new file format):
Note: if you don't use the new file format, it will work anyway, however, you will always find the warning "load pubkey "/c/Users/USERNAME/.ssh/id_rsa": invalid format".
This will prompt you where to save the file, use id_rsa as name and store it in the .ssh directory created in step #3. The content of this file should look like this:
-----BEGIN RSA PRIVATE KEY-----
Proc-Type: 4,ENCRYPTED
DEK-Info: DES-EDE3-CBC,920A7C839CE3CABE

qWuTR1ARsILMzEGwhmr5SYFdu/MxsLKA3XTLy1dO4RYsvLqZOmloRvtZgy9VSNpg
...............................
-----END RSA PRIVATE KEY-----
After following all the previous steps you will end up with 3 files in the .ssh directory:
7. Register SSH key in Github and Gitlab
As the final step, you need to register your OpenSSH Public Key in the platform of your choice in your SSH Keys:
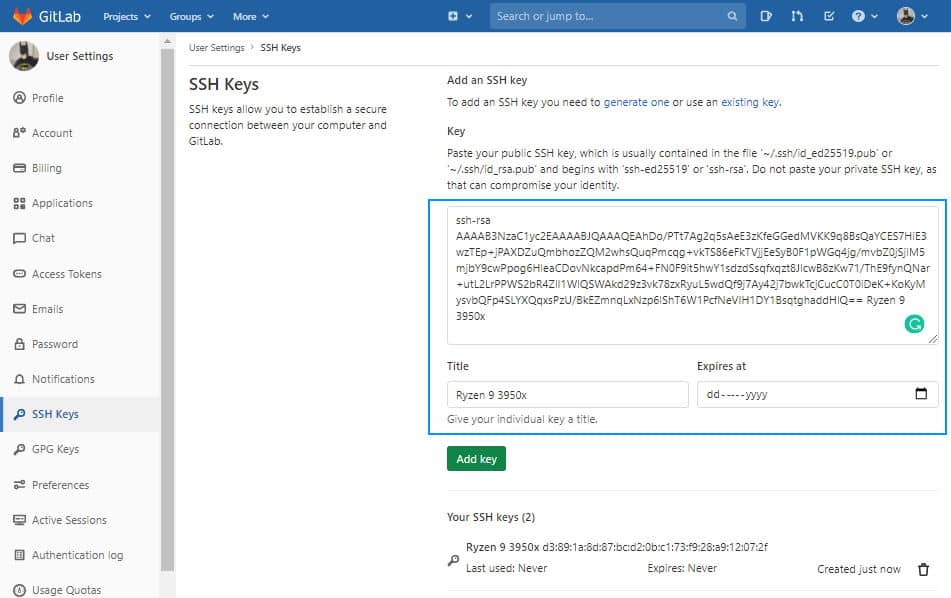
Gitlab
Login to Gitlab and open your user settings. In the left side menu, choose the SSH Keys option and register the value of your id_rsa.pub file:
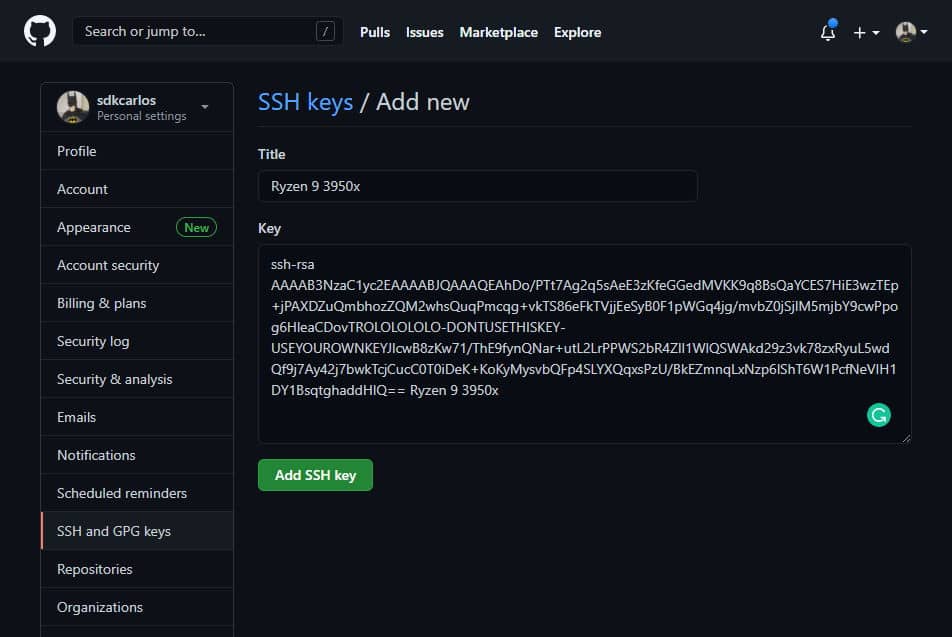
Github
Login to Github and open your user personal settings through the top right side dropdown. Select SSH AND GPG keys and register your key:
8. Using SSH Authentication
Now that you have your keys registered, you can clone your repositories and make changes to your repositories:
git clone [email protected]:username/repository-name.gitHappy coding ❤️!

