

To add the Dropbox support for your Cordova application, you need to :
- Register yourself as a Dropbox developer in the official website.
- Create your app on Dropbox and add the required configuration for a Cordova app (OAuth2 redirect uri).
- Get a copy of dropbox.js to manager the OAuth flow and use the API easily with Javascript.
- Learn to authenticate your user in your app.
- Use some common methods.
Let's get started.
Creating your Dropbox developer account
You need to register your app in Dropbox, otherwise you'll not be able to access any of their API's. Register yourself on Dropbox developers website here.
Setting up your app on Dropbox
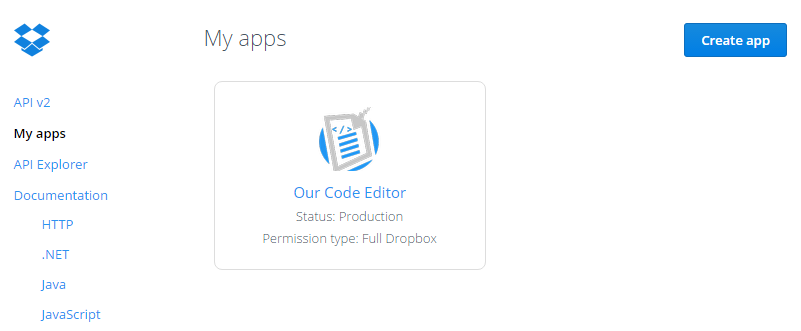
After your registration and confirmation, go to My Apps tab and click on Create app.
Follow the basic steps of the creation :

Now comes the most important point of the creation of the app, it's configuration. As we are working on a cordova project, we are going to use oAuth2, therefore your app configuration should look like :

Now you'll retrieve the app key and app secret code that we'll need to access the api with javascript.
Note: OAuth 2 redirect URIs needs to have the following url : https://www.dropbox.com/1/oauth2/redirect_receiver otherwise, you'll get only a white screen later when you try to login.
Accesing Dropbox
Now that our app is alive and registered, we'll be able to execute calls to the API. Before you can make any API calls, your users must authorize your application to access their Dropbox (Dropbox login form). This process follows the OAuth 2.0 protocol, which entails sending the user to a Web page on www.dropbox.com, and then having them redirected back to your application.
To handle all those things and don't get headaches, we are going to use the unofficial dropbox.js library. With this library we'll be able to list and see the content of our user Dropbox (Read, write, upload) via Dropbox rest API.
As the project is written in Coffescript, you'll need to build by yourself the dropbox.js file, read the following guide of how to build dropbox.js in the official project.
Or if you want, just download the built dropbox.js file from the CDN (which is easier and quickly, however you may want to build the project instead to get the latest version of it):
<script src="//cdnjs.cloudflare.com/ajax/libs/dropbox.js/0.10.2/dropbox.min.js"></script>Then include the dropbox.js file in your project and you're done for now.
Web applications can use different methods and UI (you'll need to build the file browser manually for example) to drive the user through this process, so dropbox.js lets application code hook into the authorization process by implementing an auth driver. dropbox.js ships with a couple of built-in auth drivers, which are great way to jump-start application development. When your application's needs outgrow the built-in drivers, read the auth driver guide for further information about implementing a custom auth driver.
For this article, a test project has been created using the following cordova commands :
# Create the project
cordova create hello com.example.hello HelloWorld
# Add the android platform
cordova platform add android --save
# Important we need the inappbrowser plugin in the project
cordova plugin add cordova-plugin-inappbrowser
The template will be the default cordova template. Remember that you need to have the cordova-plugin-inappbrowser already in your project. Now to start the login process, use the following code (remember to change the DROPBOX_APP_KEY with yours) :
var DROPBOX_APP_KEY = 'hereyourappkey';
var client = new Dropbox.Client({key: DROPBOX_APP_KEY});
client.authDriver(new Dropbox.AuthDriver.Cordova());

function SuccessCallback(){
    // Now from here you can use the client to download
    // upload, create ,delete etc
    // Write here the code you need to execute as download etc.
    // client.readFile
    // client.readdir
    // client.writeFile
}

// Open the login form of Dropbox and if the user already granted the access
// Only execute the SuccessCallback
client.authenticate(function(error){
    // If an error happens
    if (error) {
        console.log('Authentication error: ' + error);
        return;
    }

    if(client.isAuthenticated()) {
        console.log("Now you can do whatever you want here :3 list a folder, upload or download etc.");
        SuccessCallback();
    } else {
        alert("No Dropbox Authentication detected, try again");
    }
});
Note that if the user has already logged in the form, the next time that the previous code is executed, the login step will be not required at less till the localStorage is cleaned. If you had only a white screen on the process, remember to add the redirect receiver on the Dropbox app settings.
Now in the test app, a button will be added and the previous code will be executed.

And the login form will be shown as expected :

After the login, the code inside the SuccessCallback function should be executed without any kind of complication. Sometimes for the first time after the login, the white screen takes a little bit to disappear (2-4 seconds because a new dropbox page will be loaded) but don't worry, after it will work normally.
Executing normal tasks
Authentication was the hard part of the API integration, and error handling was the most boring part. Now that these are both behind us, you can interact with the user's Dropbox and focus on coding up your application.
All the tasks needs to be executed with the client variable. As shown in the previous step, the user needs to grant you permissions to manipulate their dropbox files via the login form.
With the client variable, you'll be able to execute the following common tasks. Remember that in dropbox, the paths are relative that means that your dropbox path will be / . Therefore i.e, if you want to read a file inside the code folder that is in your Dropbox, the path to the file will be : /code/myfile.txt.
Reading a file
To download a file, use the readFile method of the client :
client.readFile("/myfolder/myfile.txt", function(error, data) {
      if (error) {
          // Something went wrong
          // If you want a detailed explanation, read the getting started guide
          // (INVALID_TOKEN,NETWORK_ERROR,NOT_FOUND etc.)
          return console.log(error);
      }

      console.log(data);  // data has the file's contents
});
List a directory content
To list a file use the readdir method:
// Read the main dropbox content
// or the content of a specific folder
//client.readdir("/myfolder/a-folderinside-myfolder", function(error, entries) {
client.readdir("/", function(error, entries) {
      if (error) {
          return console.log(error);  // Something went wrong.
      }

      console.log("Your Dropbox contains the following folders and files:");
      console.log(entries);
});
Catching errors globally
If you don't want to write an special code for every error on your code, you can use the globall onError listener of the client.
client.onError.addListener(function(error) {
    // An error ocurred, you may want to save this somewhere
    // To analyze what is failing in your code or with the user
    console.error(error);
});
Writing a file
To create a remote file, use the writeFile method:
client.writeFile("hello_world.txt", "Hello, world!\n", function(error, stat) {
    if (error) {
        return console.log(error);
    }

    console.log(stat);
    console.log("File saved as revision " + stat.versionTag);
});
You can find more information about the tasks that you can achieve with the Javascript client, reading the official readme document here or analyzing the snippets examples here. Have fun

