
I'm sure you may have already heard about Redis, the in-memory data structure store, used as a database and cache. Sooner or later, if you ever work with a project built with PHP that handles a significant amount of traffic and may require horizontal scaling, you will have to work with Redis. Of course in a local environment, it would be great to work as well with Redis, so you don't have to create huge conditionals to check if it's available in the current environment and run some logic if it isn't. It would be simpler to have Redis available locally as well, just to make the whole project work as usual in your workstation.
In this article, I will explain how to easily install the Redis extension for PHP in your XAMPP installation in Windows.
Pre-installation notes
You need to know the following information about the PHP distribution that you are currently using in XAMPP:
| Name | Default value |
| Architecture (PHP) | x64 |
| Thread Safety |
Enabled TS: Stands for Thread Safety Enabled NTS: Stands for Thread Safety Disabled |
You can get those values with the function phpinfo() of PHP within an empty script:
<?php

phpinfo();
Once you know these values, you should be able to follow the rest of the tutorial.
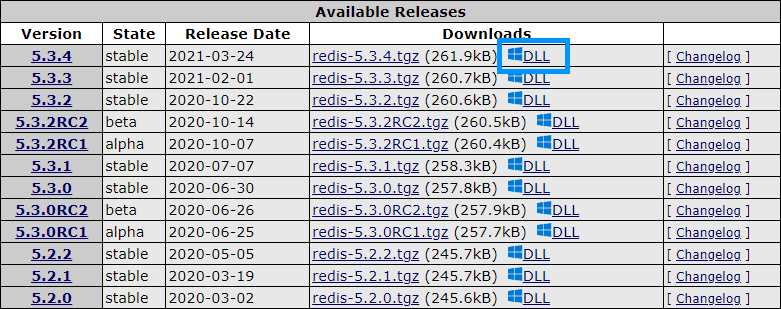
1. Download Redis DLL
The first thing you need is the dynamic link library of Redis, which fortunately for us is already compiled and available in the PECL repository of PHP on this website. You may select the version that fits your needs, in my case, I will use the latest stable version as I'm using PHP 8, click on the DLL link with the windows icon:
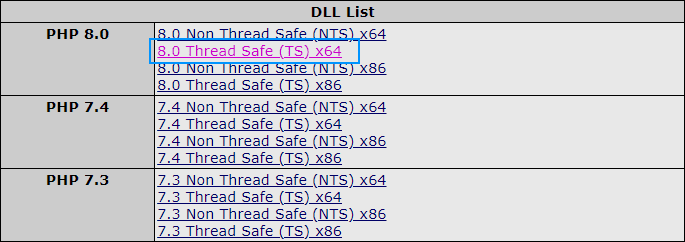
Then a new window will load, in this page scroll to DLL List and click on the right version for your PHP version with correct architecture (of XAMPP, not your operative system) and the Thread Safe in case that it's enabled in your distribution). In my case, I'm using the latest version of XAMPP with PHP 8.0 of 64 bits with Thread Safety Enabled, so in my case, I will download the following one:
This will start the download of a ZIP file. Of our interest, is the php_redis.dll file that is included in it, so keep it at hand as you will need the file in the next step.
2. Store DLL in ext directory and enable the extension in php.ini
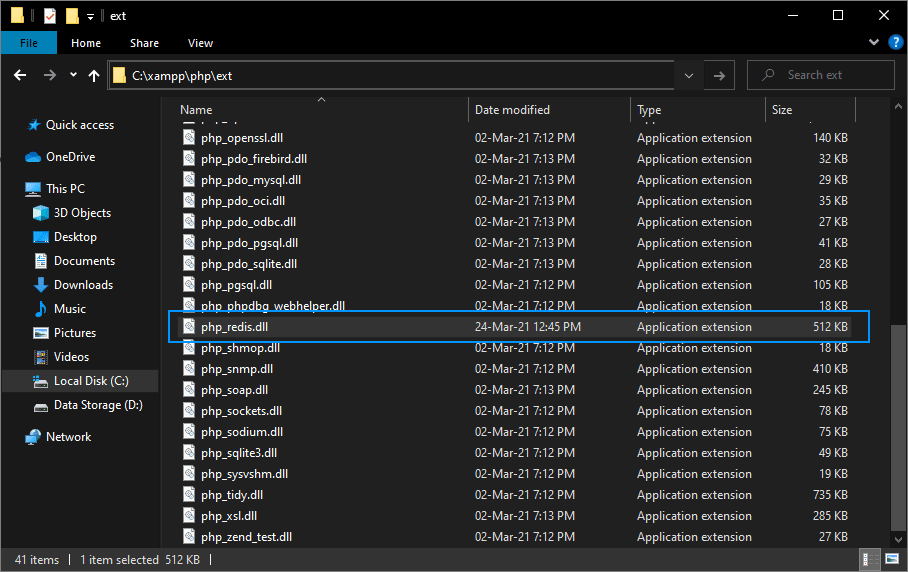
Now, from the downloaded zip, move the php_redis.dll file to the ext directory of PHP in your XAMPP directory (C:\xampp\php\ext):
This will allow us to use the extension in PHP, however, we need to enable it as well. Open the php.ini (C:\xampp\php\php.ini) file and enable the extension adding the following new line under the extensions area:
extension=redisYou won't find the mentioned line in the configuration file, so that's why you need to write it by yourself. Save the changes of the ini file and restart Apache, so the changes will apply once it starts again.
3. Testing if the extension is enabled
And that's it! After restarting apache and enabling the extension in the php.ini, you should be able to use Redis with PHP. You can easily verify if the extension is enabled either by checking in your phpinfo():

Or alternatively, run some code that uses Redis in case that you have a server running Redis through docker locally or a real Redis server, for example, the following code should succeed and print the username "sdkcarlos":
try {
    // Create a Redis Instance
    $redis = new \Redis();

    // Try to connect to a redis server
    // In this case within the host machine and the default port of redis
    $redis->connect('127.0.0.1', 6379);

    // Define some Key
    $redis->set('user', 'sdkcarlos');

    // Obtain value
    $user = $redis->get('user');

    // Should Output: sdkcarlos
    print($user);
} catch (Exception $ex) {
    echo $ex->getMessage();
}
Happy coding ❤️!

