

To create Excel files, we'll use the PHPExcel project of PHPOffice. This project provides a set of classes for the PHP programming language, which allow you to write to and read from different spreadsheet file formats, like Excel (BIFF) .xls, Excel 2007 (OfficeOpenXML) .xlsx, CSV, Libre/OpenOffice Calc .ods, Gnumeric, PDF, HTML etc. This project is built around Microsoft's OpenXML standard and PHP.
To handle PHPExcel easily in your laravel project, we'll use the maatwebsite\excel package. This package provides an eloquent way of importing and exporting Excel and CSV files for Laravel 4.* & Laravel 5.* with the power of PHPOffice's PHPExcel.
Requirements
To use PHPExcel (from PHPOffice) in our Laravel project, you'll need to include the Laravel-Excel package into the project.
- PHP version >= 5.3.7
- Laravel >= 4.1
- PHPOffice PHPExcel >= 1.8.0 (included by composer.json)
- PHP extension php_zip enabled (required if you need PHPExcel to handle .xlsx .ods or .gnumeric files).
- PHP extension php_xml enabled.
- PHP extension php_gd2 enabled (optional, but required for exact column width autocalculation).
To add this package add the following line in your composer.json file and then execute composer install:
{
    "require": {
        "maatwebsite/excel": "~2.1.0"
    }
}
Or require it directly in the console with composer using :
composer require maatwebsite/excelFinally, load the package into the laravel service provider in yourapp/config/app.php :
'providers' => [
    //...
    Maatwebsite\Excel\ExcelServiceProvider::class,
]
Note: if you're using Laravel >5.2, you'll need to install the laravelcollective/bus package.
To add the laravelcollective/bus package, add the following line in your composer.json file and then execute composer install :
{
    "require": {
        "laravelcollective/bus": "^5.2"
    }
}
Or require it directly in the console with composer using :
composer require laravelcollective/busFinally load the package into the laravel service provider in yourapp/config/app.php :
'providers' => [
    // ...
    Collective\Bus\BusServiceProvider::class,
    // ...
],
And you're ready to use PHP Office in your project.
Features
As the library is basically a wrapper of PHPOffice for laravel, you need to know some basic points in difference to the original library:
Manipulation/Creation of excel files
To manipulate the creation of the file you use a callback instead.
Excel::create('Filename', function($excel) {
    // Call writer methods here
});
Save/Export and formats
To download the created file, use ->export($ext) or ->download($ext).
- Export to Excel5 (
xls). - Export to Excel2007 (
xlsx). - Export to CSV (
csv).
You can use the writer like :
Excel::create('Filename', function($excel) {
    // Excel code
})->export('xls');

// or
->download('xls');
Now that you know that, you can proceed with the creation of excel files.
Usage with an alias
To register an alias for the Excel class, go to yourapp/config/app.php file and register the alias as you want :
'aliases' => [
    //...
    'Excel' => Maatwebsite\Excel\Facades\Excel::class,
]
As our alias will be Excel, we'll need to including using an use statement in the top of our controller and it will be available as Excel on it.
<?php

namespace App\Http\Controllers;

use App\Http\Controllers\Controller;
use Excel;

class DefaultController extends Controller
{
    public function index()
    {
        // Excel here
    }
}
Usage without an alias
Without an alias, you'll need to include the class with the entire name in your controller instead of use Excel.
<?php

namespace App\Http\Controllers;

use App\Http\Controllers\Controller;
use Maatwebsite\Excel\Facades\Excel;

class DefaultController extends Controller
{
    public function index()
    {
        // Excel here
    }
}
Download excel file
The following controller in the index action generates an excel file directly to the browser :
<?php
namespace App\Http\Controllers;
use App\Http\Controllers\Controller;
use Excel;
class DefaultController extends Controller
{
public function index()
{
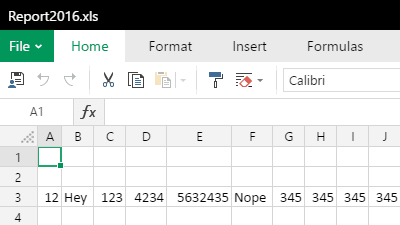
Excel::create('Report2016', function($excel) {
// Set the title
$excel->setTitle('My awesome report 2016');
// Chain the setters
$excel->setCreator('Me')->setCompany('Our Code World');
$excel->setDescription('A demonstration to change the file properties');
$data = [12,"Hey",123,4234,5632435,"Nope",345,345,345,345];
$excel->sheet('Sheet 1', function ($sheet) use ($data) {
$sheet->setOrientation('landscape');
$sheet->fromArray($data, NULL, 'A3');
});
})->download('xlsx');
}
}Save excel file in server
To save the generated excel file in the server, use the store method instead of download:
<?php

namespace App\Http\Controllers;

use App\Http\Controllers\Controller;
use Excel;

class DefaultController extends Controller
{
    public function index()
    {
        Excel::create('Report2016', function($excel) {

            // Set the title
            $excel->setTitle('My awesome report 2016');

            // Chain the setters
            $excel->setCreator('Me')->setCompany('Our Code World');

            $excel->setDescription('A demonstration to change the file properties');

            $data = [12,"Hey",123,4234,5632435,"Nope",345,345,345,345];

            $excel->sheet('Sheet 1', function ($sheet) use ($data) {
                $sheet->setOrientation('landscape');
                $sheet->fromArray($data, NULL, 'A3');
            });

        })->store('xlsx', storage_path());
        // or  ->store('xls', storage_path('excel-folder'));
    }
}
Creating charts
If you need to create charts on your excel files, then you'll need to use the "plain php" syntax of PHPOffice. The maatwebsite/excel package has already included PHPOffice, therefore you only need to cast the classes using a backslash on it.
The following snippet creates a chart in your storage path in a laravel controller :
<?php

namespace App\Http\Controllers;

use App\Http\Controllers\Controller;
use Maatwebsite\Excel\Facades\Excel;

class DefaultController extends Controller
{
    public function index()
    {
        $excel = new \PHPExcel();

        $excel->createSheet();
        $excel->setActiveSheetIndex(1);
        $excel->getActiveSheet()->setTitle('ChartTest');

        $objWorksheet = $excel->getActiveSheet();
        $objWorksheet->fromArray(
                array(
                    array('', 'Rainfall (mm)', 'Temperature (°F)', 'Humidity (%)'),
                    array('Jan', 78, 52, 61),
                    array('Feb', 64, 54, 62),
                    array('Mar', 62, 57, 63),
                    array('Apr', 21, 62, 59),
                    array('May', 11, 75, 60),
                    array('Jun', 1, 75, 57),
                    array('Jul', 1, 79, 56),
                    array('Aug', 1, 79, 59),
                    array('Sep', 10, 75, 60),
                    array('Oct', 40, 68, 63),
                    array('Nov', 69, 62, 64),
                    array('Dec', 89, 57, 66),
                )
        );

        $dataseriesLabels1 = array(
            new \PHPExcel_Chart_DataSeriesValues('String', 'Grafico!$B$1', NULL, 1), //  Temperature
        );
        $dataseriesLabels2 = array(
            new \PHPExcel_Chart_DataSeriesValues('String', 'Grafico!$C$1', NULL, 1), //  Rainfall
        );
        $dataseriesLabels3 = array(
            new \PHPExcel_Chart_DataSeriesValues('String', 'Grafico!$D$1', NULL, 1), //  Humidity
        );

        $xAxisTickValues = array(
            new \PHPExcel_Chart_DataSeriesValues('String', 'Grafico!$A$2:$A$13', NULL, 12), //  Jan to Dec
        );

        $dataSeriesValues1 = array(
            new \PHPExcel_Chart_DataSeriesValues('Number', 'Grafico!$B$2:$B$13', NULL, 12),
        );

        //  Build the dataseries
        $series1 = new \PHPExcel_Chart_DataSeries(
                \PHPExcel_Chart_DataSeries::TYPE_BARCHART, // plotType
                \PHPExcel_Chart_DataSeries::GROUPING_CLUSTERED, // plotGrouping
                range(0, count($dataSeriesValues1) - 1), // plotOrder
                $dataseriesLabels1, // plotLabel
                $xAxisTickValues, // plotCategory
                $dataSeriesValues1                              // plotValues
        );
        //  Set additional dataseries parameters
        //      Make it a vertical column rather than a horizontal bar graph
        $series1->setPlotDirection(\PHPExcel_Chart_DataSeries::DIRECTION_COL);

        $dataSeriesValues2 = array(
            new \PHPExcel_Chart_DataSeriesValues('Number', 'Grafico!$C$2:$C$13', NULL, 12),
        );

        //  Build the dataseries
        $series2 = new \PHPExcel_Chart_DataSeries(
                \PHPExcel_Chart_DataSeries::TYPE_LINECHART, // plotType
                \PHPExcel_Chart_DataSeries::GROUPING_STANDARD, // plotGrouping
                range(0, count($dataSeriesValues2) - 1), // plotOrder
                $dataseriesLabels2, // plotLabel
                NULL, // plotCategory
                $dataSeriesValues2                              // plotValues
        );

        $dataSeriesValues3 = array(
            new \PHPExcel_Chart_DataSeriesValues('Number', 'Grafico!$D$2:$D$13', NULL, 12),
        );

        //  Build the dataseries
        $series3 = new \PHPExcel_Chart_DataSeries(
                \PHPExcel_Chart_DataSeries::TYPE_AREACHART, // plotType
                \PHPExcel_Chart_DataSeries::GROUPING_STANDARD, // plotGrouping
                range(0, count($dataSeriesValues2) - 1), // plotOrder
                $dataseriesLabels3, // plotLabel
                NULL, // plotCategory
                $dataSeriesValues3                              // plotValues
        );


        //  Set the series in the plot area
        $plotarea = new \PHPExcel_Chart_PlotArea(NULL, array($series1, $series2, $series3));
        $legend = new \PHPExcel_Chart_Legend(\PHPExcel_Chart_Legend::POSITION_RIGHT, NULL, false);
        $title = new \PHPExcel_Chart_Title('Grafica anhelada maternofetal :(');

        //  Create the chart
        $chart = new \PHPExcel_Chart(
                'chart1', // name
                $title, // title
                $legend, // legend
                $plotarea, // plotArea
                true, // plotVisibleOnly
                0, // displayBlanksAs
                NULL, // xAxisLabel
                NULL            // yAxisLabel
        );

        //  Set the position where the chart should appear in the worksheet
        $chart->setTopLeftPosition('F2');
        $chart->setBottomRightPosition('O16');

        //  Add the chart to the worksheet
        $objWorksheet->addChart($chart);

        $writer = new \PHPExcel_Writer_Excel2007($excel);
        $writer->setIncludeCharts(TRUE);

        // Save the file.
        $writer->save(storage_path().'/file.xlsx');
    }
}
Conclusion
The mentioned package help you to work with a cool and easy syntax with PHPOffice, however if there are features of PHPOffice that aren't covered for the package, you can still using plain PHPOffice in your controllers.
Have fun !

