The First time using the AVD manager of Android can be a headache for some Windows users, when they try to setup an emulator with a x86 Android* image for any target API level. To prevent this error, we need to ensure that we have Intel® HAXM for Android installed on our machine.
Solution
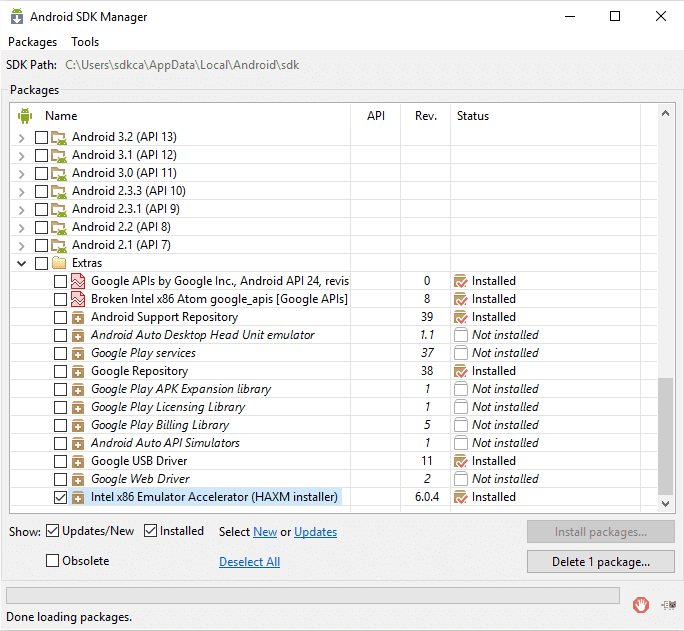
To get started, start the Android SDK Manager (located in Android\sdk) and verify in the Extras option if you already have the Intel x86 emulator accelerator (HAXM installer) already installed on your machine:

In case you don't, select the mentioned item and click on Install packages to proceed with the download and the "installation". Once the manager has finished, proceed to start again the emulation of your device using the AVD Manager.
If the problem persists, that means that the Android SDK Manager doesn't install automatically the emulator accelerator (although the download has been probably completed), therefore you need to proceed the manual installation.
The manager should download the HAXM Installer without any problem, so you need to locate the downloaded installer in the Android SDK folder (usually located in Android-sdk-folder\extras\intel\Hardware_Accelerated_Execution_Manager):

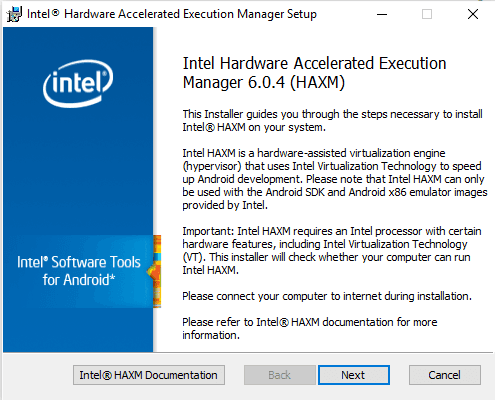
Proceed to execute the installer (intelhaxm-android.exe but in case you're using older versions of the Android SDK manager it should be intelhaxm.exe instead) in administrator mode:

Note that if your processor doesn't support the accelerated execution, then you can't proceed the emulation with an Intel Atom x86 image. Remember to set a realistic value of RAM according to the available amount of your machine.

Note: the memory reservation setting can be changed by running the installer again.
After the installation, proceed to start your emulator again and the emulator now should start without problems. In case that the error persists, restart your computer and try once again and your problem should be solved.
Have fun !


