

XAMPP is an easy to install Apache distribution containing MariaDB, PHP, and Perl. The setup, according to their own pont of view is just to download and start the installer, super easy! However, in ubuntu you may face some issues. In this article, you'll learn how to install XAMPP easily in Ubuntu.
1. Download a XAMPP distribution for Linux
Go to the official xampp website in the downloads area and choose the latest or the distribution with the versions of PHP that you want. Most all distributions of Linux are supported, including Debian, RedHat, CentOS, Ubuntu, Fedora, Gentoo, Arch, SUSE.
In this case, we've just downloaded XAMPP for linux with PHP 5.6.24 version. The downloaded file is xampp-linux-x64-5.6.24-1-installer.run.
2. Proceed with the installation
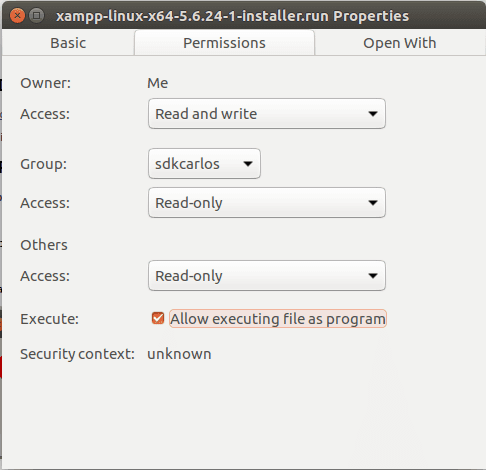
Probably, if you try to open the downloaded file (xampp-linux-x64-5.6.24-1-installer.run), a menu that says that you don't have the right program to open this kind of files will appear due to its extension .run (which in ubuntu is tipically .deb). To prevent this behaviour, you need to allow the execution of the file as a program, to do that, do Right Click on the XAMPP setup and select properties from the dropdown menu. Now from the popup select the Permissions tab and check "Allow executing file as Program":
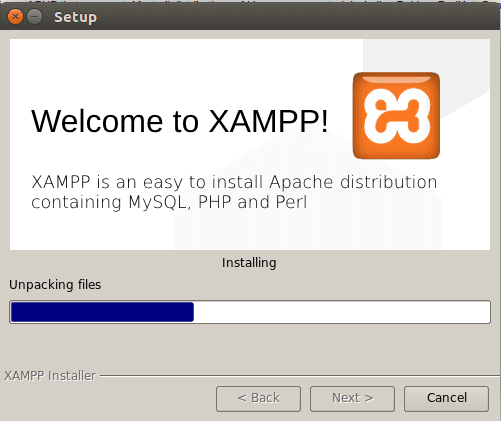
Finally, execute the file! In case you receive an error during the execution of the file:

Open a terminal, navigate to the folder where the installer is located and execute it using sudo:
sudo ./xampp-linux-x64-5.6.24-1-installer.runThat should start the XAMPP installation setup. Continue with the installation as you usual do:
Once the setup is finished, XAMPP should be available for its usage in your Desktop.
3. Test PHPMyAdmin and Apache Web Server
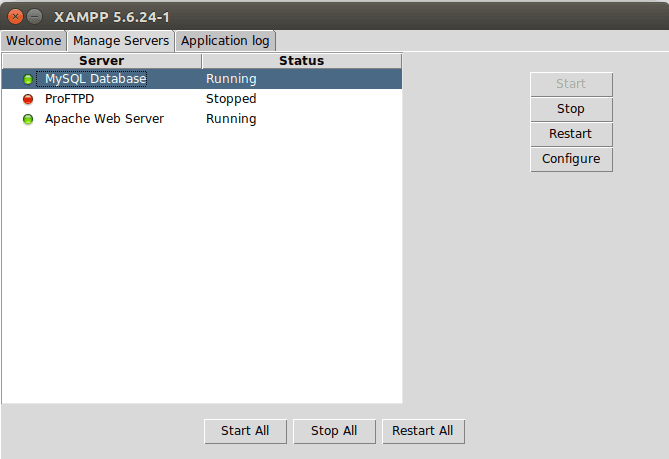
To test if you did everything right, we need to start the MySQL Database and Apache Web Server services in the XAMPP control panel. Open the XAMPP control panel, navigate to the Manage Servers tab.
In the Manage Servers tab you'll find a list of services where the previously mentioned services are located. Select individually the services you want to start (in this case MySQL Database and Apache Web Server) and click on Start in the right panel:
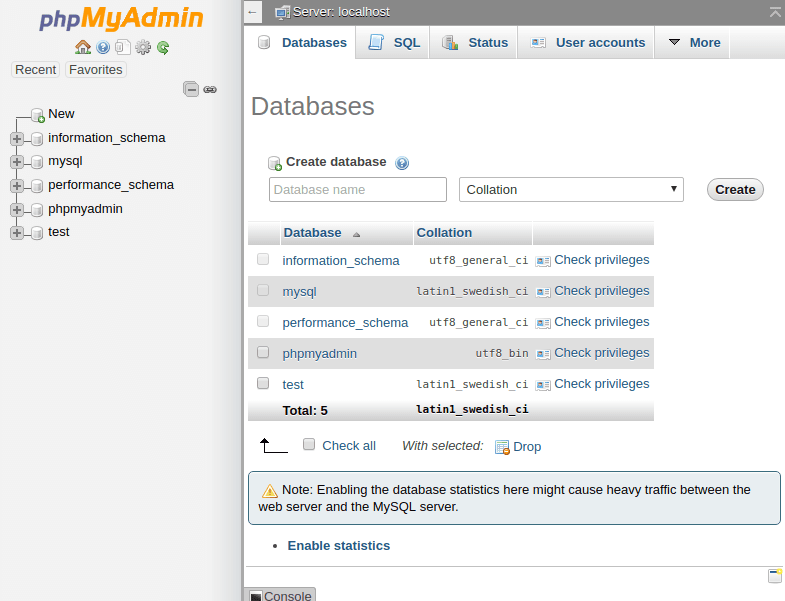
Check that MySQL Database service is running and navigate to http://localhost/phpmyadmin and if everything went right, you should see a functional instance of PHPMyAdmin:
Now to try apache, you'll need to write some PHP code. Create a php file in the htdocs folder of xampp (usually located in /opt/lampp/htdocs/) with the name hello_world.php with the following code:
<?php
echo "Hello world!";
?>
Note: in case you're not able to create files, folders or other things in the directory, execute the following command to grant all rights to the htdocs folder of xampp.
sudo chmod 777 -R /opt/lampp/htdocs/After the creation of the file, if you navigate to http://localhost/hello_world.php you should get as output "Hello World" in the browser.
Happy coding !

