
Joysticks are the favorite way to control a game character as it is much more precise and easy to use than buttons. In the same way that the joystick in the real life works, most of the mobile games have it's own joystick implementation for touch interfaces. There are not a lot of joystick plugins available for Phaser.js and most of them are paid i.e Phaser Virtual Joystick Plugin.
But don't worry, there's a free solution if you don't want to implement by yourself a Joystick and you'll learn how to implement it in this article.
Requirements
We are going to depend of the phaser-vjoy-plugin, this plugin is virtual Joystick plugin for Phaser.io. Not all the people have the same finger length, neither the same screen size. Users have a very big pool of different devices and configurations, and dealing with all of these posibilities can drive us crazy, that's why VJoy exists.
You can get a copy of the plugin using bower:
bower install phaser-vjoy-pluginOr downloading a .zip file of the repository in Github or just by copying the vjoy.js file content in the repository here. This plugin was developed by the guys at Informal Penguins.
Note: this plugin work pretty awesome on mobile devices, but that's not the case of the desktop browser, so use it only for your mobile games.
Implementation
The implementation of VJoy is pretty easy and very straightforward, so you only need to follow these 4 steps and you're ready to go.
1. Load required files
Before continue, proceed to add the required files in your document. Use a script tag to load Phaser and the VJoy plugin:
<!-- Add phaser from the cdn or a local source -->
<script src="https://cdnjs.cloudflare.com/ajax/libs/phaser/2.6.2/phaser.min.js"></script>
<!-- Add the VJoy plugin -->
<script src="vjoy.js"></script>
And let's continue with the configuration!
2. Register the plugin in Phaser.js
To use the VJoy plugin, we need to tell phaser that we're using it as a plugin. To register the plugin, use the game.plugins.add method and as first parameter the instance of Vjoy (Phaser.Plugin.VJoy) and save the returned value in a variable (in this case game.vjoy for more accessibility).
Besides, you need to specify the are of the canvas where the joystick should be enabled using the game.vjoy.inputEnable method. This method expects 4 parameters that are equivalent to the coordinates respectively (x1, y1, x2, y2) where the rectangle that contains the Joystick should be located.
var game = new Phaser.Game(800, 600, Phaser.AUTO, 'phaser-joystick', {
    create: function create() {
        // Register the VJoy plugin
        game.vjoy = game.plugins.add(Phaser.Plugin.VJoy);

        // Select an area of the canvas where the joystick should be available
        // It draws a rectangle using Phaser.Rectangle
        // It takes as Arguments 4 coordinates (x1, y1, x2, y2)
        // With a canvas of 800x600, the following code will allow the joystick
        // to move in the left area of the screen
        game.vjoy.inputEnable(0, 0, 400, 600);
    }
});
Now that the plugin has been registered (in this case at the half left area of the screen), we need to load the resources of the Joystick (images).
3. Preload the Joystick assets
The plugin will require automatically using the identifiers [vjoy_base,vjoy_body and vjoy_cap] to load the images that compose the Joystick, therefore you must look for them to be loaded in the preload function of phaser as an asset. Remember that the parts (images) of the Joystick are located in the assets directory of the github repository of VJoy here.
var game = new Phaser.Game(800, 600, Phaser.AUTO, "phaser-joystick", {
    preload: function preload() {
        // Load the followings assets [vjoy_base,vjoy_body, vjoy_cap] with images
        // Note that you can customize them as you wish as long as they keep the
        // width of the default images
        game.load.image('vjoy_base', 'assets/base.png');
        game.load.image('vjoy_body', 'assets/body.png');
        game.load.image('vjoy_cap', 'assets/cap.png');
    }
});
If you don't load the images, you'll find some warnings in the console like:
Phaser.Cache.getImage: Key "vjoy_base" not found in Cache.
Phaser.Cache.getImage: Key "vjoy_body" not found in Cache.
Phaser.Cache.getImage: Key "vjoy_cap" not found in Cache.
4. Handle actions in the Update function
Now that you've registered the plugins and the assets are loaded, now you need to handle what's going to happen when the user uses the Joystick.
var game = new Phaser.Game(800, 600, Phaser.AUTO, "phaser-joystick", {
    update: function update() {
        // Retrieve the cursors value
        var cursors = game.vjoy.cursors;

        if (cursors.left) {
            // Do something if dragging to left
        } else if (cursors.right) {
            // Do something if dragging to right
        }

        if (cursors.up) {
            // Do something if dragging up
        } else if (cursors.down) {
            //Do something if dragging down
        }
    }
});
Is up to you which actions should be executed according to the direction of the Joystick. Note that you can even modify the if statements to allow perpendicular movements.
Example
The following html document shows an example that moves an image in the canvas according to the direction of the Joystick:
<!DOCTYPE html>
<html>
<head lang="en">
<meta charset="UTF-8">
<title>Free Touch Joystick for Phaser.js</title>
<style>
#phaser-joystick {
margin: 0 auto;
width: 800px;
}
</style>
</head>
<body>
<!-- Add a canvas -->
<div id="phaser-joystick"></div>
<script src="https://cdnjs.cloudflare.com/ajax/libs/phaser/2.6.2/phaser.min.js"></script>
<script src="vjoy.js"></script>
<script>
/* To make your code more maintable, add the JS code in JS files */
(function (Phaser) {'use strict';
var sprite;
var GameConfig = {
preload: function preload() {
/**
* Load the images
*/
game.load.image('logo', 'assets/ourcodeworld-logo.png');
game.load.image('vjoy_base', 'assets/base.png');
game.load.image('vjoy_body', 'assets/body.png');
game.load.image('vjoy_cap', 'assets/cap.png');
},
create: function create() {
// Set a gray as background color
game.stage.backgroundColor = '#f7f7f7';
sprite = game.add.sprite(300, 300, 'logo');
game.vjoy = game.plugins.add(Phaser.Plugin.VJoy);
game.vjoy.inputEnable(0, 0, 400, 600);
game.vjoy.speed = {
x:500,
y:500
};
},
update: function update() {
/**
* Important to get the cursors on the update function
*/
var cursors = game.vjoy.cursors;
// If to left or right
if (cursors.left) {
sprite.x--;
} else if (cursors.right) {
sprite.x++;
}
// If up or down
if (cursors.up) {
sprite.y--;
} else if (cursors.down) {
sprite.y++;
}
}
};
// Initialize game
var game = new Phaser.Game(800, 600, Phaser.AUTO, 'phaser-joystick', GameConfig);
}.call(this, Phaser));
</script>
</body>
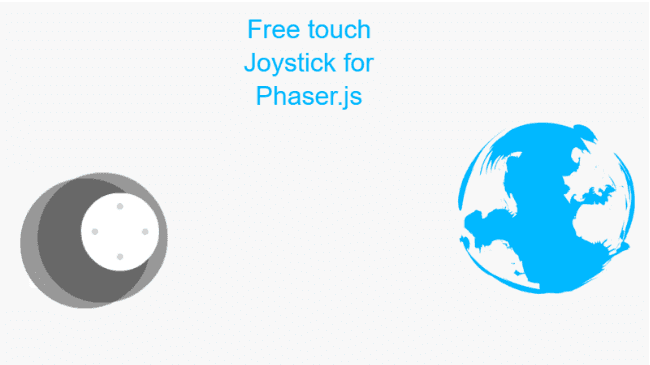
</html>If you execute the previous example with all the resources of the joystick and the logo of Our Code World, you should get as result something like:

Happy coding !

