
Till the date there are not a lot of solutions to create dynamic user interfaces in a desktop application for Windows using tools like WinForms. The most known way to do it is implementing CefSharp in order to be able to design your interface using HTML, CSS and JavaScript. However not everyone can simply add more than 50MB to the size of the project by implementing CefSharp to use custom HTML controls in their projects. For those that still want to implement custom controls and make them look better than they're by default, there's still an awesome solution to don't increase considerably the size of your project and use custom controls.
We are talking about the MetroFramework, this UI framework brings the Modern UI alias Metro UI of Windows 8 to any .NET Windows Forms application. This framework adds Metro Styled Components like:
- Button
- ComboBox
- Checkbox
- RadioButton
- Toggle
- Label
- Link
- Panel
- ScrollBar
- MetroTile
- ProgressBar
- ProgressSpinner
- TabControl
- TrackBar
- Custom User Control
- ContextMenu
- MessageBox
- DateTimePicker
- Grid
If you know how to configure it, then you will be able to simply drag and drop the elements to your form easily and add the library as a reference to use it in your app anywhere. In this article, we are going to teach you precisely this.
1. Install the framework via NuGet
The preferred way of installation is via NuGet. Install the package with Visual Studio, by accessing the NuGET package manager. Do right click in your project in the Solution Explorer at the right top of Visual Studio and select Manage NuGet packages in the dropdown menu:

In the emergent Window, go to the Browse tab and search for metromodernui, select the package in the list and install it in your project:

Once the setup finishes, you will be able to use the dynamic libraries included in the package. For more information about this library, please visit the official repository at Github here.
2. Create a new Tab for Metro Controls in the Toolbox
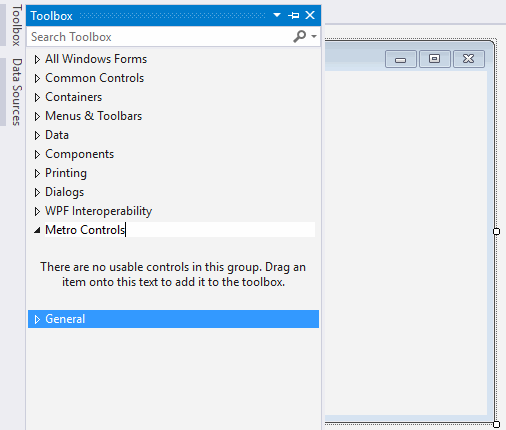
With MetroFramework you will be able to drag and drop controls into your forms in the same way you do with the traditional controls. To be organized, we recommend you to create a custom Toolbox Tab to store inside the exclusive controls of MetroFramework. Do right click on an empty space of the Toolbox and from the Dropdown menu select Add Tab, this will allow you to create an empty Tab and to give a custom name, in this case we'll name it Metro Controls:
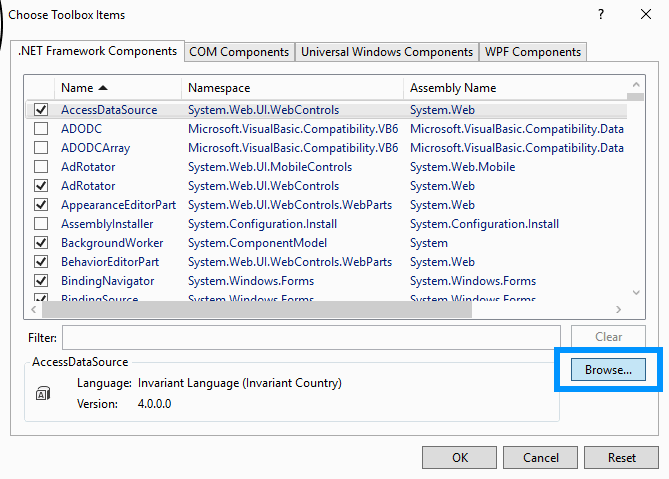
Then do right click on the custom tab that you've created (Metro Controls) and select Choose Items from the menu:

In the new window, go to the .NET Framework Components tab and click on Browse:
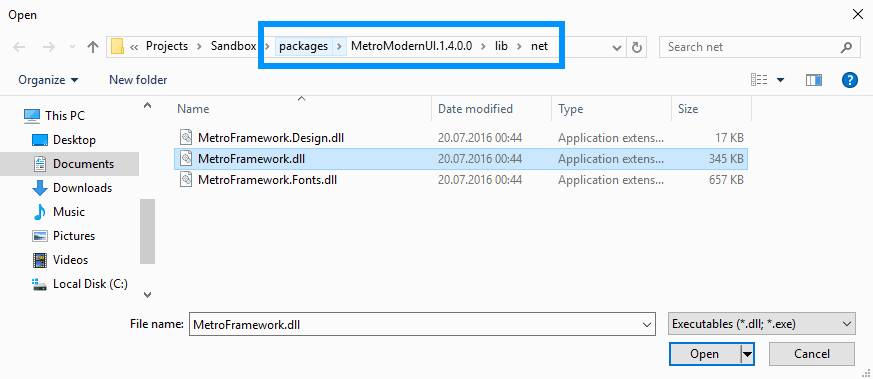
Once the filebrowser appears, you will need to navigate to the folder of your WinForms project, then inside the packages folder search for the MetroModernUI folder, then on lib and finally on net. Inside the net folder there should be 3 .dll files, you will only select the MetroFramework.dll file and click on open.
Then a loading bar will appear and the controls will appear on the list of .NET components, finally click on OK:
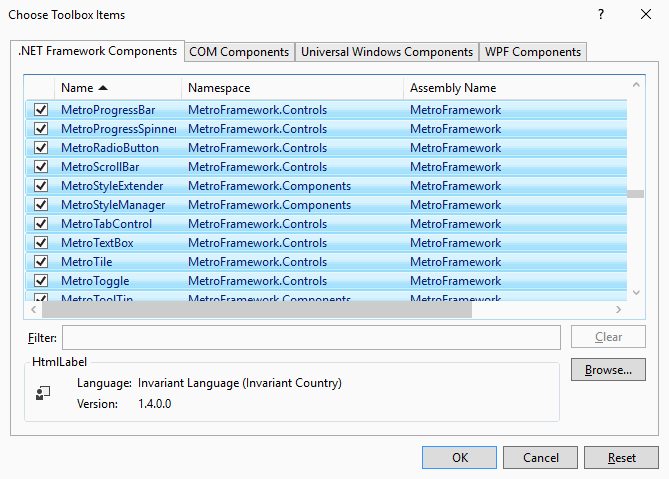
By default all components will be selected, however you can unselect the one you don't want. Finally the controls will appear in the previously created tab of Controls:
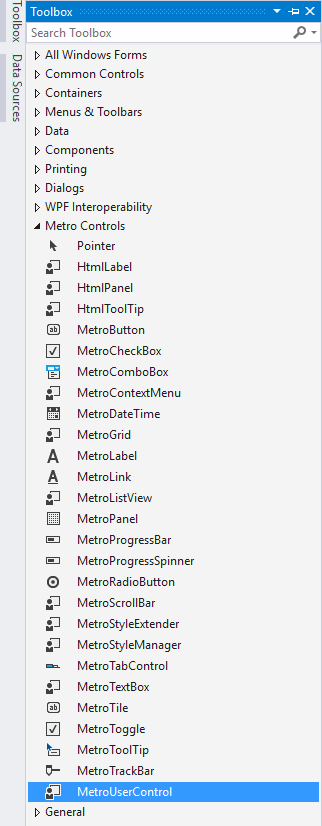
And you will be able to simply drag and drop the controls you need in your form in the same way you do with the default components of Windows.
3. Add References to the Metro Controls and Fonts
With the previous step you are able to drag and drop components and to work with them in your project, however if you decide to deploy your project in other computer, it won't work because those components doesn't exist there. Therefore you need to add the reference to the DLL files of MetroFramework in your project in order to be able to use them everywhere.
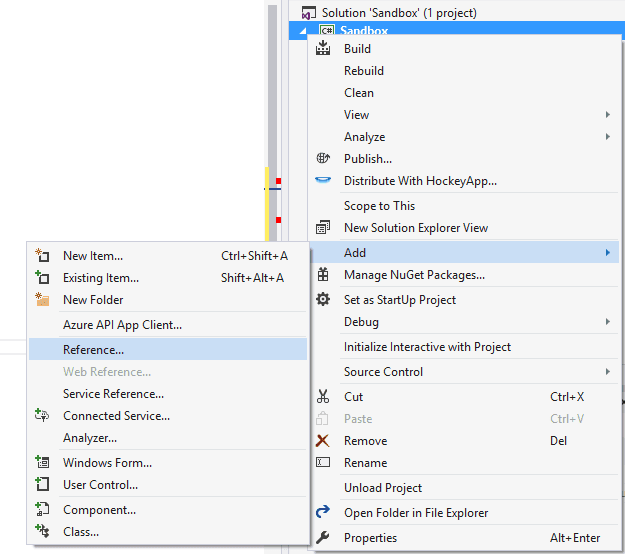
Go to the solution explorer in the top right area of Visual Studio, do right click on your project, then on the Add Menu and then Reference:
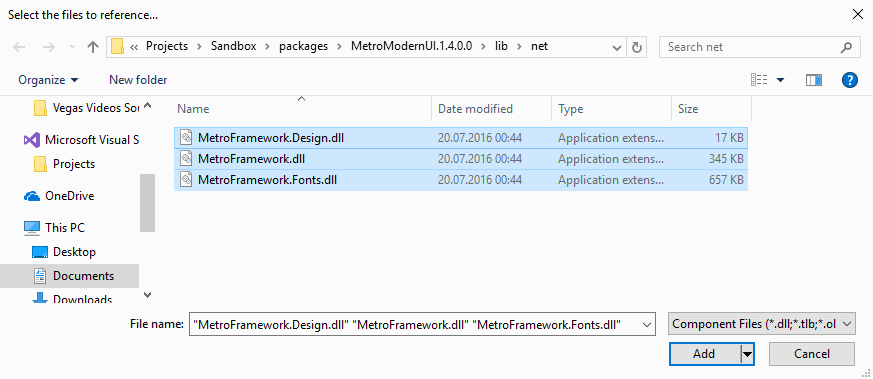
On the emergent window, search for the Browse tab and then click on the Browse button. Once again as we previously made in the Step 2, search for the net folder inside the MetroModern folder in the packages and select the 3 dll files:
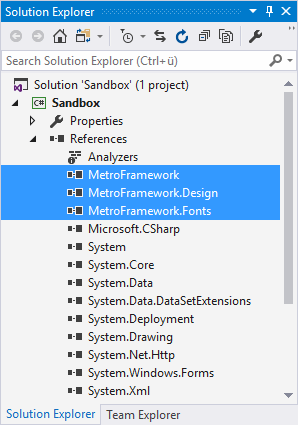
Click on Add and then in the Reference Manager Window select Ok. Then on the references of your project, there should appear the 3 references to the DLL files:
Now you can do whatever you want with this framework !
4. Using the Framework
Although most of the functionalities work in the same way, if you want to work with code directly from the framework e.g the Alert boxes, then you will need to import the required namespaces at the top of your class:
using MetroFramework.Forms;
using MetroFramework;
For example, you can add a button with the visual builder in your form, then double click on it and the click event will be added automatically in the same way it does with the default controls. Now in the click event you can display a Metro Box using:
MetroMessageBox.Show(this, "Your message here.", "Title Here", MessageBoxButtons.OKCancel, MessageBoxIcon.Hand);And it will display a message box with metro style:

For more information we recommend you to read the documentation in the official blog of the author of the library or by checking the official repository at Github here.
Happy coding !

