
Almost every frontend developers (at least those that work on some coding sandbox) knows about the awesome HTML and JS based code editor plugin namely Ace Editor. It matches the features and performance of native editors such as Sublime, Vim and TextMate. It can be easily embedded in any web page and JavaScript application, is maintained as the primary editor for Cloud9 IDE and is the successor of the Mozilla Skywriter (Bespin) project.
If you are working with React, then we recommend you to use the open source react-ace component that will help you to implement ace editor easily in your application.
Why should I use another third party library instead of just ACE?
Well, besides of the fact that the library offers a ready to use ACE component to be used with ReactJS (thing that you can do easy by yourself), ace editor creates WebWorkers via a worker script url. This requires the worker scripts to be located on your server and forces you to host the ace editor on your server as well. While that is ok in most cases, it prevents you from providing a fully working ace editor package. That's where Brace comes in the game, it is a browserify compatible version of the ace editor. Brace has an update script which automatically pulls down the ace builds and refactors them to provide the following:
- inline all supported workers
- automatically require the workers that a 'mode' (language) depends on inside the mode file itself
- provide the modes and themes at the same paths that ace's
setModeandsetThemeuse (just replace 'ace' with 'brace')
So the module itself is a wrapper that uses Brace under the hood.
1. Install react-ace
To get started with the implementation of Ace Editor in your React application, install the react-ace module. This module is a set of react components for Ace / Brace that can be easily embedded into your project. To install, open a terminal, switch to the directory of your project and run the following command:
npm install react-aceAfter the installation of the module you will be able to import the component to render in your view. For more information about this module, please visit the official repository at Github here.
2. Using ACE Editor
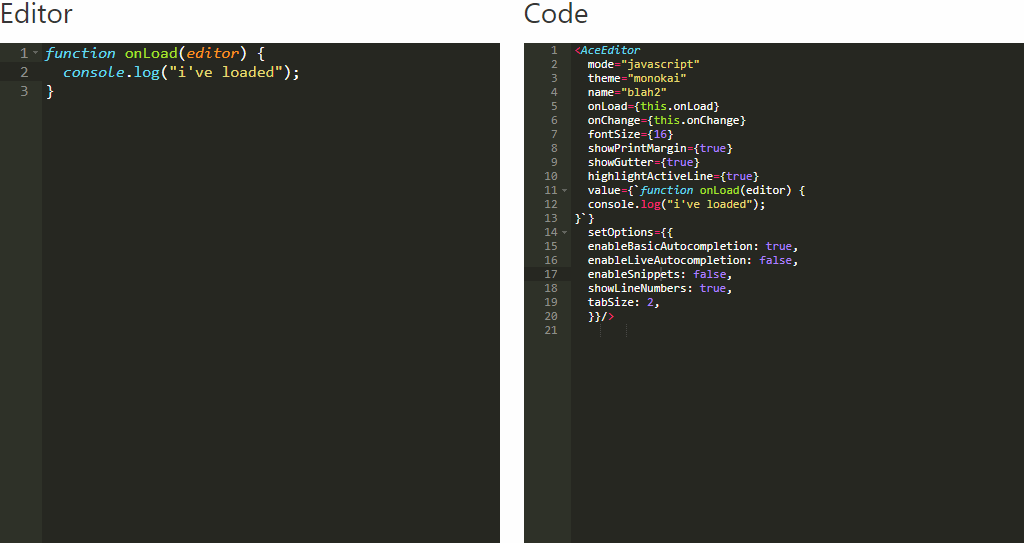
The usage of Ace Editor in React is pretty simple, as everything has been abstracted into a single component namely <AceEditor>. This component expects almost all the properties of the original AceEditor but instead of passing them as an object, they're providen with props:
import React from 'react';

// Import Brace and the AceEditor Component
import brace from 'brace';
import AceEditor from 'react-ace';

// Import a Mode (language)
import 'brace/mode/java';

// Import a Theme (okadia, github, xcode etc)
import 'brace/theme/github';

export default class App extends React.Component {

    constructor(props, context) {
        super(props, context);

        this.onChange = this.onChange.bind(this);
    }

    onChange(newValue) {
        console.log('change', newValue);
    }

    render() {
        return (
            <div>
                <AceEditor
                    mode="java"
                    theme="github"
                    onChange={this.onChange}
                    name="UNIQUE_ID_OF_DIV"
                    editorProps={{
                        $blockScrolling: true
                    }}
                />
            </div>
        );
    }
}
To check all the available properties for this component, don't forget to read the official docs here.
3. Creating a split editor
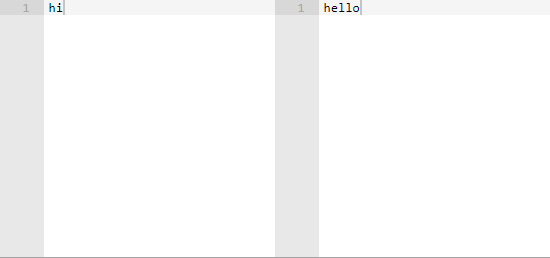
You can create a split editor as well importing the split component from the react ace module instead of the default component. Then you can provide the number of editors that will be shown as a single component, the orientation can be either beside or below according to your needs:
import React from 'react';

// Import Brace and the AceEditor Component
import brace from 'brace';

import {split as SplitEditor} from 'react-ace';

// Import a Mode (language)
import 'brace/mode/java';

// Import a Theme (okadia, github, xcode etc)
import 'brace/theme/github';

export default class App extends React.Component {

    constructor(props, context) {
        super(props, context);

        this.onChange = this.onChange.bind(this);
    }

    onChange(newValue) {
        console.log('change', newValue);
    }

    render() {
        return (
            <div>
                <SplitEditor
                    mode="java"
                    theme="github"
                    splits={2}
                    orientation="beside"
                    value={['hi', 'hello']}
                    name="UNIQUE_ID_OF_DIV"
                    editorProps={{$blockScrolling: true}}
                />
            </div>
        );
    }
}
In this case as our splits prop has a value of 2 and the orientation is "beside", the component will render:
Happy coding !

