

Struggling till the date with Symfony 2.8 in your project? In December 30th 2017 Symfony 4 was released introducing a new workflow based on the tool "Symfony Flex", that replaces and improves the Symfony Installer and the Symfony Standard Edition, it enables a distribution composition based project instead of inheritance. According to Fabian Potencier and Symfony developers, this new way to work is easier, more flexible, and even powerful.
The first thing that you need to know is that as usual with a major release of Symfony, the project structure has changed:
my-symfony-project/
âââ assets/
âââ bin/
â âââ console
âââ config/
â âââ bundles.php
â âââ packages/
â âââ routes.yaml
â âââ services.yaml
âââ public/
â âââ index.php
âââ src/
â âââ ...
â âââ Kernel.php
âââ templates/
âââ tests/
âââ translations/
âââ var/
âââ vendor/The bundles are now loaded in the /config/bundles.php file instead of the Kernel. Symfony 4 doesn't have the known app/config/parameters.yml file, but uses environment variables instead. The environment variables are stored in the .env file in the root directory of your project, an approach that most of the frameworks do in other languages. This is also one of the recommendations of the 12-Factor Application Manifesto. This leads to another big change, the widely known app_dev.php tool isn't available anymore, this is totally replaced by the environment variable APP_ENV with possible values of dev and prod.
From a general point of view, there are many changes comparing it with Symfony 3, however it should theoretically easy to get used to it by reading the docs. You can even upgrade Symfony 3 based applications to Symfony 4 following these steps in the Symfony website. To get familiar with the Symfony 4 Workflow we'll create a Hello World application by downloading Symfony, creating a controller, a basic route and installing the web profiler.
Requirements
To get started with the creation of your first Symfony 4 project, you will need in your development environment:
- PHP >= 7.1: Symfony requires at least this version of PHP to work.
- Composer installed: The installation of packages, dependencies and tools are made easier thanks to composer.
In this article we won't focus on the configuration of a local server as we'll use the built-in web server of PHP just for test purposes.
1. Creation of your project
To create your first Symfony project, following the standard documentation, we won't use the Symfony Installer or the standard edition, but the flex version that can be downloaded from the symfony/skeleton package. This package contains the basic structure for any Symfony 4 based project and can be installed using the following command:
composer create-project symfony/skeleton [your project name]In this case our project name will be sandbox, so to create it our command would be:
composer create-project symfony/skeleton sandboxRunning the command in our command line will generate an output similar to:
Installing symfony/skeleton (v4.0.0)
  - Installing symfony/skeleton (v4.0.0): Loading from cache
Created project in sandbox
Loading composer repositories with package information
Updating dependencies (including require-dev)
Package operations: 21 installs, 0 updates, 0 removals
  - Installing symfony/flex (v1.0.44): Loading from cache
  - Installing symfony/polyfill-mbstring (v1.6.0): Loading from cache
  - Installing symfony/console (v4.0.0): Loading from cache
  - Installing symfony/routing (v4.0.0): Loading from cache
  - Installing symfony/http-foundation (v4.0.0): Loading from cache
  - Installing symfony/event-dispatcher (v4.0.0): Loading from cache
  - Installing psr/log (1.0.2): Loading from cache
  - Installing symfony/debug (v4.0.0): Loading from cache
  - Installing symfony/http-kernel (v4.0.0): Loading from cache
  - Installing symfony/finder (v4.0.0): Loading from cache
  - Installing symfony/filesystem (v4.0.0): Loading from cache
  - Installing psr/container (1.0.0): Loading from cache
  - Installing symfony/dependency-injection (v4.0.0): Loading from cache
  - Installing symfony/config (v4.0.0): Loading from cache
  - Installing psr/simple-cache (1.0.0): Loading from cache
  - Installing psr/cache (1.0.1): Loading from cache
  - Installing symfony/cache (v4.0.0): Loading from cache
  - Installing symfony/framework-bundle (v4.0.0): Loading from cache
  - Installing symfony/yaml (v4.0.0): Loading from cache
  - Installing symfony/dotenv (v4.0.0): Loading from cache
Writing lock file
Generating autoload files
Symfony operations: 4 recipes (aa684fb587b2a7b45ff0bf0d50f5d7f2)
  - Configuring symfony/flex (>=1.0): From github.com/symfony/recipes:master
  - Configuring symfony/console (>=3.3): From github.com/symfony/recipes:master
  - Configuring symfony/routing (>=3.3): From github.com/symfony/recipes:master
  - Configuring symfony/framework-bundle (>=3.3): From github.com/symfony/recipes:master
Executing script cache:clear [OK]
Executing script assets:install --symlink --relative public [OK]


 What's next?


  * Run your application:
    1. Change to the project directory
    2. Execute the php -S 127.0.0.1:8000 -t public command;
    3. Browse to the http://localhost:8000/ URL.

       Quit the server with CTRL-C.
       Run composer require server for a better web server.

  * Read the documentation at https://symfony.com/doc
Till this point, you have a 100% functional Symfony 4 application, so you can test with the built-in server of PHP in your browser by switching to the directory of your project with the command line and starting the server with the following command:
REM switch to your project's directory
cd sandbox

REM Run the following command to start the application
php -S 127.0.0.1:8000 -t public
After running the command, the output in your command line will be similar to:
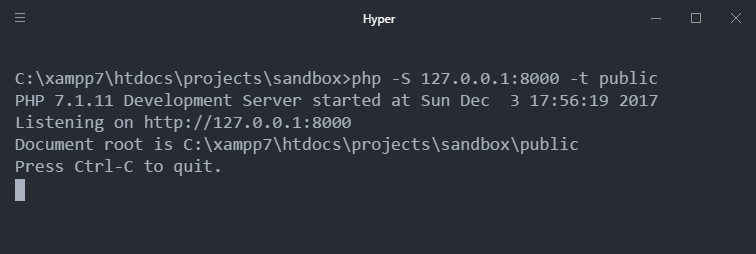
And if you access the mentioned local URL in your favorite browser, you will see the welcome message of Symfony:
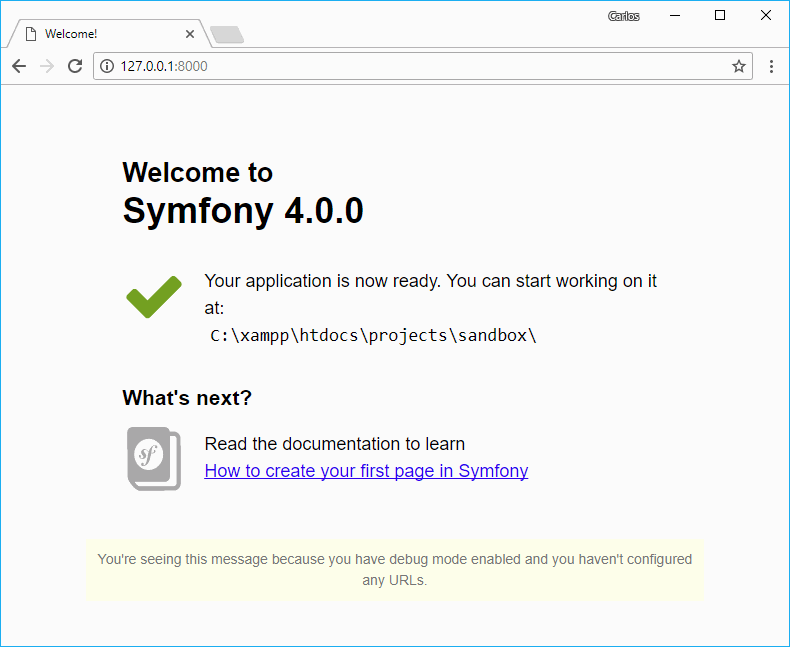
Awesome isn't?
2. Creating your first controller
As next, we'll proceed with the most common task on MVC based frameworks, the creation of a controller. With the new Symfony structure, you will have initially a Controller folder in the /src directory of your project where the controllers of your application will be located. As usual, the namespace for the controllers in this case will be App\Controller so you can create the first controller namely DefaultController.php with the following content:
<?php
// src/Controller/DefaultController.php
namespace App\Controller;

use Symfony\Component\HttpFoundation\Response;
use Symfony\Bundle\FrameworkBundle\Controller\Controller;

class DefaultController extends Controller
{
    public function index()
    {
        return new Response('
            <html>
                <body>
                    <h1>Hello Symfony 4 World</h1>
                </body>
            </html>
        ');
    }
}
As you can see we have already registered an action named index that will return the HTML as first parameter as response. As this is a demo, our response is very simple, however you can make it complex by implementing as usual Twig or PHP Views.
3. Registering and accessing your first route
Our controller exists already, however there's no way yet to access the index action, so you will need to register as first step a route. but in Symfony 4 you will find the config/routes.yaml file instead. You can register the index route as follows:
# config/routes.yaml
index:
    path: /
    defaults: { _controller: 'App\Controller\DefaultController::index' }
You can as well refer another yaml file that contains more routes, however we'll keep it simple. Now if you access the route of the PHP built-in server (in our case http://127.0.0.1:8000/) you will find:
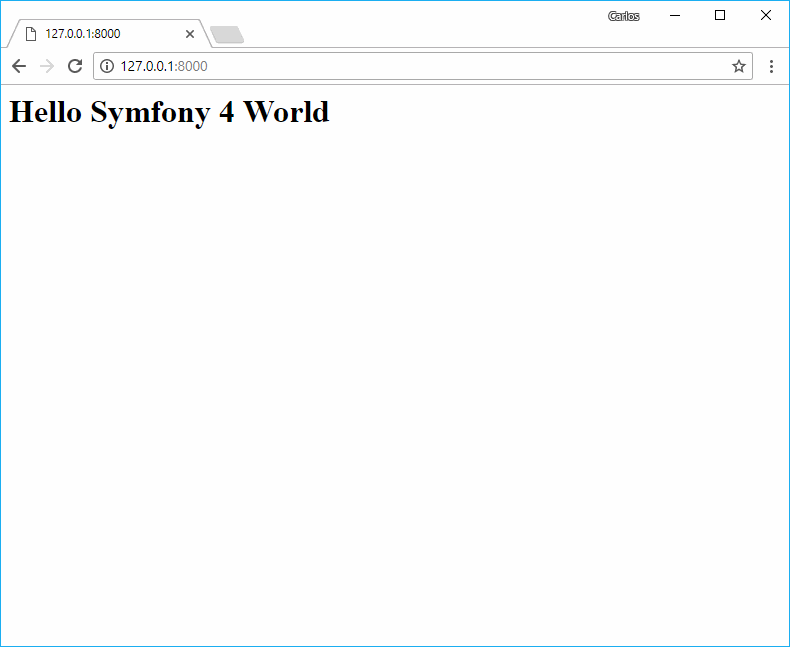
Your hello world message. As you can see, the workflow stays almost the same as with older versions of Symfony, however you may not feel comfortable yet as there things that aren't present on this version like the debug bar.
4. Installing the Symfony Profiler
Noticed something strange after viewing your Hello World message? Where's the beauty debug bar that used to be on every Symfony Project? As explained, Flex is good for a developer that wants to start small, without a lot of initial dependencies. That's how Symfony <= 4 works, during the installation of your first symfony project you will face the installation of a lot of bundles like Doctrine, Swiftmailer and other things that in some cases the developer doesn't need. Symfony Flex is all about making the creation of a project based on Symfony very simple and easy to create, however without losing the ability to build more complex projects with a lot of dependencies.
So theoretically the thing works as Follows: Install what you need, no more. The problem for this approach for experienced Symfony Developers is facing the pain of installing every single package that you need manually, so Fabian Potencier mentioned the usage of the so-called "packs". These packs are a regular Git repository registered on Composer that contains a composer.json file that references a set of related packages.
There is already a very useful package for debugging purposes that includes packages like the phpunit-bridge and our beloved debug bar namely debug-pack that you can install using the following command:
composer require debug-packNote
Remember that debug-pack is an alias defined by Symfony Flex so if you try to do the same in a non-flex based symfony project you will get the error that the package doesn't exist.
After running the require command you will get an output similar to:
Using version ^1.0 for symfony/debug-pack
./composer.json has been updated
Loading composer repositories with package information
Updating dependencies (including require-dev)
Package operations: 15 installs, 0 updates, 0 removals
- Installing symfony/polyfill-php72 (v1.6.0): Loading from cache
- Installing symfony/var-dumper (v4.0.0): Loading from cache
- Installing symfony/phpunit-bridge (v4.0.0): Downloading (100%)
- Installing twig/twig (v2.4.4): Loading from cache
- Installing symfony/twig-bridge (v4.0.0): Loading from cache
- Installing symfony/web-profiler-bundle (v4.0.0): Loading from cache
- Installing symfony/twig-bundle (v4.0.0): Loading from cache
- Installing symfony/stopwatch (v4.0.0): Loading from cache
- Installing monolog/monolog (1.23.0): Loading from cache
- Installing easycorp/easy-log-handler (v1.0.3): Downloading (100%)
- Installing symfony/monolog-bridge (v4.0.0): Downloading (100%)
- Installing symfony/monolog-bundle (v3.1.2): Downloading (100%)
- Installing symfony/debug-bundle (v4.0.0): Downloading (100%)
Writing lock file
Generating autoload files
Symfony operations: 6 recipes (348c2becb437cad80d6556e397d1c765)
- Configuring symfony/phpunit-bridge (>=3.3): From github.com/symfony/recipes:master
- Configuring symfony/web-profiler-bundle (>=3.3): From github.com/symfony/recipes:master
- Configuring symfony/twig-bundle (>=3.3): From github.com/symfony/recipes:master
- Configuring easycorp/easy-log-handler (>=1.0): From github.com/symfony/recipes:master
- Configuring symfony/monolog-bundle (>=3.1): From github.com/symfony/recipes:master
- Configuring symfony/debug-bundle (>=3.3): From github.com/symfony/recipes:master
Executing script cache:clear [OK]
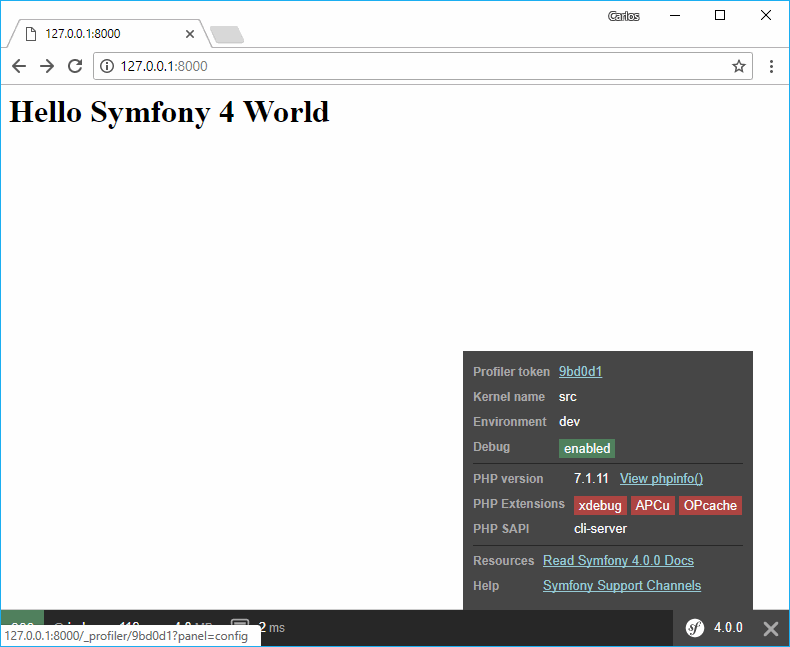
Executing script assets:install --symlink --relative public [OK]After a succesful installation, you may be able to use the profiler of symfony in your project:
Note as well that you can remove the pack by removing it with the same identifier:
composer remove debug-packHowever, what if you don't want to use all the bundles of the pack? Then just follow the Flex logic that would be install only what you need and use, that in this case would be the profiler of Symfony with the following command:
composer require profilerThis would install less packages than the debug-pack and would show us as well our debug bar:
Using version ^1.0 for symfony/profiler-pack
./composer.json has been updated
Loading composer repositories with package information
Updating dependencies (including require-dev)
Package operations: 8 installs, 0 updates, 0 removals
  - Installing twig/twig (v2.4.4): Loading from cache
  - Installing symfony/polyfill-php72 (v1.6.0): Loading from cache
  - Installing symfony/var-dumper (v4.0.0): Loading from cache
  - Installing symfony/twig-bridge (v4.0.0): Loading from cache
  - Installing symfony/web-profiler-bundle (v4.0.0): Loading from cache
  - Installing symfony/twig-bundle (v4.0.0): Loading from cache
  - Installing symfony/stopwatch (v4.0.0): Loading from cache
Writing lock file
Generating autoload files
Symfony operations: 2 recipes (d9ef4bccbc708c404cd724696fa62a4f)
  - Configuring symfony/web-profiler-bundle (>=3.3): From github.com/symfony/recipes:master
  - Configuring symfony/twig-bundle (>=3.3): From github.com/symfony/recipes:master
Executing script cache:clear [KO]
There still a lot of work to do and learn with the new Symfony so stay tunned, read the documentation and news about the new version. Fabian Potencier published an awesome introduction and quick demo of Symfony 4, so you may want to take a look to know more highlights that may not be included in this article. There are many details as well that we skipped as it's better to read them from the official website, we recommend you as well to read the blog of Fabien Potencier for news about SF4.
Happy coding !

