

Although a lot of users don't find the necessity of installing a complex MySQL database manager, because they prefer to use simpler tools, like adminer, there are other that prefer reliable and robust solutions as PHPMyAdmin. Whatever the people say, using a graphical interface to manage databases is a lot easier than manipulating everything from the CLI.
If you are working in a server without a web hosting control panel, like Plesk, where this tool is already integrated and ready to use, you will need to install PHPMyAdmin by yourself. In this article, we'll show you how to install PHPMyAdmin in your Ubuntu 16.04 based server (assuming that you have already the LAMP Stack installed).
Requirements
As previously mentioned, we will assume that you have already installed the LAMP stack installed in your system (Apache, MySQL and PHP). This means that you have already MySQL installed and you have a root user for it and a password that you know as well.
Knowing this, let's get started !
1. Install PHPMyAdmin and required PHP extensions
As first step, as a good practice update the packages of your system with the following command:
sudo apt-get updateAnd proceed with the installation of the PHPMyAdmin package and the required extensions:
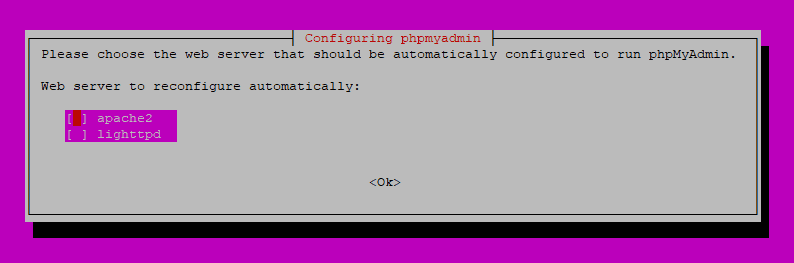
sudo apt-get install phpmyadmin php-mbstring php-mcrypt php-gettextAfter confirm that you need extra space on the disk to install, the setup will start and you will be prompted for some basic details. The first one is the preferred web server, that in our case is apache2:
As next, create the phpmyadmin database from scratch (initial configuration with the default values as this is our first time installing phpmyadmin):
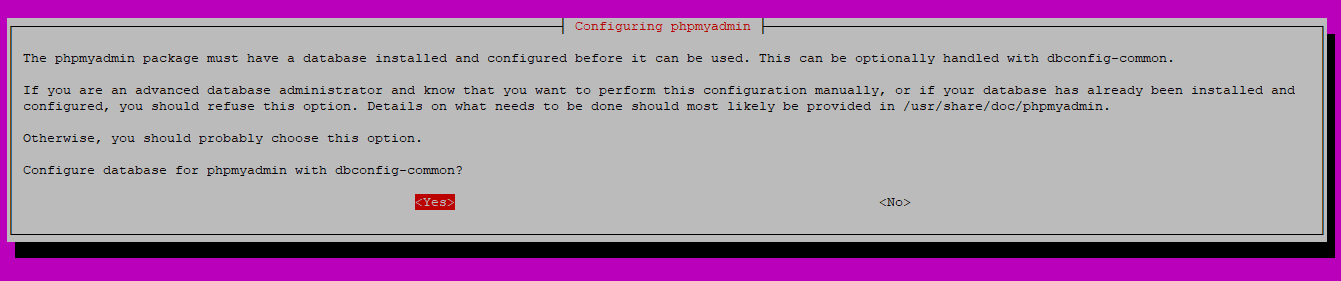
During this step as well, you will need to define a new password for the phpmyadmin user, but that is totally up to you (save the password somewhere). After finishing the setup PHPMyAdmin is now installed and almost functional.
2. Enable extensions and test PHPMyAdmin
After installing PHPMyAdmin you only need to enable the installed extensions of PHP with the following commands:
sudo phpenmod mcrypt
sudo phpenmod mbstring
And then restart apache to make the changes available to it:
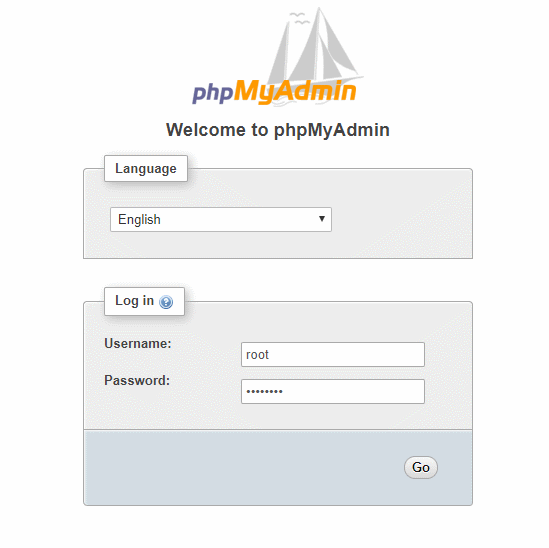
sudo systemctl restart apache2Finally you will be able to access the web interface of PHPMyAdmin through the domain name of your server or IP address and /phpmyadmin as suffix e.g http://your-server-ip/phpmyadmin and you will see the login page of PHPMyAdmin:
Important note
Login as the root user to have access to everything. The password for this has been defined during the installation of MySQL (not PHPMyAdmin) in your server (thing that we didn't do in this tutorial as you had to install MySQL previously).
If you are unable to access the mentioned URL from the browser and you have already restarted apache, please read the next section to solve the issue.
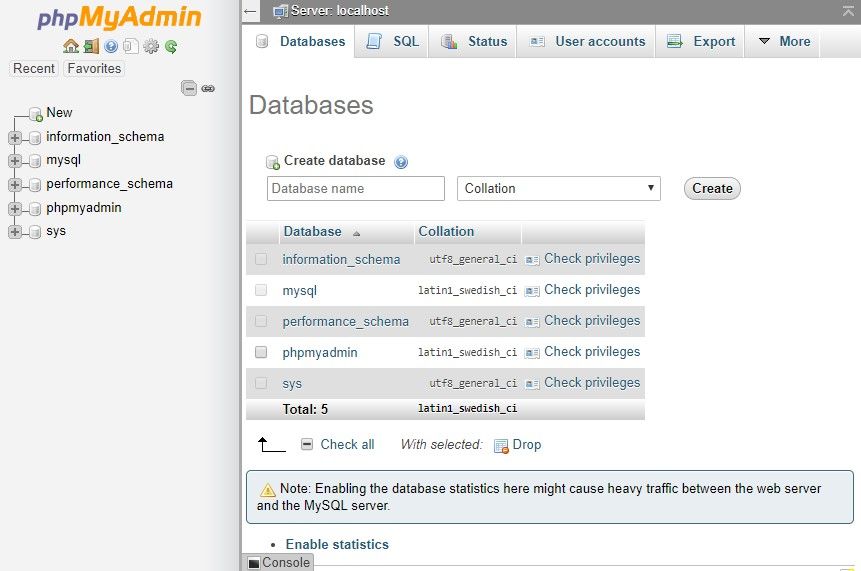
After logging in, you should feel familiar with the tool:
If you are unable to access PHPMyAdmin through the browser
In case that you try to access PHPMyAdmin with the mentioned URL http://your-server-ip/phpmyadmin, you will need to do an extra step. As first, edit the apache config file with your favorite editor in the CLI, in our case we use nano, so proceed to edit the file:
sudo nano /etc/apache2/apache2.confThen, append the following line at the end of the file:
Include /etc/phpmyadmin/apache.confSave changes, then, restart apache with the following command:
sudo systemctl restart apache2Finally try to access again at the URL http://your-server-ip/phpmyadmin and it should be accesible now.
3. Add extra security layer (optional)
PHPMyAdmin is widely known in the web and this makes it a target of malicious attacks, so it's pretty useful to add an extra security layer (with an extra basic authentication), because as you may know PHPMyAdmin has suffered vulnerabilities in the past.
In order to add an extra authentication step, we need to add a new directive namely AllowOverride inside the block <Directory /usr/share/phpmyadmin> in the configuration file of PHPMyAdmin. To do this, edit the apache config file of PHPMyAdmin with your favorite editor. We use nano, so the command to edit would be:
sudo nano /etc/phpmyadmin/apache.confInside this file search for the mentioned block and add the AllowOverride All directive:
<Directory /usr/share/phpmyadmin>
    Options FollowSymLinks
    DirectoryIndex index.php
    AllowOverride All
    . . .
Save the changes and restart apache once again:
sudo systemctl restart apache2Doing this, we will able to override directives of apache from a .htaccess file. However this file doesn't exist in the PHPMyAdmin index directory, so you will need to create it as well with your text editor, with nano the command would be:
sudo nano /usr/share/phpmyadmin/.htaccessInside this file, you need to add the following content that will help you to add another login screen (basic login security):
AuthType Basic
AuthName "Restricted Files"
AuthUserFile /etc/phpmyadmin/.htpasswd
Require valid-user
These directives basically work as explained in the next paragraph:
AuthType Basic: Specify the type of authentication to use. In this case is basic which means a plain username and password.AuthName: This option set a title to the auth dialog of the browser. This text needs to be usually generic so the users won't get information about what's being protected.AuthUserFile: Define the path of the password file that will be used during the authentication (we'll create this is in the next step).Require valid-user: Specify that only authentified user have access to this resource.
Save the file with the content and proceed with the creationg of the AuthUserFile. Before creating this file, you will need a special tool to do it, namely the apache utilities that you can install in your system with the following command:
sudo apt-get install apache2-utilsFrom this package, we'll need the htpasswd utility that will help us to create users to login in this way. The user to login in PHPMyAdmin with the extra security layer can be created with this command:
# Use this command to register a new user
sudo htpasswd -c /etc/phpmyadmin/.htpasswd <username>
# Example for the user phpmyadmin-webaccess
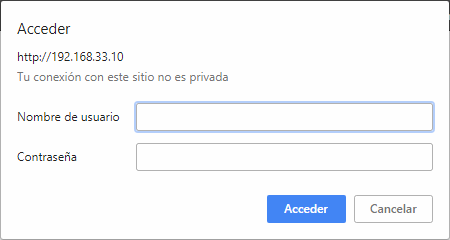
sudo htpasswd -c /etc/phpmyadmin/.htpasswd phpmyadmin-webaccessYou will be prompted for the password that you will use to login with the given user. If you want to add an extra user, you will need to do it without the -c argument. Finally, if you try to access the PHPMyAdmin URL again, you will be prompted by the browser for the new extra credentials:
An then, if the credentials are correct, you will need to login now normally in PHPMyAdmin with the root credentials.
Happy coding !

