
Create an user system with symfony 2 or 3 "isn't" a difficult task. The homepage provides you with a quick introduction of how to create a custom user provider for your application here.
But what could be better than something that's already implemented and is used for many symfony developers and is maintained currently in Github? maybe create your own user provider,because that would be self satisfying, for your knowledge and your dev-ego ! but you'll be wasting precious development time in something that you could install in less than 30 minutes and would provide the same features than you need to create from the beginning.
Why FOSUserBundle ?
The FOSUserBundle adds support for a database-backed user system in Symfony2. It provides a flexible framework for user management that aims to handle common tasks such as user registration and password retrieval.
Features include:
- Users can be stored via Doctrine ORM, MongoDB/CouchDB ODM or Propel (we'll use Doctrine in this case)
- Registration support, with an optional confirmation per email
- Password reset support
This article will teach how to set up easily FOSUserBundle in your project (with user and group classes), and you will not fail on this task, that's a promise.
1. Create an user bundle (optional)
Create a new bundle in the /src folder of your symfony project using the php bin/console generate:bundle command in Symfony. The main point of this is to isolate the user administration in a single bundle. The structure of a bundle doesn't needs to be special, it just need to be registered in the Kernel and everything will work right.
Note
In case you don't want to create an extra bundle for the user system, simply follow the next steps in an existent bundle.
2. Create User.php and Group.php
The goal of this bundle is to persist some User class to a database. Your first job, then, is to create the User class for your application. This class can look and act however you want: add any extra properties (fields for the user table) or methods you may find useful.
If you decided to create an extra bundle, it won't probably have the Entity folder inside, therefore you need to create a new folder named Entity. Inside the Entity folder of the bundle, create 2 files User.php and Group.php.
User.php
The User class should have the following code inside:
<?php
// src/Acme/UserBundle/Entity/User.php
// Change the namespace according to the path in your project
namespace userBundle\Entity;

// Using FOSUserBundle 1.3x the user class will locate instead in :
// use FOS\UserBundle\Entity\User as BaseUser;

use FOS\UserBundle\Model\User as BaseUser;
use Doctrine\ORM\Mapping as ORM;

/**
 * @ORM\Entity
 * @ORM\Table(name="fos_user")
 */
class User extends BaseUser
{
    /**
     * @ORM\Id
     * @ORM\Column(type="integer")
     * @ORM\GeneratedValue(strategy="AUTO")
     */
    protected $id;

    // Change the targetEntity path if you want to create the group

    /**
     * @ORM\ManyToMany(targetEntity="userBundle\Entity\Group")
     * @ORM\JoinTable(name="fos_user_user_group",
     *      joinColumns={@ORM\JoinColumn(name="user_id", referencedColumnName="id")},
     *      inverseJoinColumns={@ORM\JoinColumn(name="group_id", referencedColumnName="id")}
     * )
     */
    protected $groups;

    public function __construct()
    {
        parent::__construct();
        // your own logic
    }
}
Group.php
The Group class should have the following code inside:
<?php

// Change the namespace according to the path in your project
namespace userBundle\Entity;

use FOS\UserBundle\Model\Group as BaseGroup;
use Doctrine\ORM\Mapping as ORM;

/**
 * @ORM\Entity
 * @ORM\Table(name="fos_group")
 */
class Group extends BaseGroup
{
    /**
     * @ORM\Id
     * @ORM\Column(type="integer")
     * @ORM\GeneratedValue(strategy="AUTO")
     */
     protected $id;
}
Finally your bundle should look something like :
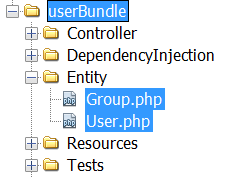
The userBundle has been created directly in the /src folder of the symfony project, therefore the namespace of the classes is namespace userBundle\Entity;
3. Change the default user provider
Now that your User class exists, you need to enable the FOSUserBundle class as your default user provider in your project. You need to add the configuration in the config.yml file of your project, it specifies the driver of your database, the path of the user and group class as shown in the following example, add the snippet in your config.yml file and change the path to the classes if you need to:
# /app/config.yml
fos_user:
    db_driver: orm
    firewall_name: main
    user_class: userBundle\Entity\User
    group:
        group_class: userBundle\Entity\Group
Now your class will be used as the default user provider.
4. Update the security configuration
You need to modify the security.yml file of your project and add the following configuration. Coment all the existing content in this file or remove it and replace it with:
# app/config/security.yml
security:
    encoders:
        FOS\UserBundle\Model\UserInterface: bcrypt

    role_hierarchy:
        ROLE_ADMIN:       ROLE_USER
        ROLE_SUPER_ADMIN: ROLE_ADMIN

    providers:
        fos_userbundle:
            id: fos_user.user_provider.username

    firewalls:
        main:
            pattern: ^/
            form_login:
                provider: fos_userbundle
                csrf_token_generator: security.csrf.token_manager
                # if you are using Symfony < 2.8, use the following config instead:
                # csrf_provider: form.csrf_provider

            logout:       true
            anonymous:    true

    access_control:
        - { path: ^/login$, role: IS_AUTHENTICATED_ANONYMOUSLY }
        - { path: ^/register, role: IS_AUTHENTICATED_ANONYMOUSLY }
        - { path: ^/resetting, role: IS_AUTHENTICATED_ANONYMOUSLY }
        - { path: ^/admin/, role: ROLE_ADMIN }
Remember (according to the version of your symfony project) to change the csrf_token_generator property in firewalls if it doesn't work at first time.
5. Install FOSUserBundle with composer
You may be asking to yourself, why this step isn't the first step as it's the main point of this article? Well, the answer is pretty simple. In almost all tutorials, the first step is to install the FOSUserBundle using composer, however in the latest versions of Symfony that will lead to the known error:
The child node "db_driver" at path "fos_user" must be configured.
The problem is only caused by the order in which you execute the steps of installation. To continue, include the bundle using Composer:
composer require friendsofsymfony/user-bundle "~2.0@dev"
Or add the line to your composer.json line and then execute composer install:
"require":{
  "friendsofsymfony/user-bundle": "~2.0@dev"
}
However, after the installation of FOSUserBundle is completed, you will probably face a last exception:
[Symfony\Component\Config\Exception\FileLoaderLoadException] There is no extension able to load the configuration for fos_user
You'll see this error simply because we haven't enabled the bundle in the AppKernel.php file, therefore you need to do locate the app/AppKernel.php file and register the bundle:
<?php
// app/AppKernel.php

public function registerBundles()
{
    $bundles = array(
        new FOS\UserBundle\FOSUserBundle(),
    );
}
6. Enable the default routes
The structure of FOSUserBundle is ready, however without routes in your app, you couldn't use the bundle, therefore we need to import the routing from the FOSUserBundle to the routes of your app. To enable the default routes (login, register, logout etc) by adding the following lines in your app/routing.yml file:
# app/config/routing.yml
fos_user:
    resource: "@FOSUserBundle/Resources/config/routing/all.xml"

# IMPORTANT
# Import the following routes only if when you start the project
# those routes are not available :

fos_user_profile:
    resource: "@FOSUserBundle/Resources/config/routing/profile.xml"
    prefix: /profile

fos_user_register:
    resource: "@FOSUserBundle/Resources/config/routing/registration.xml"
    prefix: /register

fos_user_resetting:
    resource: "@FOSUserBundle/Resources/config/routing/resetting.xml"
    prefix: /resetting

fos_user_change_password:
    resource: "@FOSUserBundle/Resources/config/routing/change_password.xml"
    prefix: /profile
7. Update the database schema
After all the required basic configuration, you only need to update the database to create the tables where your users will be inserted using the symfony command:
For Symfony 2.x the console is in the app directory:
php app/console doctrine:schema:update --forceAnd for Symfony 3.x the console is in the bin directory:
php bin/console doctrine:schema:update --forceNote
In case that you get the exception The child node "from_email" at path "fos_user" must be configured, please read this article to know how to solve it.
8.Test your user system
Now you need to test if everything works, remember to clear the cache first. Register the first user in the following URL:
http://yourapp/app_dev.php/register
And login at:
http://yourapp/app_dev.php/login
Have fun !

