
In previous tutorials, we wrote about how to create a SSTV audio file from an image, so you can easily trasmit an image inside audio frequencies, pretty interesting stuff. However, it's pretty complicated to find a way of decoding such audio and convert it into an image again with some program out there. Although the process is probably nothing easy, it can be done in Linux platforms using the QSSTV application.
In this article, we will show you how to decode a SSTV audio file from multiple formats using QSSTV in Ubuntu Desktop 18.04.
1. Install QMake
QSSTV has been developped and tested under Qt 5. It is not maintained anymore on the older versions of Qt. Qt is a cross-platform application development framework for desktop, embedded and mobile. Supported Platforms include Linux, OS X, Windows, VxWorks, QNX, Android, iOS, BlackBerry, Sailfish OS and others.
In order to build QSSTV from source, you will need to install all the required libraries to prevent any build fail, all the packages in Ubuntu can be installed with the following command:
# A. Install all packages in a single command
sudo apt-get install qt5-default libopenjp2-7-dev libpulse-dev libv4l-dev libasound2-dev libgtk-3-dev libfftw3-dev
Or if you prefer installing package by package:
# B. Or install one package at time
sudo apt-get install qt5-default

sudo apt-get install libopenjp2-7-dev

sudo apt-get install libpulse-dev

sudo apt-get install libv4l-dev

sudo apt-get install libasound2-dev

sudo apt-get install libgtk-3-dev

sudo apt-get install libfftw3-dev
After the installation of these packages, you can continue with the installation of the other components.
2. Install Hamlib
You will need Hamlib installed on your system to run properly QSSTV, the purpose of this project is to provide stable, flexible, shared libraries that enable quicker development of Amateur Radio Equipment Control Applications.
Many Amateur Radio Transceivers come with serial interfaces that allows software to control the radio. This project will endeavour to provide shared libraries that greatly simplify the application programmer's interaction with radio equipment and other controllable devices such as rotators, switches, etc. To install hamlib on your system, just run the following command on your terminal:
sudo apt-get install hamlib-devFor more information about Hamlib, please visit the official repository at Github here.
3. Install pavucontrol
In order to manage the audio output sources you will need Pavucontrol available in your system. PulseAudio is a sound system for POSIX OSes, meaning that it is a proxy for your sound applications. It allows you to do advanced operations on your sound data as it passes between your application and your hardware. PulseAudio offers a graphical interface to handle audio devices namely pavucontrol. You can install this tool with the following command:
sudo apt-get install pavucontrolAfter installing, you will be able to open this program from the command line typing pavucontrol.
3. Download QSSTV
QSSTV is a program for receiving and transmitting SSTV and HAMDRM (sometimes called DSSTV). It is compatible with most of MMSSTV and EasyPal. Fortunately, we don't need to build this package from source as there's an acceptable version of the program available at the default repositories of Ubuntu. Proceed to install the tool with:
sudo apt-get install qsstvThis will install a program that you can start from the command line typing in the terminal:
qsstvThe window will look something like:
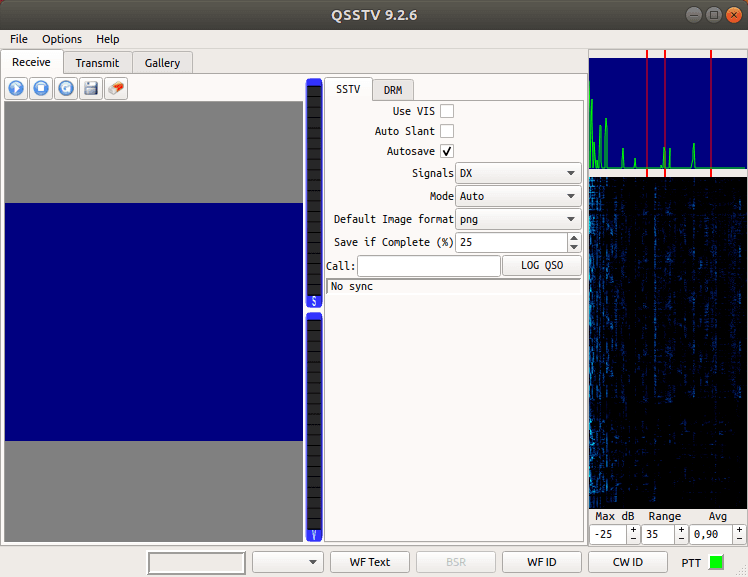
We will use this application to decode the audio file into an image later after configuring from where should QSSTV receive the output. For more information about QSSTV, please visit the official webpage here.
4. Configuring QSSTV
Firstly, you will need to load a PulseAudio module called "module-null-sink". To load it manually when you need it, from your shell screen run the following command, we will name it as virtual-cable:
pactl load-module module-null-sink sink_name=virtual-cableThis command will print it's pactl module id in the terminal if it was created succesfully. Provided there were no errors reported, you can ignore the number printed out by pactl. Although Pulseaudio can best be tweaked from command line, I find the pavucontrol GUI very handy and a real time saver. Run it as:
pavucontrolAfter starting the app, go to the Output Devices tab to verify that you have the Null Output device (available after running the pactl command):

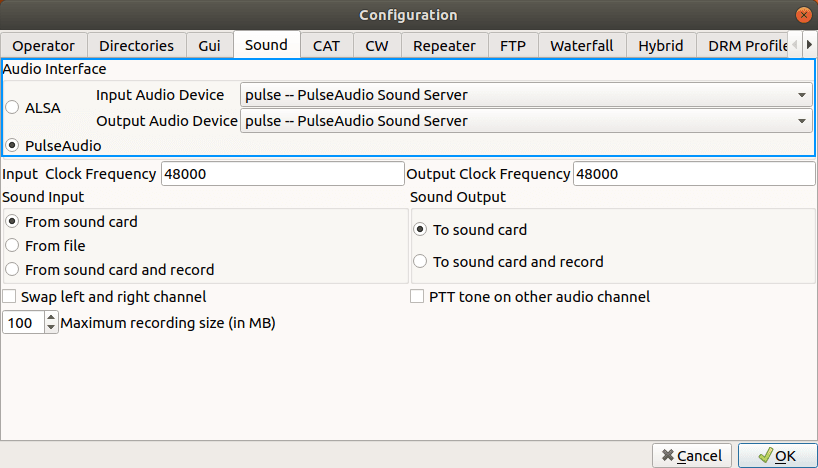
After verifying that the Null Output exists in your system, start QSSTV (built on the previous step) and go to Options, then Configuration and open the Sound tab. In this window you need to be sure that the PulseAudio interface is selected instead of any other:
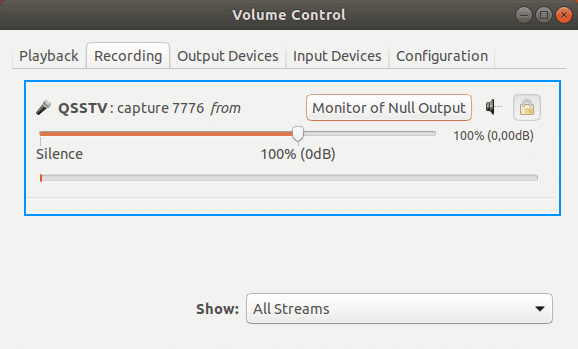
After saving changes, return again to the pavucontrol window. As you know QSSTV needs to record the audio from some file played on your system after the configuration of this tutorial, so you will need to specify that the QSSTV should capture the audio from our Null Output:
After saving this configuration, we will be able to play an audio file with SSTV data from the command line that will be decodified by the QSSTV program easily.
5. Decoding and audio file
You can play the audio file with SSTV data from the command line using paplay (available by default in Ubuntu), so you can simply run the following command in the terminal to play the audio (replace the audio file path with yours):
Remember that you can learn how to convert an image to an audio file in Martin1 representation if you follow this tutorial, the output file of the mentioned tutorial can be decoded in this article:
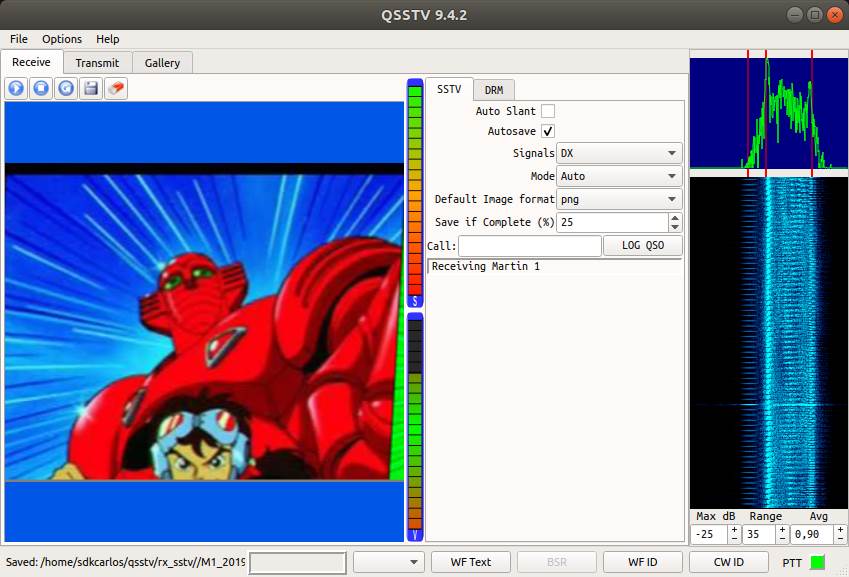
paplay -d virtual-cable youraudiofile.wavNow if you switch to the QSSTV window, you will see that it will start decoding the audio progressively:
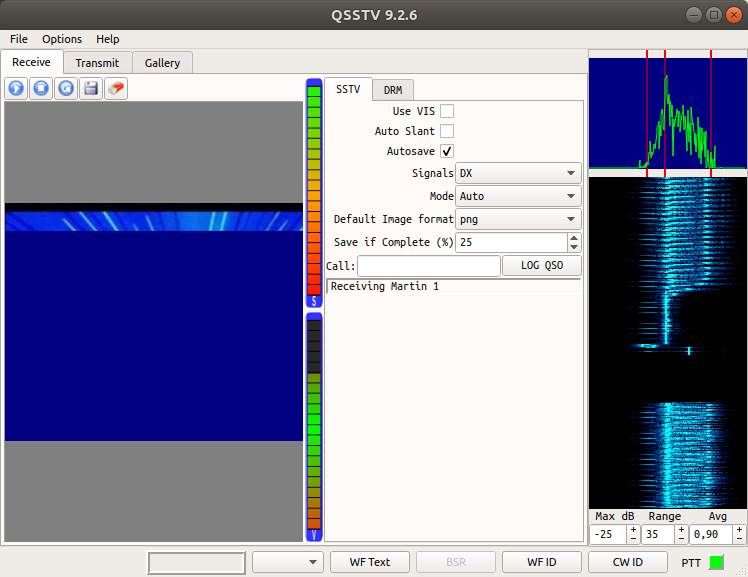
And so on:
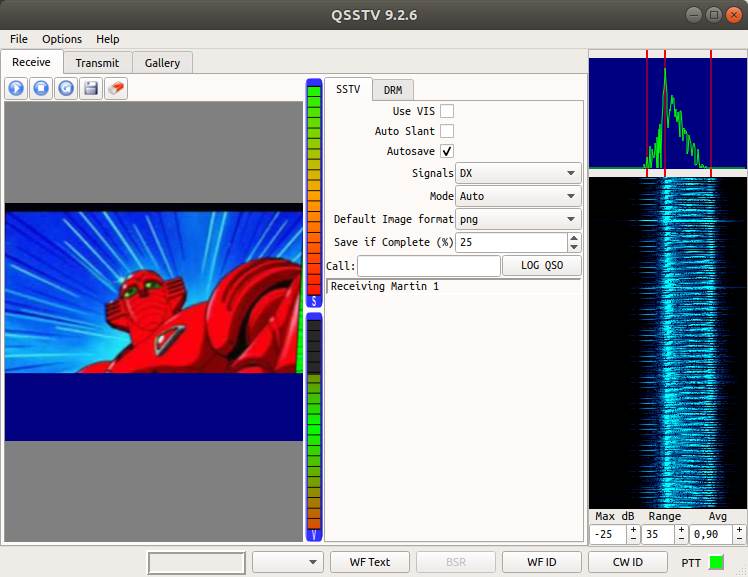
Until the audio finishes and you have the output of the entire image:
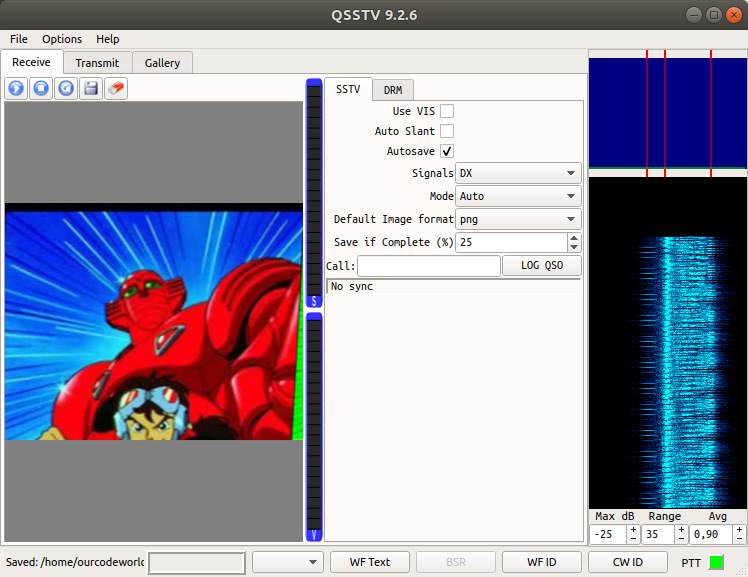
The images will be normally stored in /home/{youruser}/qsstv/rx_sstv/ directory. And that's it, thats the easiest way to decode an SSTV audio file in Martin1 format into an image in Ubuntu 18.04 desktop.
6. Restaurate audio in system
Now, notice that if you try to play some audio as usual, open youtube or something, you won't hear anything as we have a virtual-cable mounted on the system, so the output will be redirected to it instead. To restore the default audio output of your system, simply list as first all the the audio devices with:
pactl list short modulesThis will generate an output similar to:
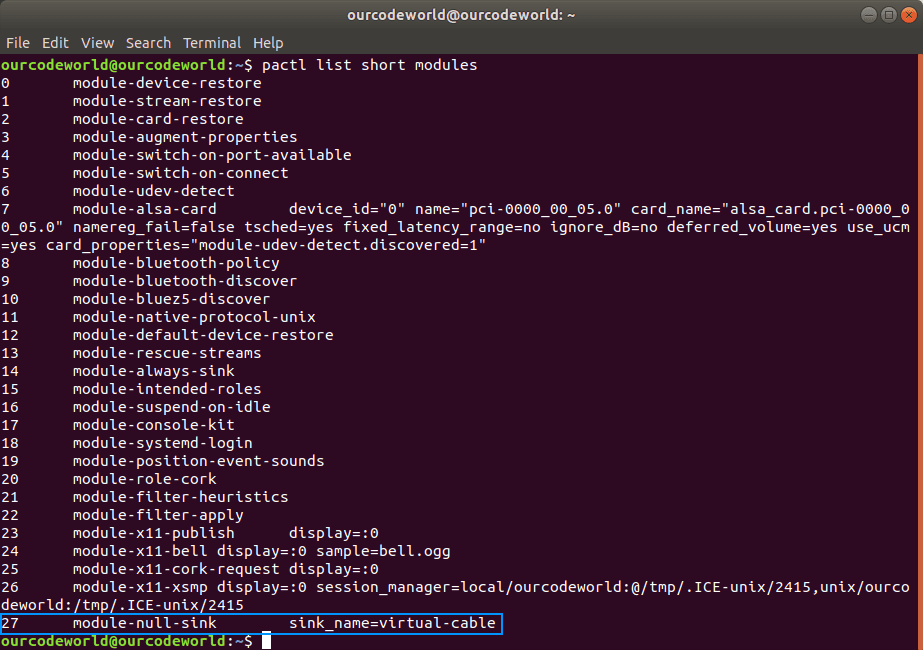
As you can see, the created device in the step #4 has the identifier 27. You need to unload this module using the following command:
# In our case, the module is the #27
pactl unload-module 27
# pactl unload-module {number}
After unloading the module, the audio of your system will be restored as default.
This tutorial is a recopilation of multiple sources that may be useful for you as well if you try with other formats:
- http://users.telenet.be/on4qz/qsstv/manual/installation.html
- https://www.chonky.net/hamradio/decoding-sstv-from-a-file-on-a-linux-system
Happy coding !

