
Although there are a couple of implementations of this kind of T-Shirt Designer with multiple technologies, like SVG, plain canvas manipulation with JavaScript and even flash (Ewww), most of them include stuff that is difficult to understand at least for a newbie developer that aims to start with simpler code. As an attempt to help developers to get started with a very simple project to design custom T-Shirts using JavaScript, manipulating canvas with the help of Fabric.js will be one of the easiest way to do it.
In this article, we'll explain you briefly how to create your own T-Shirt designer from scratch with the help of the Fabric.js library in your web application.
Requirements
The tutorial will work basically with the Fabric.js library. Fabric.js is a framework that makes it easy to work with HTML5 canvas element. It is an interactive object model on top of canvas element. It is also an SVG-to-canvas parser. You can download the latest version of Fabric.js from the official releases page of the repository at Github here. Then, simply include the script in your page with a script tag:
<!-- Include Fabric.js in the page -->
<script src="./fabric.min.js"></script>
You will need as well, the background image of a transparent T-Shirt, that in our case will be the following one, you can use your own T-Shirt design of course as long as it has the same transparency style (save it as background_tshirt.png):
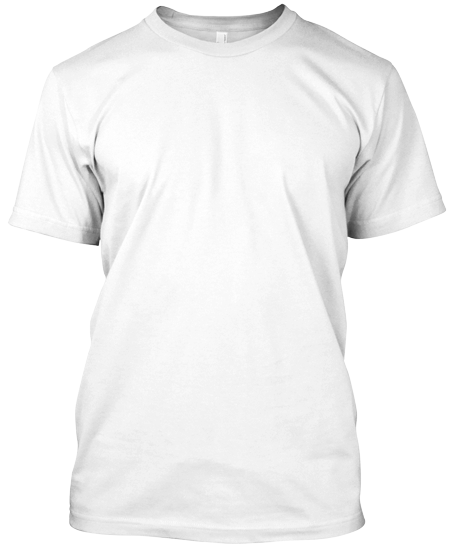
Note: download the image exactly as it is here, it contains the transparency, so in this case, as our website background is black, you will see the T-Shirt as black, you will see it after we write some code to make it work.
In this tutorial, we will implement 2 kinds of Tee Designers, one where the user is allowed to upload and resize images dinamically or with fixed pictures whose resolution is defined by the application manager.
A. Static images implementation
For our first implementation that may be useful for some people, but useless for others, will be based on the following conditions:
- The user will unable to upload his own images.
- You are the one that designs the picture that will be placed on the T-Shirt.
- All the pictures will have the same resolution, in our case 580x1025 (width*height) for good quality.
- The user can't resize the image on the T-Shirt.
As first step, we will define the contain of the T-Shirt designer, that is specified by the following markup:
<!-- Create the container of the tool -->
<div id="tshirt-div">
    <!--
        Initially, the image will have the background tshirt that has transparency
        So we can simply update the color with CSS or JavaScript dinamically
    -->
    <img id="tshirt-backgroundpicture" src="./background_tshirt.png"/>

    <!--
        The container where Fabric.js will work. Notice that in the the style of #canvas
        the width and height need to match with the attributes
    -->
    <div id="drawingArea" class="drawing-area">
        <div class="canvas-container">
            <canvas id="canvas" width="200" height="400"></canvas>
        </div>
    </div>
</div>
This markup requires special CSS in order to work properly, as the container will have some divs inside, that need to overlap another. The CSS to make it work will be the following one:
.drawing-area{
    position: absolute;
    top: 60px;
    left: 122px;
    z-index: 10;
    width: 200px;
    height: 400px;
}

.canvas-container{
    width: 200px;
    height: 400px;
    position: relative;
    user-select: none;
}

#tshirt-div{
    width: 452px;
    height: 548px;
    position: relative;
    background-color: #fff;
}

#canvas{
    position: absolute;
    width: 200px;
    height: 400px;
    left: 0px;
    top: 0px;
    user-select: none;
    cursor: default;
}
Until this point, we will have with the previous markup and styles, a very simple HTML structure that looks like this:

As mentioned, the canvas will overlay the divs and the image background of the T-Shirt. Now, we will add as well 2 new controls on the page that will be 2 selects, the first select that allows the user to specify the color of the T-Shirt dinamically with CSS and JavaScript only and the second select that allows the user to load a single image over the T-Shirt from your own collection of Pictures:
<!--
    The select that will allow the user to pick one of the static designs
    In our case, we only offer a single picture, namely the logo of Batman
-->
<label for="tshirt-design">T-Shirt Design:</label>
<select id="tshirt-design">
    <option value="">Select one of our designs ...</option>
    <option value="./batman.png">Batman</option>
</select>

<!-- The Select that allows the user to change the color of the T-Shirt -->
<label for="tshirt-color">T-Shirt Color:</label>
<select id="tshirt-color">
    <!-- You can add any color with a new option and definings its hex code -->
    <option value="#fff">White</option>
    <option value="#000">Black</option>
    <option value="#f00">Red</option>
    <option value="#008000">Green</option>
    <option value="#ff0">Yellow</option>
</select>
The color picker of the T-Shirt allows you as the developer to add a new color of T-Shirt by simply adding a new option with the hexadecimal representation of it as value. The T-Shirt design select, allows the user to select one of your designs that can be drawn on the T-Shirt. For this implementation in specific, is recommended to work with the mentioned dimensions of the pictures, for example the Batman logo in our case is the following one:

It will fit perfectly on our T-Shirt later. Now, we need to get started with the JavaScript logic that will handle the project:
// Select the canvas an make it accesible for all the snippets of this article
let canvas = new fabric.Canvas('tshirt-canvas');

/**
 * Method that defines a picture as background image of the canvas.
 *
 * @param {String} imageUrl      The server URL of the image that you want to load on the T-Shirt.
 *
 * @return {void} Return value description.
 */
function updateTshirtImage(imageURL){
    // If the user doesn't pick an option of the select, clear the canvas
    if(!imageURL){
        canvas.clear();
    }

    // Create a new image that can be used in Fabric with the URL
    fabric.Image.fromURL(imageURL, function(img) {
        // Define the image as background image of the Canvas
        canvas.setBackgroundImage(img, canvas.renderAll.bind(canvas), {
            // Scale the image to the canvas size
            scaleX: canvas.width / img.width,
            scaleY: canvas.height / img.height
        });
    });
}
In this piece of code, we exposed the canvas of Fabric locally in the script tag where we will run the code of this project. All the code relies on the canvas variable that contains a Fabric.js instance, including the updateTshirtImage method that draws one of your designs over the T-Shirt. Now, we will need to register 2 event listeners in the document that will react to the change of option in both of the selects previously added:
// 1. When the T-Shirt color select changes:
// Update the TShirt color according to the selected color by the user
document.getElementById("tshirt-color").addEventListener("change", function(){
    document.getElementById("tshirt-div").style.backgroundColor = this.value;
}, false);

// 2. When the user picks a design:
// Update the TShirt background image according to the selected image by the user
document.getElementById("tshirt-design").addEventListener("change", function(){

    // Call the updateTshirtImage method providing as first argument the URL
    // of the image provided by the select
    updateTshirtImage(this.value);
}, false);
With all this code in our project, we will have at the end a document with the following markup:
<!DOCTYPE html>
    <html lang="en">
    <head>
        <meta charset="UTF-8">
        <meta name="viewport" content="width=device-width, initial-scale=1.0">
        <meta http-equiv="X-UA-Compatible" content="ie=edge">
        <title>Static Tee Designer</title>
        <style>
            .drawing-area{
                position: absolute;
                top: 60px;
                left: 122px;
                z-index: 10;
                width: 200px;
                height: 400px;
            }

            .canvas-container{
                width: 200px;
                height: 400px;
                position: relative;
                user-select: none;
            }

            #tshirt-div{
                width: 452px;
                height: 548px;
                position: relative;
                background-color: #fff;
            }

            #canvas{
                position: absolute;
                width: 200px;
                height: 400px;
                left: 0px;
                top: 0px;
                user-select: none;
                cursor: default;
            }
        </style>
    </head>
    <body>
        <!-- Create the container of the tool -->
        <div id="tshirt-div">
            <!--
                Initially, the image will have the background tshirt that has transparency
                So we can simply update the color with CSS or JavaScript dinamically
            -->
            <img id="tshirt-backgroundpicture" src="./background_tshirt.png"/>

            <div id="drawingArea" class="drawing-area">
                <div class="canvas-container">
                    <canvas id="tshirt-canvas" width="200" height="400"></canvas>
                </div>
            </div>
        </div>

        <!-- The select that will allow the user to pick one of the static designs -->
        <br>
        <label for="tshirt-design">T-Shirt Design:</label>
        <select id="tshirt-design">
            <option value="">Select one of our designs ...</option>
            <option value="./batman.png">Batman</option>
        </select>

        <!-- The Select that allows the user to change the color of the T-Shirt -->
        <br><br>
        <label for="tshirt-color">T-Shirt Color:</label>
        <select id="tshirt-color">
            <!-- You can add any color with a new option and definings its hex code -->
            <option value="#fff">White</option>
            <option value="#000">Black</option>
            <option value="#f00">Red</option>
            <option value="#008000">Green</option>
            <option value="#ff0">Yellow</option>
        </select>

        <!-- Include Fabric.js in the page -->
        <script src="./fabric.min.js"></script>

        <script>
            let canvas = new fabric.Canvas('tshirt-canvas');

            function updateTshirtImage(imageURL){
                // If the user doesn't pick an option of the select, clear the canvas
                if(!imageURL){
                    canvas.clear();
                }

                // Create a new image that can be used in Fabric with the URL
                fabric.Image.fromURL(imageURL, function(img) {
                    // Define the image as background image of the Canvas
                    canvas.setBackgroundImage(img, canvas.renderAll.bind(canvas), {
                        // Scale the image to the canvas size
                        scaleX: canvas.width / img.width,
                        scaleY: canvas.height / img.height
                    });
                });
            }

            // Update the TShirt color according to the selected color by the user
            document.getElementById("tshirt-color").addEventListener("change", function(){
                document.getElementById("tshirt-div").style.backgroundColor = this.value;
            }, false);

            // Update the TShirt color according to the selected color by the user
            document.getElementById("tshirt-design").addEventListener("change", function(){

                // Call the updateTshirtImage method providing as first argument the URL
                // of the image provided by the select
                updateTshirtImage(this.value);
            }, false);
        </script>
    </body>
</html>
This document will generate with all the resources a pretty simple T-Shirt designer with static designs and colors that you can change through select inputs:
B. Dynamic images implementation
But, what if you are not the one who decides which picture is going to appear on the T-Shirt and with which size? Well, then we need obviously a more dynamic solution for this situation! This implementation will be based on the following conditions:
- The user should be able to upload a custom picture that will be placed on the T-Shirt.
- The user will be able to resize the images and load as well your own designs.
In this case, we will start with the same markup as with the first implementation:
<!-- Create the container of the tool -->
<div id="tshirt-div">
    <!--
        Initially, the image will have the background tshirt that has transparency
        So we can simply update the color with CSS or JavaScript dinamically
    -->
    <img id="tshirt-backgroundpicture" src="./background_tshirt.png"/>

    <!--
        The container where Fabric.js will work. Notice that in the the style of #canvas
        the width and height need to match with the attributes
    -->
    <div id="drawingArea" class="drawing-area">
        <div class="canvas-container">
            <canvas id="canvas" width="200" height="400"></canvas>
        </div>
    </div>
</div>
And the same CSS:
.drawing-area{
position: absolute;
top: 60px;
left: 122px;
z-index: 10;
width: 200px;
height: 400px;
}
.canvas-container{
width: 200px;
height: 400px;
position: relative;
user-select: none;
}
#tshirt-div{
width: 452px;
height: 548px;
position: relative;
background-color: #fff;
}
#canvas{
position: absolute;
width: 200px;
height: 400px;
left: 0px;
top: 0px;
user-select: none;
cursor: default;
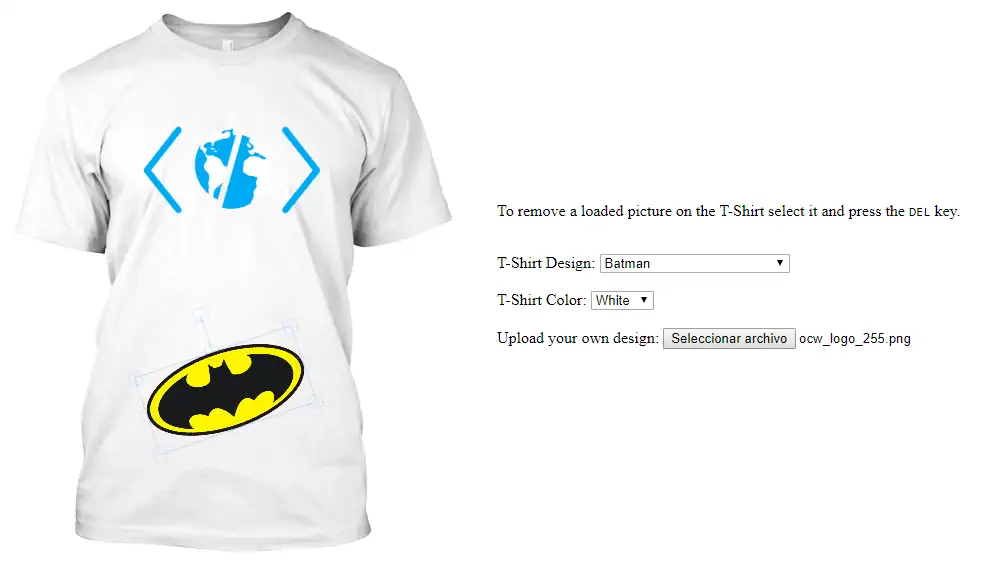
}The controls will be the same as well, however there will be another control that will allow the user to upload a custom picture to add to the T-Shirt:
<p>To remove a loaded picture on the T-Shirt select it and press the <kbd>DEL</kbd> key.</p>
<!-- The select that will allow the user to pick one of the static designs -->
<br>
<label for="tshirt-design">T-Shirt Design:</label>
<select id="tshirt-design">
    <option value="">Select one of our designs ...</option>
    <option value="./batman_small.png">Batman</option>
</select>

<!-- The Select that allows the user to change the color of the T-Shirt -->
<br><br>
<label for="tshirt-color">T-Shirt Color:</label>
<select id="tshirt-color">
    <!-- You can add any color with a new option and definings its hex code -->
    <option value="#fff">White</option>
    <option value="#000">Black</option>
    <option value="#f00">Red</option>
    <option value="#008000">Green</option>
    <option value="#ff0">Yellow</option>
</select>

<br><br>
<label for="tshirt-custompicture">Upload your own design:</label>
<input type="file" id="tshirt-custompicture" />
Now for the JavaScript logic, we will use almost the same function to load an image from a web URL but with a slightly modification, as instead of loading the image as background of Fabric.js, we will handle the picture as an object on the Fabric canvas:
// Select the canvas an make it accesible for all the snippets of this article
let canvas = new fabric.Canvas('tshirt-canvas');

/**
 * Method that adds an image to the T-Shirt canvas from a web URL.
 *
 * @param {String} imageUrl      The server URL of the image that you want to load on the T-Shirt.
 *
 * @return {void} Return value description.
 */
function updateTshirtImage(imageURL){
    fabric.Image.fromURL(imageURL, function(img) {
        img.scaleToHeight(300);
        img.scaleToWidth(300);
        canvas.centerObject(img);
        canvas.add(img);
        canvas.renderAll();
    });
}
We will add as well multiple listeners that will work as follows:
- The T-Shirt color select will change the color of the T-Shirt through CSS.
- The T-Shirt design select will load into the canvas a resizable object in the Fabric.js canvas from your own designs, not the user ones.
- The T-Shirt Custom Picture fileinput will allow the user to select a custom picture from the PC to load directly into the T-Shirt.
- When the user press the DEL key in the document (keycode 46), the selected element on the Fabric.js canvas will be removed.
// Update the TShirt color according to the selected color by the user
document.getElementById("tshirt-color").addEventListener("change", function(){
    document.getElementById("tshirt-div").style.backgroundColor = this.value;
}, false);

// Update the TShirt color according to the selected color by the user
document.getElementById("tshirt-design").addEventListener("change", function(){

    // Call the updateTshirtImage method providing as first argument the URL
    // of the image provided by the select
    updateTshirtImage(this.value);
}, false);

// When the user clicks on upload a custom picture
document.getElementById('tshirt-custompicture').addEventListener("change", function(e){
    var reader = new FileReader();

    reader.onload = function (event){
        var imgObj = new Image();
        imgObj.src = event.target.result;

        // When the picture loads, create the image in Fabric.js
        imgObj.onload = function () {
            var img = new fabric.Image(imgObj);

            img.scaleToHeight(300);
            img.scaleToWidth(300);
            canvas.centerObject(img);
            canvas.add(img);
            canvas.renderAll();
        };
    };

    // If the user selected a picture, load it
    if(e.target.files[0]){
        reader.readAsDataURL(e.target.files[0]);
    }
}, false);

// When the user selects a picture that has been added and press the DEL key
// The object will be removed !
document.addEventListener("keydown", function(e) {
    var keyCode = e.keyCode;

    if(keyCode == 46){
        console.log("Removing selected element on Fabric.js on DELETE key !");
        canvas.remove(canvas.getActiveObject());
    }
}, false);
Finally with all this code in our project, the dynamic T-Shirt designer that allows the user to upload his own pictures and resize them as he wants will end up something like:
<!DOCTYPE html>
    <html lang="en">
    <head>
        <meta charset="UTF-8">
        <meta name="viewport" content="width=device-width, initial-scale=1.0">
        <meta http-equiv="X-UA-Compatible" content="ie=edge">
        <title>Dynamic and Resizable Tee Designer</title>
        <style>
            .drawing-area{
                position: absolute;
                top: 60px;
                left: 122px;
                z-index: 10;
                width: 200px;
                height: 400px;
            }

            .canvas-container{
                width: 200px;
                height: 400px;
                position: relative;
                user-select: none;
            }

            #tshirt-div{
                width: 452px;
                height: 548px;
                position: relative;
                background-color: #fff;
            }

            #canvas{
                position: absolute;
                width: 200px;
                height: 400px;
                left: 0px;
                top: 0px;
                user-select: none;
                cursor: default;
            }
        </style>
    </head>
    <body>
        <!-- Create the container of the tool -->
        <div id="tshirt-div">
            <!--
                Initially, the image will have the background tshirt that has transparency
                So we can simply update the color with CSS or JavaScript dinamically
            -->
            <img id="tshirt-backgroundpicture" src="./background_tshirt.png"/>

            <div id="drawingArea" class="drawing-area">
                <div class="canvas-container">
                    <canvas id="tshirt-canvas" width="200" height="400"></canvas>
                </div>
            </div>
        </div>

        <p>To remove a loaded picture on the T-Shirt select it and press the <kbd>DEL</kbd> key.</p>
        <!-- The select that will allow the user to pick one of the static designs -->
        <br>
        <label for="tshirt-design">T-Shirt Design:</label>
        <select id="tshirt-design">
            <option value="">Select one of our designs ...</option>
            <option value="./batman_small.png">Batman</option>
        </select>

        <!-- The Select that allows the user to change the color of the T-Shirt -->
        <br><br>
        <label for="tshirt-color">T-Shirt Color:</label>
        <select id="tshirt-color">
            <!-- You can add any color with a new option and definings its hex code -->
            <option value="#fff">White</option>
            <option value="#000">Black</option>
            <option value="#f00">Red</option>
            <option value="#008000">Green</option>
            <option value="#ff0">Yellow</option>
        </select>

        <br><br>
        <label for="tshirt-custompicture">Upload your own design:</label>
        <input type="file" id="tshirt-custompicture" />

        <!-- Include Fabric.js in the page -->
        <script src="./fabric.min.js"></script>

        <script>
            let canvas = new fabric.Canvas('tshirt-canvas');

            function updateTshirtImage(imageURL){
                fabric.Image.fromURL(imageURL, function(img) {
                    img.scaleToHeight(300);
                    img.scaleToWidth(300);
                    canvas.centerObject(img);
                    canvas.add(img);
                    canvas.renderAll();
                });
            }

            // Update the TShirt color according to the selected color by the user
            document.getElementById("tshirt-color").addEventListener("change", function(){
                document.getElementById("tshirt-div").style.backgroundColor = this.value;
            }, false);

            // Update the TShirt color according to the selected color by the user
            document.getElementById("tshirt-design").addEventListener("change", function(){

                // Call the updateTshirtImage method providing as first argument the URL
                // of the image provided by the select
                updateTshirtImage(this.value);
            }, false);

            // When the user clicks on upload a custom picture
            document.getElementById('tshirt-custompicture').addEventListener("change", function(e){
                var reader = new FileReader();

                reader.onload = function (event){
                    var imgObj = new Image();
                    imgObj.src = event.target.result;

                    // When the picture loads, create the image in Fabric.js
                    imgObj.onload = function () {
                        var img = new fabric.Image(imgObj);

                        img.scaleToHeight(300);
                        img.scaleToWidth(300);
                        canvas.centerObject(img);
                        canvas.add(img);
                        canvas.renderAll();
                    };
                };

                // If the user selected a picture, load it
                if(e.target.files[0]){
                    reader.readAsDataURL(e.target.files[0]);
                }
            }, false);

            // When the user selects a picture that has been added and press the DEL key
            // The object will be removed !
            document.addEventListener("keydown", function(e) {
                var keyCode = e.keyCode;

                if(keyCode == 46){
                    console.log("Removing selected element on Fabric.js on DELETE key !");
                    canvas.remove(canvas.getActiveObject());
                }
            }, false);
        </script>
    </body>
</html>
Generating an application like the following one:
Exporting T-Shirt image
As final step, what everyone would need once the user has designed the T-Shirt is to export the picture of the design. To export it easily with JavaScript in both of our implementations, we recommend you to use the DomToImage library. dom-to-image is a library which can turn arbitrary DOM node into a vector (SVG) or raster (PNG or JPEG) image, written in JavaScript. It's based on domvas by Paul Bakaus and has been completely rewritten, with some bugs fixed and some new features (like web font and image support) added.
You can download this library from the official releases page of the repository at Github here, then include the script in your document:
<!-- Include DomToImage in the page -->
<script src="./domtoimage.min.js"></script>
And export it in your desired format e.g PNG, JPEG and create the picture from the T-Shirt, for example as PNG:
// Define as node the T-Shirt Div
var node = document.getElementById('tshirt-div');

domtoimage.toPng(node).then(function (dataUrl) {
    // Print the data URL of the picture in the Console
    console.log(dataUrl);

    // You can for example to test, add the image at the end of the document
    var img = new Image();
    img.src = dataUrl;
    document.body.appendChild(img);
}).catch(function (error) {
    console.error('oops, something went wrong!', error);
});
The variable dataUrl contains a Base64 image in PNG format e.g data:image/png;base64,iVBORw0KGg of the generated image of the library. You can check the docs of the library to know more about different ways of exporting the picture with JavaScript. An example of the exported image with this tool:

Happy coding !

