
As i was a beginner in the programming world, the term CDN was very new for me, after learning a little bit more about how it was supposed to work, I just thought about how difficult it would be to implement one for a personal website. However, a couple of years later i finally realized how easy it really was.
In this short article, we will explain you how to implement a CDN for your blog/website using the StackPath services for only $10 USD monthly.
Requirements
To follow this tutorial and implement a CDN for your website/blog/web app you will need:
- Create an account on Stackpath and buy the CDN service (we have an individual CDN service for just $10 USD up to 1TB Monthly). This service allows you to have unlimited websites associated to the same CDN service.
- Own a domain, in this tutorial we will use the
freeguitarprotabs.comdomain. - Access to the DNS settings of your domain. In our case, our domains has the DNS configuration on GoDaddy.
Advantages of using Stackpath CDN
- All PoPs are Included with every CDN package. This means that your website resources will be cached on servers in China, Australia, USA, Brazil and other countries around the world (32 Points of Presence).
- Every CDN and Edge Delivery subscription includes more per dollar than any other provider’s and cost-effective rates for additional consumption, with all pricing clearly published. For example, the cheapest individual CDN service of $10 USD is special for professional websites and blogs with standard content and average traffic levels, it includes:
- 1TB/mo Bandwidth
- Unlimited Sites
- Unlimited Requests
- All Global PoPs Included
- Free Private SSL Certificate per site
- SSL Traffic Included
- Network Layer DDoS Protection
- Really easy to configure.
1. Create a default stack
A stack is defined as a container associated to a subscription, in this subscription you will be able to add multiple services as a CDN, a Web Application Firewall, Traffic Monitoring and Analytics. In our case, we will use only the CDN service, so proceed to create a new default stack.
2. Create a new site
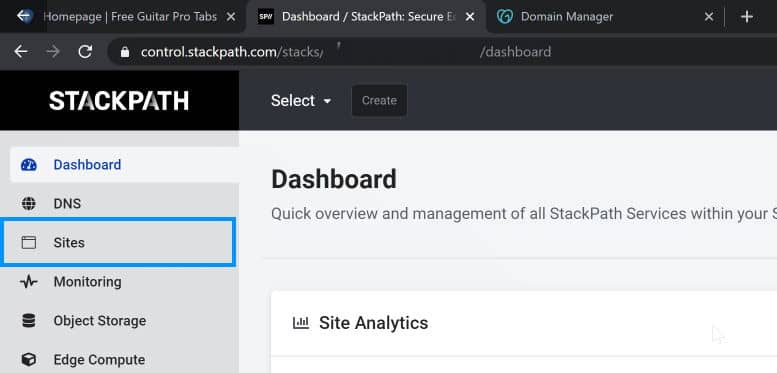
After creating the stack, go to the control panel website and search for the Sites option in the left side bar:
In this new page, register your domain and click on next (select the service that you hired for your stack, in our case only the CDN):

on the next step you will need to provide the IP of your server, which is automatically retrieved on the app when you provide the hostname (if it's not, you should provide the IP address):

After you provide this information, you will have a new website registered on your Stackpath control panel. Go now to the website and proceed with the configuration of the DNS.
You will need to update 2 records on your DNS manager, namely the @ CNAME and WWW as shown in the following table:
| Record Type | Name | Value | TTL |
| A | @ | <stackpath-given-ip> | 600 |
| CNAME | www | <sites's edge address> | 600 |
In our case, we made this through the DNS manager of GoDaddy:

You will need to update the values with the address of your stack. According to the current TTL value, you will have to wait the mentioned time until the records are updated. In our case, the TTL was of 1 hour, and we waited approximately 30 minutes until the Stackpath API was able to verify that the DNS records were available.
3. Create SSL certificate
Finally, in order to provide support for SSL, you will need to create a free certificate on the StackPath control panel. Select your website and go to the EdgeSSL page in the left side menu: Then, under the Custom Delivery Certificate panel, click on Create Certificate:

On the new page, select the delivery domains. In our case we will work with both version of our domain with and without www. Then click on Continue to validation. Select the HTTP Request as the validation method:

Finally, to complete the validation request, you will need to add a new CNAME record on the DNS manager with the following values:
| Record Type | Name | Value | TTL |
| CNAME | yourdomain.com | <sites's edge address> | 600 |
After registering the record, click on "I've configured my DNS, continue", your website should now have a correctly implemented CDN service.
Happy coding ❤️!

