

A web server is a system that processes requests via HTTP, the basic network protocol used to distribute information on the web or locally. You can use the http module of Node.js wheter to request things from the web or even create your own http server to answer to whose responses, serve files etc.
In this article, you'll learn how to implement a self-written http server using the http module and the httpdispatcher module for adding routing functionality.
Implementation
To get started, create a JS file with the name server.js, it will contain the following code to create and handle a basic http server:
Note: the http module is already built in node.js so you don't need to download any module. Unless not yet.
// require the http module of node.js
var http = require('http');

// define the port of access for your server
const PORT = 8080;

// We need a function which handles requests and send response
function handleRequest(request, response){
    response.end('Server working properly. Requested URL : ' + request.url);
}

// Create a server
var myFirstServer = http.createServer(handleRequest);

// Start the server !
myFirstServer.listen(PORT, function(){
    // Callback triggered when server is successfully listening. Hurray!
    console.log("Server listening on: http://localhost:%s", PORT);
});
The createServer method returns a new instance of http.Server. To create our server, you need to specify a port and use the listen method, this cause the server to accept connections on the specified handle.
To start the server use the following command in your Node.js command prompt:
node server.jsNow open your favorite browser and navigate to http://localhost:8080, you should get the following response (and it should change according to the given URL):
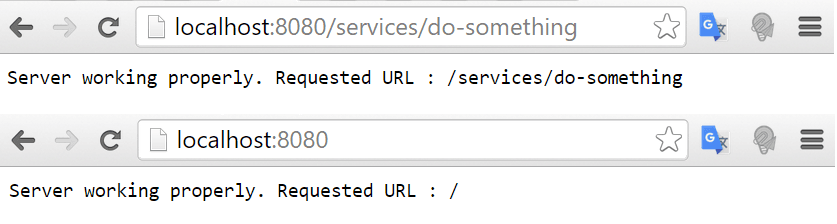
As you can see, the server answers to all url addresses.
Note that the http module is very simple, creating a complex web application using the previous example would consume a lot of time for a properly implementation, so you should use the previous example for simple things as serve files or for learning purposes. If you're working with complex projects, you should use a framework for it i.e Express, hapi, koa or restify. In this article you'll learn how to create a basic routing system using the httpdispatcher module.
Adding routing functionality
As mentioned before, your server for now return a response for any URL, therefore to add some "real life" features, your server need to respond to specific URL addresses.
To handle this in this basic example, we need to use a dispatcher, it will work as a kind of router that allow you to respond differently to particular URLs. httpdispatcher is a simple class allows developer to have a clear dispatcher for dynamic pages and static resources.
To add http dispatcher into your project, add the module executing the following command in the Node.js command prompt:
npm install httpdispatcherNow, let's add some routes using the dispatcher in the example:
// require the http module of node.js
var http = require('http');
// require the dispatcher module
var dispatcher = require('httpdispatcher');

// define the port of access for your server
const PORT = 8080;

// We need a function which handles requests and send response
function handleRequest(request, response){
    try {
        // log the request on console
        console.log(request.url);
        // Dispatch
        dispatcher.dispatch(request, response);
    } catch(err) {
        console.log(err);
    }
}

// Create a server
var myFirstServer = http.createServer(handleRequest);

// add some routes

//A sample GET request
dispatcher.onGet("/", function(req, res) {
    res.writeHead(200, {'Content-Type': 'text/html'});
    res.end('<h1>Hey, this is the homepage of your server</h1>');
});

dispatcher.onGet("/welcome", function(req, res) {
    res.writeHead(200, {'Content-Type': 'text/plain'});
    res.end('Welcome homepage');
});

dispatcher.onError(function(req, res) {
    res.writeHead(404);
    res.end("Error, the URL doesn't exist");
});

// Start the server !
myFirstServer.listen(PORT, function(){
    // Callback triggered when server is successfully listening. Hurray!
    console.log("Server listening on: http://localhost:%s", PORT);
});
The httpdispatcher module makes easy for you the creation of routes and responses for different request formats (POST, GET) and as promised, you have now a functional http server made with Node.js, to start it execute:
node server.jsIf you navigate to http://localhost:8080 and http://localhost:8080/welcome you'll see respectively the response given in the example. If you try to access a not existent url, i.e http://localhost:8080/this-doesnt-exists you'll get a 404 response with "Error, the URL doesn't exist".
If you want more powerful features, you can read our tutorial of How to create a http server with Express for high scalability projects.
Have fun !

