
If you want to create instead of a Squirrel based installer, a MSI (Microsoft Installer) setup, please follow this tutorial instead.
As a developer, you may know that Linux has package managers so the developers don't "need" to make the installers. Developers just need to provide a package for a distribution, each distribution then has a way to install this package and this way can be in a terminal (apt-get) or via a graphical interface, e.g. Ubuntu Software Center. However, Windows is not Linux.

Almost all installers are created by a tool (e.g. WiX, Nsis, Inno Setup and many others). In this article, you will learn how to create an installer for windows using the electron-winstaller module which uses Squirrel, the installation and update framework for Windows desktop apps.
1. Prepare your work area
And with this, we don't mean that you should clean your computer. To make this tutorial easy to understand, we are going to create a folder in the desktop with the name electron-workspace, this folder will contain inside a folder that contains the source code of your Electron Project:
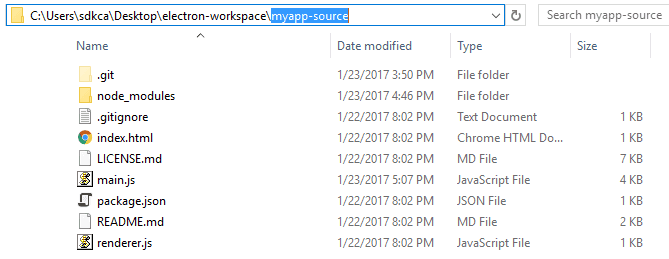
In this case, the folder will be located at C:\Users\sdkca\Desktop\electron-workspace and the source code of the electron project will be inside of it (myapp-source).
2. Install the Electron winstaller module
Now, we need to install the module that will help us to create the installer, in this case we are going to use electron-winstaller. This NPM module builds Windows installers for Electron apps using Squirrel. Start the NodeJS command prompt and Navigate to the workspace using (note that the module needs to be installed in the workspace, not in your project):
cd C:\Users\sdkca\Desktop\electron-workspaceAnd then install the module with:
npm install electron-winstallerAfter the installation of the module, our workspace will have now 2 folders:

3. Manage desktop shortcuts (install, update and uninstall events)
An application that can be installed, but the executable can't be found to start it once it's closed doesn't work for nothing. Therefore, we are going to use the electron-squirrel-startup module that will help you to achieve our goal. It handles the most common commands, such as managing desktop shortcuts (installation event, update event and uninstall event).
This module needs to be installed inside your project, not in the workspace, therefore navigate to the folder of the source code of your Electron project with the NodeJS command prompt, in this case we are going to use:
cd C:\Users\sdkca\Desktop\electron-workspace\myapp-sourceAnd then install the module using:
npm install electron-squirrel-startupAfter the installation of the module, we need to instruct with some code what we are going to do. We are going to add some code, specifically in the main.js file of your Electron Project. At the start of your file (after the declaration of the app variable) add the following lines:
// Module to control application life. (this variable should already exist)
const app = electron.app

// this should be placed at top of main.js to handle setup events quickly
if (handleSquirrelEvent(app)) {
    // squirrel event handled and app will exit in 1000ms, so don't do anything else
    return;
}
The handleSquirrelEvent function expects as first argument the app variable, this function can be added at the end of your main.js file:
Note
The following code will be only executed if the application is within an installer, so this code will be not executed while you work on your project.
function handleSquirrelEvent(application) {
    if (process.argv.length === 1) {
        return false;
    }

    const ChildProcess = require('child_process');
    const path = require('path');

    const appFolder = path.resolve(process.execPath, '..');
    const rootAtomFolder = path.resolve(appFolder, '..');
    const updateDotExe = path.resolve(path.join(rootAtomFolder, 'Update.exe'));
    const exeName = path.basename(process.execPath);

    const spawn = function(command, args) {
        let spawnedProcess, error;

        try {
            spawnedProcess = ChildProcess.spawn(command, args, {
                detached: true
            });
        } catch (error) {}

        return spawnedProcess;
    };

    const spawnUpdate = function(args) {
        return spawn(updateDotExe, args);
    };

    const squirrelEvent = process.argv[1];
    switch (squirrelEvent) {
        case '--squirrel-install':
        case '--squirrel-updated':
            // Optionally do things such as:
            // - Add your .exe to the PATH
            // - Write to the registry for things like file associations and
            //   explorer context menus

            // Install desktop and start menu shortcuts
            spawnUpdate(['--createShortcut', exeName]);

            setTimeout(application.quit, 1000);
            return true;

        case '--squirrel-uninstall':
            // Undo anything you did in the --squirrel-install and
            // --squirrel-updated handlers

            // Remove desktop and start menu shortcuts
            spawnUpdate(['--removeShortcut', exeName]);

            setTimeout(application.quit, 1000);
            return true;

        case '--squirrel-obsolete':
            // This is called on the outgoing version of your app before
            // we update to the new version - it's the opposite of
            // --squirrel-updated

            application.quit();
            return true;
    }
};
The previous code should handle the basic things that happens when a new app is installed in your system e.g the shortcut will be added to the Start Menu and Desktop and it will remove the shortcut when the uninstaller is executed, besides it should work without any modification. Feel free to add more code if you need to.
4. Build your app
The required modifications to accomplish the basic tasks of an installed applications were made, now proceed to build your application. We assume that you know how to build your application using tools like electron-packager. If you don't, please read the following article about how to create a distribution from your app using electron packager in Windows.
After know how to build your application, proceed to do it. Navigate to the workspace (in order to build the project inside of it):
cd C:\Users\sdkca\Desktop\electron-workspace\myapp-sourceAnd build the project, for example, we are going to build our project using the following command:
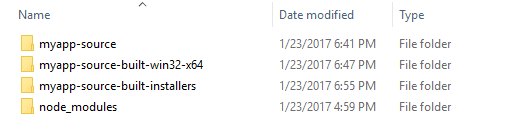
electron-packager C:\Users\sdkca\Desktop\electron-workspace\myapp-source --platform=win32 --arch=x64 myapp-source-builtThat will create the myapp-source-built-win32-x64 folder inside the electron-workspace folder that has the following structure:

5. Create an installer from your application
Once your project has been built, you can create an installer from it. Create a folder where the installers will be created, specifically in our workspace (C:\Users\sdkca\Desktop\electron-workspace) with the name you want, in this case it will be myapp-source-built-installers. You won't touch this folder as the installers will be created in the next step automatically. At this step, you should have 4 folders (myapp-source-built-installers is empty):
Now create a script that will create our installers, create the build.js file in our electron workspace (C:\Users\sdkca\Desktop\electron-workspace) with the following code inside:
Note
If you don't feel comfortable working with relative paths, you can use absolute paths in your first try to know what's happening.
// C:\Users\sdkca\Desktop\electron-workspace\build.js
var electronInstaller = require('electron-winstaller');

// In this case, we can use relative paths
var settings = {
    // Specify the folder where the built app is located
    appDirectory: './myapp-source-built-win32-x64',
    // Specify the existing folder where
    outputDirectory: './myapp-source-built-installers',
    // The name of the Author of the app (the name of your company)
    authors: 'Our Code World Inc.',
    // The name of the executable of your built
    exe: './myapp-source-built.exe'
};

resultPromise = electronInstaller.createWindowsInstaller(settings);

resultPromise.then(() => {
    console.log("The installers of your application were succesfully created !");
}, (e) => {
    console.log(`Well, sometimes you are not so lucky: ${e.message}`)
});
Note
You can change the icon and other properties in the settings of the previous script. Check all the supported options here.
To build an installer from your app, you just need to execute this script. However, in case that you find this error:
The Component/@Id attribute's value, 'your-app-exe-name.exe', is not a legal identifier. Identifiers may contain ASCII characters A-Z, a-z, digits, underscores (_), or periods (.). Every identifier must begin with either a letter or an underscore.
Is necessary to edit the name property of your project in the /your-built-project/resources/app/package.json file and remove or replace all the hyphen (- symbol) e.g if your package.json looks like:
{
  "name": "electron-quick-start"
}
Change it to:
{
  "name": "electron_quick_start"
}
If you already verified this, proceed to execute the build.js script navigating to the workspace with the NodeJS command prompt:
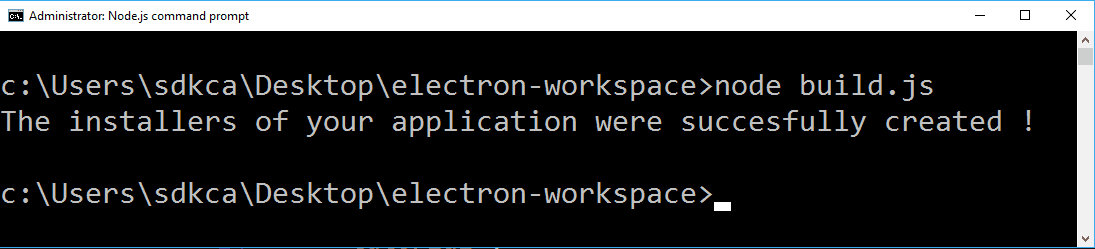
cd C:\Users\sdkca\Desktop\electron-workspaceAnd execute the script:
node build.jsThe installer files will be created and it will took a while. Once the installers are created you will see the following message in the console:
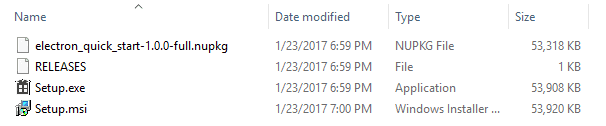
Finally, open the installers folder (in this case located in C:\Users\sdkca\Desktop\electron-workspace\myapp-source-built-installers) and you will find there 3 installers (msi installer, executable installer and a nuGET package):
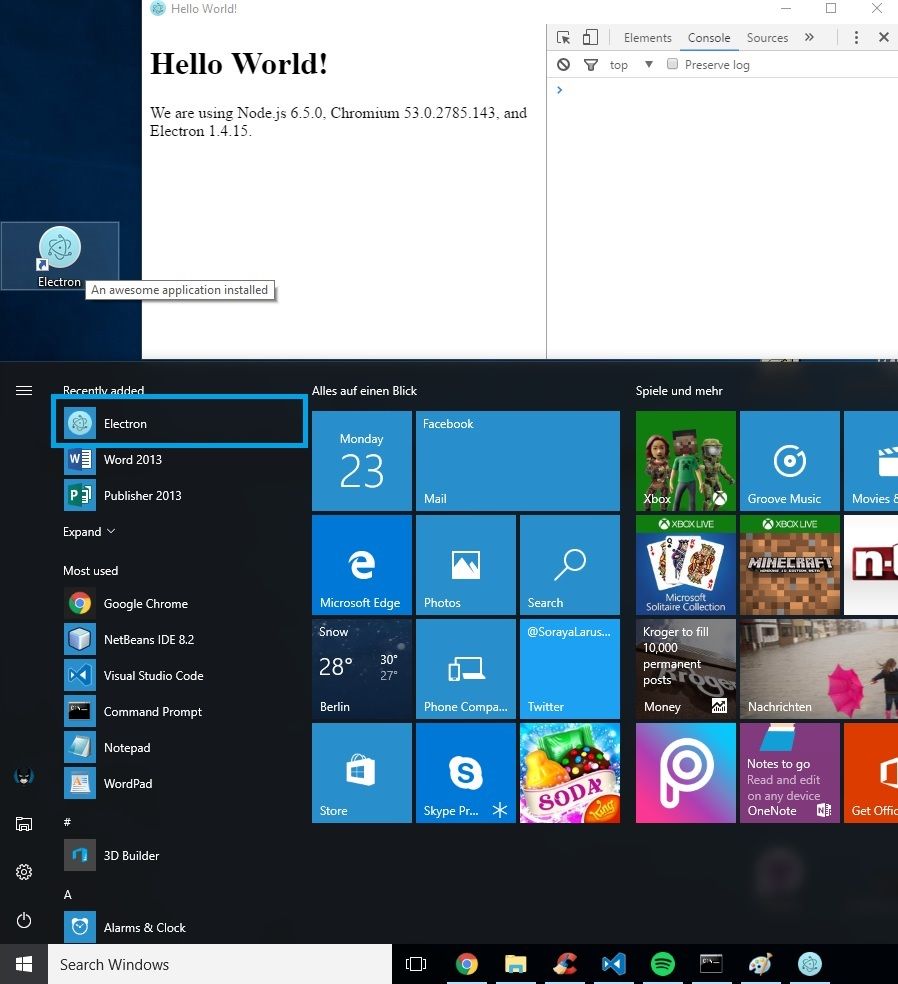
You can try to install your app locally executing as administrator the Setup.exe file. Then a mini setup will install the application on your system and you will be able to see it in the start menu of Windows and as a shortcut in the Desktop:
Note
The setup loading animation can be changed if you provide the path of a gif file to show during the installation in the loadingGif option in your build.js script.
Note that the name of the executable, description and other properties can be changed in the package.json of your app and in the options of the winstaller module, for more information please visit the repository to see the documentation.
Important notes
For development or internal use, creating installers without a signature is okay, but for a production app you need to sign your application. Internet Explorer's SmartScreen filter will block your app from being downloaded, and many anti-virus vendors will consider your app as malware unless you obtain a valid cert.
Any certificate valid for "Authenticode Code Signing" will work here, but if you get the right kind of code certificate, you can also opt-in to Windows Error Reporting. This MSDN page has the latest links on where to get a WER-compatible certificate. The "Standard Code Signing" certificate is sufficient for this purpose.
Happy coding !

