
If you ever tried to learn to play the guitar, and the geek side was already alive inside of you, then you probably tried the awesome Guitar Pro, the software to compose music, transcribe your favorite songs, or simply read the thousands of tabs available on the Internet. The way in you could simply download a tab of a song and then try to play it with the guitar was simply incredible.
Now, if you have basic programming knowledge with Javascript, you could try to implement and create your own "Guitar Pro" in the browser using the open source library AlphaTab and you will learn how to do it easily in this article.
What's AlphaTab
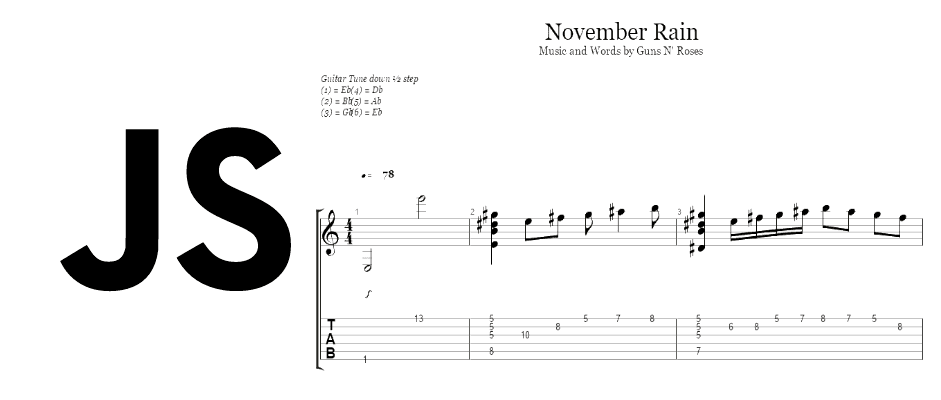
alphaTab is a cross platform music notation and guitar tablature rendering library. You can use alphaTab within your own website or application to load and display music sheets from data sources like Guitar Pro or the built in markup language named alphaTex. alphaTab mostly focuses on web based platforms allowing music notation to be embedded into websites and browser based apps but is designed to be used also from .net based platforms like Windows, UWP and Xamarin. The most known features of AlphaTab are:
- load GuitarPro 3-5, GuitarPro 6, AlphaTex or MusicXML
- render as SVG, HTML5 canvas, GDI+
- display single or multiple instruments as standard music notation and guitar tablatures consisting of song information, repeats, alternate endings, guitar tunints, clefs, key signatures, time signatures, notes, rests, accidentals, drum tabs, piano grand staff, tied notes, grace notes, dead notes, ghost notes, markers, tempos, lyrics, chords, vibratos, dynamics, tap/slap/pop, fade-in, let-ring, palm-mute, string bends, whammy bar, tremolo picking, strokes, slides, trills, pick strokes, tuplets, fingering, triplet feels.
- adapt to your responsive design by dynamic resizing.
- play the music sheet via HTML5 Web Audio API and Flash.
It is strictly prohibited to remove the copyright notice "Rendered using alphaTab" in any way. That means you must not:
- Remove or change the parts of the source code which are responsible for rendering this notice.
- Hide this message by cropping or colorizing the message.
By using alphaTab you agree that you won't try anything to hide this message. Visit the homepage of the project and the official Github repository for more information.
Requirements
- The build master (Javascript source code and fonts) for Javascript of AlphaTab.
- As AlphaTab uses WebWorkers, the files needs to be served in the
httporhttpsprotocol (file://won't work). - A valid guitar pro tab to test (you can find a lot of tabs from your favorite songs and artists in freeguitarprotabs.com).
Besides, AlphaTab uses the Bravura Font to render the Music Notation. Bravura is a music font that draws on the heritage of the finest European music engraving of the 19th and early 20th centuries, with a bolder and more substantial look than most other music fonts: thin strokes are slightly thicker than in other fonts, improving the overall "blackness" of the font and its legibility when read at a distance. Bravura is licensed under the SIL Open Font License (OFL), which means that it is free to download with very few restrictions on its use.
Be sure to import the font in your project, otherwise the notes won't be correctly rendered:
Getting started
1. Add required files
Add the required files to make AlphaTab work with some script tags:
<!-- Including alphaTab -->
<script type="text/javascript" src="js/AlphaTab.js"></script>

<!-- jQuery Plugin -->
<script src="js/jquery-2.2.4.min.js"></script>
<script type="text/javascript" src="js/jquery.alphaTab.js"></script>

<!-- Including alphaSynth -->
<script type="text/javascript" src="js/swfobject.js"></script>
<script type="text/javascript" src="js/AlphaSynth.js"></script>

<!-- alphaSynth Plugin -->
<script type="text/javascript" src="js/jquery.alphaTab.alphaSynth.js"></script>
2. Create music sheet container
As first step, you need to create a container that will wrap the entire canvas or SVG generated by the library. This div needs to provide the URL to the Guitar Pro Tab file through the data-file attribute and you need to define the initial track to show (to prevent errors, always the first track identified with 0). Optionally you can insert a div that shows a loading message and is remove later when the Guitar Pro Tab is finally loaded:
<div id="alphaTab" data-file="/path/to/myguitarpro-tab-file.gp3" data-tracks="0">

    <div id="loading-div">
        Loading ...
    </div>
</div>
3. Add action buttons
To provide a basic control for the playback, we need to add some buttons that allow us to play,pause and stop the MIDI sounds. Besides, we are going to add a div to show the information of the tab:
<input type="button" id="playPause" value="Play/Pause"/>
<input type="button" id="stopBtn" value="Stop"/>

<div id="file-info"></div>
4. Declare flag variables and initialize alphaTab
We'll use some flags to know the status of the tab, this in order to execute conditionally other things:
var playerReady = false;
var playerState = 0;
var at = $('#alphaTab');

// Load alphaTab
at.alphaTab({
    width: -1, // negative width enables auto sizing
    useWorker: true
});

// Initialize Player and Setup Player UI
var as = at.alphaTab('playerInit'); // init alphaSynth
5. Add some basic event listeners and actions
Now add some event listeners, to know when the Guitar Pro Tab is loaded, when the state of the player changes and the click listeners to start, stop and pause the playback:
at.on('loaded', function (e) {
    var score = e.originalEvent.detail;

    // Add only the name of the tracks for information:
    var info = jQuery('#file-info');
    info.html('');
    info.append('<p><b>Title:</b> ' + score.Title + '</p>');
    info.append('<p><b>Subtitle:</b> ' + score.Subtitle + '</p>');
    info.append('<p><b>Album:</b> ' + score.Album + '</p>');
    info.append('<p><b>Tempo:</b> ' + score.Tempo + '</p>');
    info.append('<p><b>Bars:</b> ' + score.MasterBars.length + '</p>');
    info.append('<p><b>Tracks:</b> (' + score.Tracks.length + ')</p>');
    var tracksHTML = $('<ul></ul>');

    for (var i = 0; i < score.Tracks.length; i++) {
        tracksHTML.append('<li> (#' + i + ') ' + score.Tracks[i].Name + '</li>');
    }

    info.append(tracksHTML);

    // Remove loading window
    $("#loading-div").remove();
});


// Important to load the file that allows to play sounds
as.On('ready', function (r) {
    // Load sound data (used to play sound, not the song itself)
    // Note: you need to provide the correct path to the default.sf2 file
    as.LoadSoundFontUrl('files/default.sf2');
});

// Show progress of the load of the guitar pro tab
as.On('soundFontLoad', function (loaded, full) {
    var percentage = ((loaded / full) * 100) | 0;

    console.log("Percentage sound loaded ", percentage + '%');
});


as.On('soundFontLoaded', function () {
    console.log("The sound source has been loaded");
});


as.On('readyForPlay', function (r) {
    playerReady = r;
});

as.On('playerStateChanged', function (s) {
    playerState = s;

    console.log(playerState);
    // 0 stopped
    // 1 playing
    // 2 paused
});

$('#playPause').click(function () {
    if (playerState == 1) {
        as.Pause();
    } else {
        as.Play();
    }
});

$("#stopBtn").click(function () {
    as.Stop();
});
6. Enable cursor and add basic CSS
Enable the cursor to see the progress of the playback and to highlight the notes:
at.alphaTab('playerCursor');And add some CSS to make the player work (this will provide a width to the container and some style to the cursor):
.barCursor {
opacity: 0.15;
background: #FFF200;
}
.beatCursor {
opacity: 0.75;
background: #0078ff;
}
.selectionWrapper div {
opacity: 0.1;
background: #4040FF;
}
.atHighlight * {
fill: #0078ff;
}
.alphaTabSurface {
box-shadow: 0 0 10px rgba(0, 0, 0, 0.3);
background: #FFF;
border-radius: 3px;
}
#alphaTab {
width: 95%;
display: block;
margin: auto;
}
#wrapper {
position: absolute;
top: 100px;
background: blue;
height: 600px;
width: 80%;
overflow: auto;
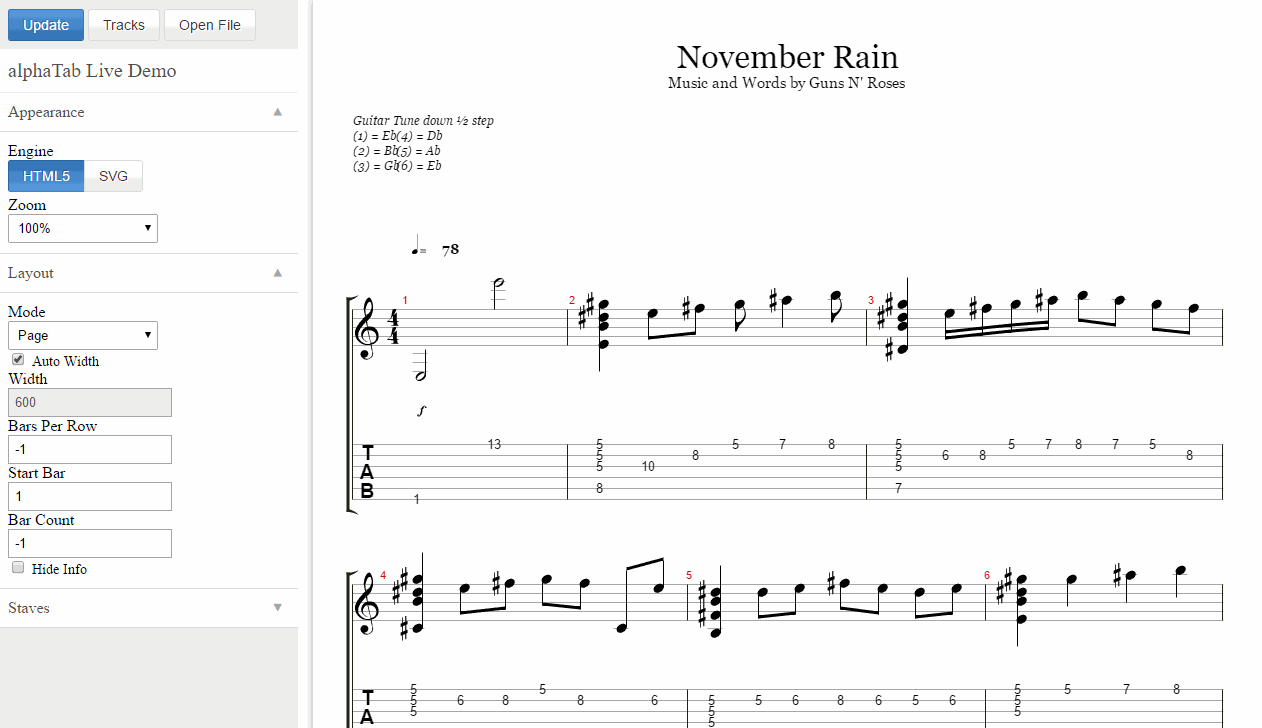
}After following the previous step, you should have now a very simple implementation of a player for Guitar Pro files in the browser. Besides, we recommend you to check other features and examples of AlphaTab here.
Example
The following example shows how to show the tracks of a Guitar Pro Tab file and the buttons to play, pause or stop it:
<!DOCTYPE html>
<html lang="en">

<head>
    <meta charset="utf-8">
    <title>Guitar Pro tab with AlphaTab</title>

    <!-- Including alphaTab -->
    <script type="text/javascript" src="js/AlphaTab.js"></script>

    <!-- jQuery Plugin -->
    <script src="js/jquery-2.2.4.min.js"></script>
    <script type="text/javascript" src="js/jquery.alphaTab.js"></script>

    <!-- Including alphaSynth -->
    <script type="text/javascript" src="js/swfobject.js"></script>
    <script type="text/javascript" src="js/AlphaSynth.js"></script>

    <!-- alphaSynth Plugin -->
    <script type="text/javascript" src="js/jquery.alphaTab.alphaSynth.js"></script>

    <!-- Styles used during the reproduction of the MIDI melody -->
    <style type="text/css">
        .barCursor {
            opacity: 0.15;
            background: #FFF200;
        }

        .beatCursor {
            opacity: 0.75;
            background: #0078ff;
        }

        .selectionWrapper div {
            opacity: 0.1;
            background: #4040FF;
        }

        .atHighlight * {
            fill: #0078ff;
        }

        .alphaTabSurface {
            box-shadow: 0 0 10px rgba(0, 0, 0, 0.3);
            background: #FFF;
            border-radius: 3px;
        }

        #alphaTab {
            width: 95%;
            display: block;
            margin: auto;
        }

        #wrapper {
            position: absolute;
            top: 100px;
            background: blue;
            height: 600px;
            width: 80%;
            overflow: auto;
        }
    </style>
</head>

<body>
    <!-- START CONTROLS AND INFORMATION -->
    <div>
        <div style="display: inline-block; margin: 1em;">
            <!-- The action button to play or pause the tab -->
            <input type="button" id="playPause" value="Loading ... " disabled="disabled" />
            <input type="button" id="stopBtn" value="Stop" disabled="disabled" />
        </div>
        <div style="display: inline-block; margin: 1em;">
            <!-- The basic information of the gp file will be shown here -->
            <div id="file-info"></div>
        </div>
        <div style="display: inline-block;margin: 1em;">
            <!-- The track filter will be rendered in this div-->
            <div id="trackList"></div>
        </div>
    </div>
    <!-- END CONTROLS AND INFORMATION -->


    <!-- START DYNAMIC MUSIC SHEET -->

    <!--
        The data-tracks defines which track of the gp file should be initially used
        Note: change the data-file property according to the URL of your guitar tab file
    -->
    <div id="alphaTab" data-file="files/guns_november_rain.gp3" data-tracks="0">
        <!-- This loading div is removed once the gp file is loaded -->
        <div id="loading-div">
            Loading ...
        </div>
    </div>

    <!-- END DYNAMIC MUSIC SHEET -->

    <script>
        var playerReady = false;
        var playerState = 0;
        var at = $('#alphaTab');


        // 1. Register resize event
        // we do this before initializing to receive the initial resize event
        $(at).on('resize', function (e) {
            var info = e.originalEvent.detail;
            var newSize = info.NewWidth;

            if (newSize < 700) {
                console.log(info.NewWidth, 'horizontal');
                info.Settings.Layout.Mode = "horizontal";
            } else {
                console.log(info.NewWidth, 'page');
                info.Settings.Layout.Mode = "page";
                delete info.Settings.Layout.AdditionalSettings['barsPerRow'];
            }
        });

        //
        // 2. Load alphaTab
        at.alphaTab({
            width: -1, // negative width enables auto sizing
            useWorker: true
        });

        //
        // 1. Initialize track selector
        // Note that in this example we allow to render multiple tracks in the view
        // You can simply create a select box that displays only 1 track at time
        var tracks = [];
        at.on('loaded', function (e) {
            var score = e.originalEvent.detail;
            var trackList = $('#trackList');
            trackList.empty();

            // Loop through the tracks of the file and add the tracks filter
            for (var i = 0; i < score.Tracks.length; i++) {
                // build list item for track
                var li = $('<li></li>');
                var a = $('<a href="#"></a>')
                    .data('track', score.Tracks[i].Index)
                    .append('<input type="checkbox" />')
                    .append(score.Tracks[i].Name)

                    // here we build the new track list and render it
                    .on('click', function (e) {
                        var track = $(this).data('track');
                        var index = tracks.indexOf(track);
                        if (index > -1) {
                            tracks.splice(index, 1);
                            $(this).find('input').prop('checked', false);
                        } else {
                            tracks.push(track);
                            tracks.sort(),
                                $(this).find('input').prop('checked', true);
                        }

                        // render new tracks
                        at.alphaTab('tracks', tracks);

                        $(e.target).blur();

                        return false;
                    });

                li.append(a);

                trackList.append(li);
            }


            // Add only the name of the tracks for information:

            var info = jQuery('#file-info');
            info.html('');
            info.append('<p><b>Title:</b> ' + score.Title + '</p>');
            info.append('<p><b>Subtitle:</b> ' + score.Subtitle + '</p>');
            info.append('<p><b>Album:</b> ' + score.Album + '</p>');
            info.append('<p><b>Tempo:</b> ' + score.Tempo + '</p>');
            info.append('<p><b>Bars:</b> ' + score.MasterBars.length + '</p>');
            info.append('<p><b>Tracks:</b> (' + score.Tracks.length + ')</p>');
            var tracksHTML = $('<ul></ul>');

            for (var i = 0; i < score.Tracks.length; i++) {
                tracksHTML.append('<li> (#' + i + ') ' + score.Tracks[i].Name + '</li>');
            }

            info.append(tracksHTML);

            $("#loading-div").remove();
        });


        // 3. Initialize Player and Setup Player UI
        var as = at.alphaTab('playerInit'); // init alphaSynth

        as.On('ready', function (r) {
            // Load sound data (used to play sound, not the song itself)
            as.LoadSoundFontUrl('files/default.sf2');
        });


        as.On('soundFontLoad', function (loaded, full) {
            var percentage = ((loaded / full) * 100) | 0;

            console.log("Percentage sound loaded ", percentage + '%');
        });


        as.On('soundFontLoaded', function () {
            console.log("The sound source has been loaded");
        });


        as.On('readyForPlay', function (r) {
            playerReady = r;
            updateControls();
        });

        as.On('playerStateChanged', function (s) {
            playerState = s;
            updateControls();
        });

        $('#playPause').click(function () {
            if (playerState == 1) {
                as.Pause();
            } else {
                as.Play();
            }
        });

        $("#stopBtn").click(function () {
            as.Stop();
            // Disable stop btn
            $(this).attr("disabled", "disabled");
        });

        function updateControls() {
            if (playerReady) {
                $('#playPause').prop('disabled', false);
                $('#playPause').removeAttr('disabled');

                switch (playerState) {
                    case 0: // stopped
                        $("#playPause").val("Play");
                        break;

                    case 1: // playing
                        $("#playPause").val("Pause");
                        $('#stopBtn').removeAttr('disabled').removeClass('disabled');
                        break;

                    case 2: // paused
                        $("#playPause").val("Play");
                        $('#stopBtn').removeAttr('disabled').removeClass('disabled');
                        break;
                }
            }
        }

        // 3. Add cursors (optional, displays the current position of the playback etc)
        at.alphaTab('playerCursor');

    </script>
</body>

</html>
The previous html file (with all JS files and Fonts) should display the following result in the browser:
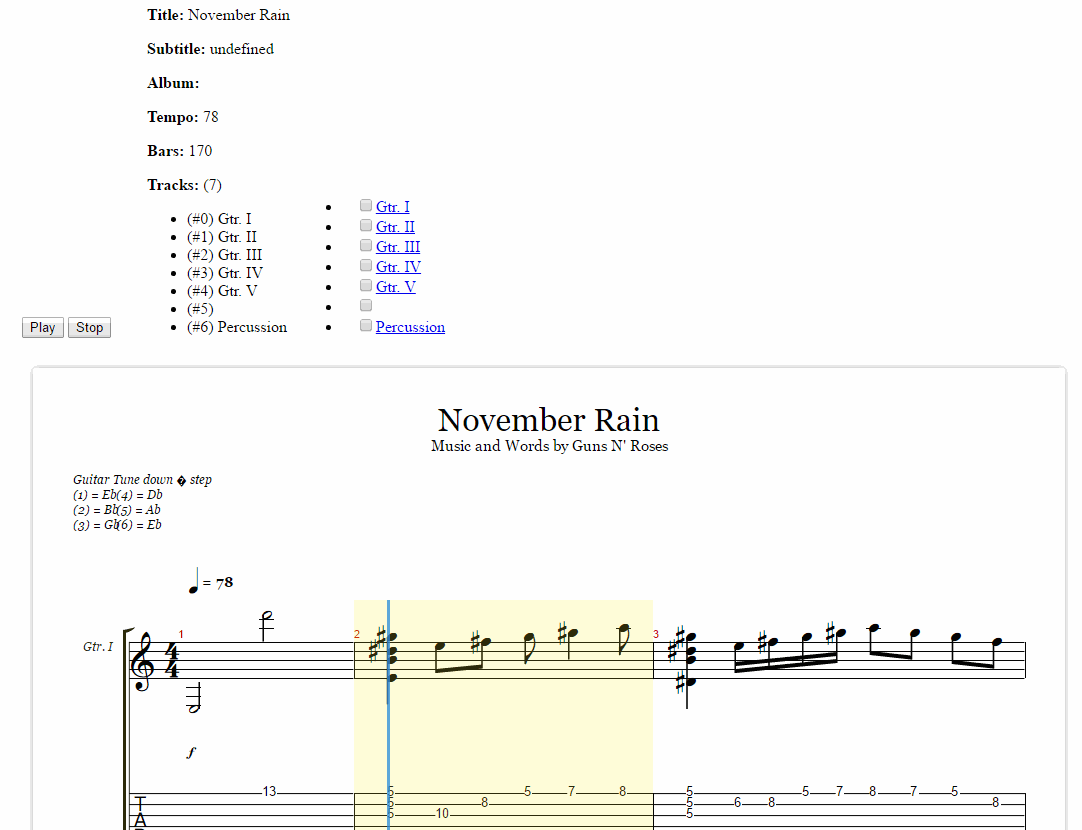
As previously said, the example is very agnostic and really, really simple, however it's very useful to see how the basic methods of AlphaTab work. Alternatively, you can simply download the latest release of AlphaTab that includes the library and some examples (including a tab that will be displayed):
Happy coding !

