
CefSharp will be always the best open source solution to create graphical user interfaces with HTML, CSS and JavaScript. However, in the commercial side, there are a lot of companies that rely on Sciter for the UI of their application. Sciter is an embeddable HTML/CSS/script engine for modern UI development. Sciter brings a stack of web technologies to desktop UI development. Web designers, and developers, can reuse their experience and expertise in creating modern looking desktop applications.
Advantages of Sciter in comparison with CefSharp? Well, an empty application that implements CefSharp will be at least of 40MB, while Sciter only about 13MB. To implement Sciter on your C# project, we'll install the native C# bindings for Sciter created by @MISoftware.
Requirements
- You won't need anything special but Visual Studio and the nuGet package manager. nuGet is available by default from Visual Studio > 2010, in this case we are going to use Visual Studio Community 2017.
- We'll follow the tutorial with an already existing project, so be sure to create an empty (or use an existent project) WinForms C# application first.
1. Download Sciter binaries
The first thing you will need to use sciter, is sciter itself because the native bindings doesn't provide the source of sciter. Open the official website of Sciter and go to the downloads area and click on the Download SDK Button.
Note
Don't worry about the download filesize of the SDK. It usually is about 50MB (with all the platforms iOS,Android etc), however for C# we will need to copy only around 12MB.
From the zip file, you will need to copy all the content inside the bin folder according to your platform:
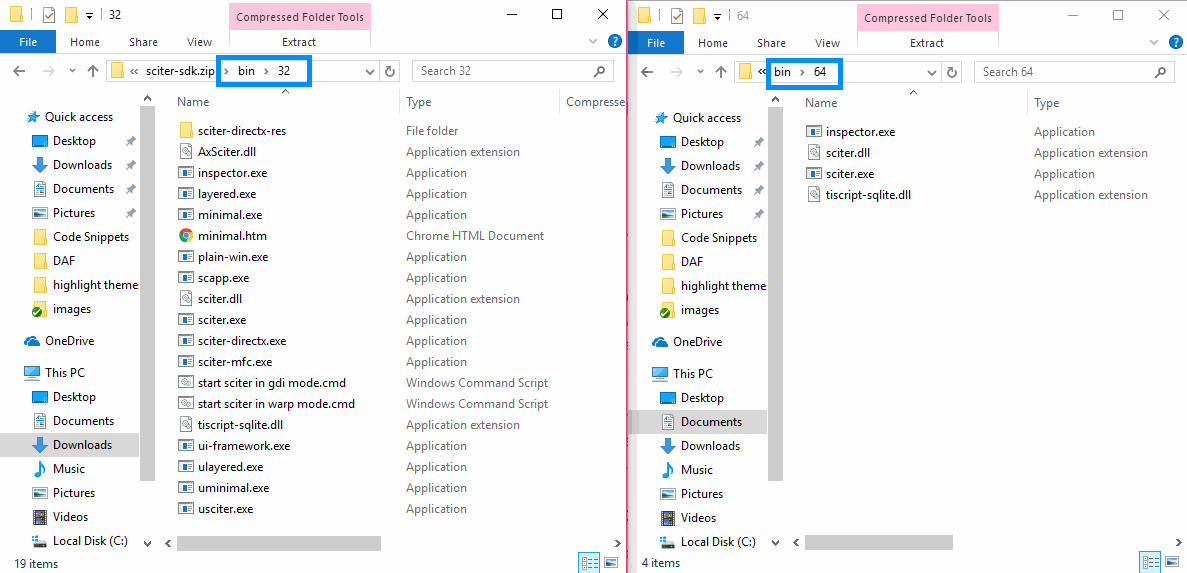
That means that if your WinForms project is using x64 copy the content of /bin/64 or if you're using x86 copy the content of /bin/32. All the files from the sciter now need to be placed on the bin/Debug and bin/Release folders of your project.
Be sure to do correctly this step, otherwise later while you try to run your application you will get an exception, namely:
System.TypeInitializationException: The type initializer for 'SciterSharp.SciterWindow' threw an exception.
2. Download SciterSharpWindows via nuGet
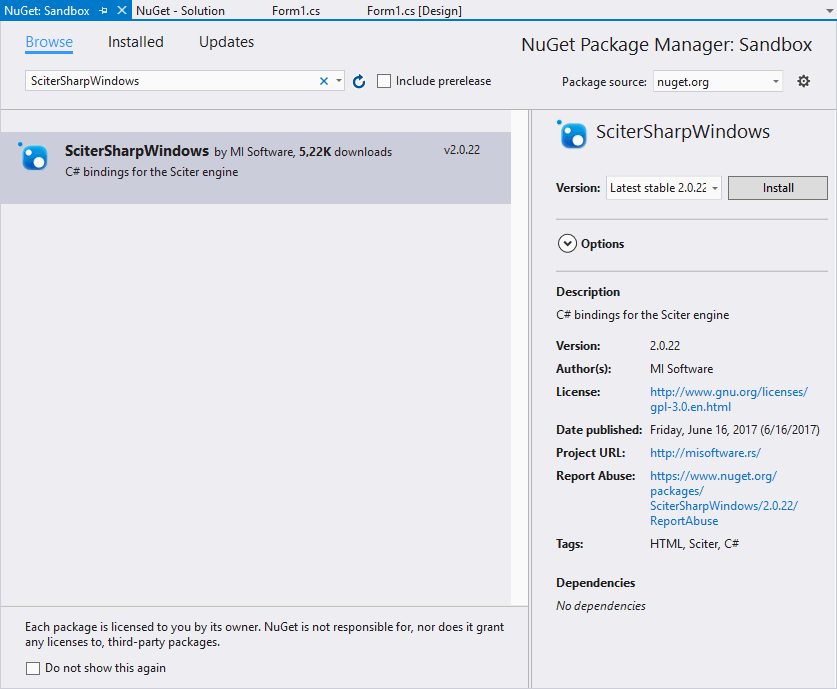
As next step, we need to add the native bindings for Sciter in your project. Open Visual Studio, Open your project and go to the solution explorer on the top right corner of VS and do right click on your project. From the dropdown select the Manage NuGet Packages option:

Then on the emergent window, search for SciterSharpWindows and install the package on your project:
3. Add control to your form
As next, import the SciterSharp type in your form class (at the top of your class):
using SciterSharp.WinForms;Then, on the formload event of your main form, proceed to create the Sciter element but before, expose the SciterElement on your class to make it accesible for other methods. Then create the element, add the HandleCreated callback and append it to the form. In this case we'll render it on the entire form by setting the Dock property of the element to Fill:
using System.Windows.Forms;
using System;
using SciterSharp.WinForms;

namespace Sandbox
{
    public partial class Form1 : Form
    {
        // Create a class-accesible sciter control
        private SciterControl SciterElement;

        public Form1()
        {
            InitializeComponent();
        }

        private void Form1_Load(object sender, EventArgs e)
        {
            // Create a new instance of the sciter control
            SciterElement = new SciterControl();
            // Set the callback once the element is ready to be used
            SciterElement.HandleCreated += SciterControl1_HandleCreated;

            // Add the Sciter Control to the Form and fill it
            this.Controls.Add(SciterElement);
            SciterElement.Dock = DockStyle.Fill;
        }

        private void SciterControl1_HandleCreated(object sender, EventArgs e)
        {
            // Initialize with some HTML
            SciterElement.SciterWnd.LoadHtml(@"
                <h1 style='background-color:#03a9f4;color:white;'>
                    Hello World
                </h1>
            ");
        }
    }
}
The previous example would generate the following form:
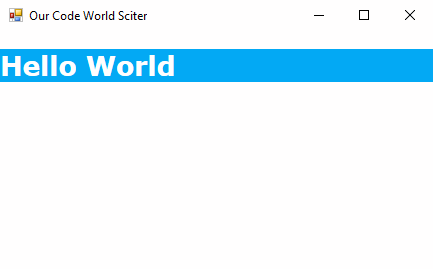
And that's it ! You can use easily Sciter in your WinForm application to create awesome and impressing graphical user interfaces. For more information about how does the scither JavaScript,CSS and HTML interface works, please refer to the official documentation of the Sciter project.
Happy coding !

