

In some situations when you work with Canvas using or not a framework, you won't be able to provide a fixed size to the canvas as this may be automatic generated by the library and is now your responsability what do with it. The problem of this approach is that sometimes those canvas will contain huge margins around the content, basically empty spaces that no one probably wants in the image as this increases the size (visual and filesize) considerably.
If you are willing to solve this issue quickly and easy, the following trimCanvas function that has been written by Remy Sharp, will help you to solve this problematic feature that a lot of developers may need someday when working with Canvas:
// MIT http://rem.mit-license.org
function trimCanvas(c) {
    var ctx = c.getContext('2d'),
        copy = document.createElement('canvas').getContext('2d'),
        pixels = ctx.getImageData(0, 0, c.width, c.height),
        l = pixels.data.length,
        i,
        bound = {
            top: null,
            left: null,
            right: null,
            bottom: null
        },
        x, y;

    // Iterate over every pixel to find the highest
    // and where it ends on every axis ()
    for (i = 0; i < l; i += 4) {
        if (pixels.data[i + 3] !== 0) {
            x = (i / 4) % c.width;
            y = ~~((i / 4) / c.width);

            if (bound.top === null) {
                bound.top = y;
            }

            if (bound.left === null) {
                bound.left = x;
            } else if (x < bound.left) {
                bound.left = x;
            }

            if (bound.right === null) {
                bound.right = x;
            } else if (bound.right < x) {
                bound.right = x;
            }

            if (bound.bottom === null) {
                bound.bottom = y;
            } else if (bound.bottom < y) {
                bound.bottom = y;
            }
        }
    }

    // Calculate the height and width of the content
    var trimHeight = bound.bottom - bound.top,
        trimWidth = bound.right - bound.left,
        trimmed = ctx.getImageData(bound.left, bound.top, trimWidth, trimHeight);

    copy.canvas.width = trimWidth;
    copy.canvas.height = trimHeight;
    copy.putImageData(trimmed, 0, 0);

    // Return trimmed canvas
    return copy.canvas;
}
The logic of the function although is not simple to write, it can be easily understood. The function expects as first argument a canvas object, not the context as the script needs to make a copy of the canvas in order to create the new one with its content but without overwriting the content of the original. Then, all the pixels are stored inside an array that will be iterated with a for loop to find the highest bound points in the image in order trim it (basically builds an object with the coordinates where your canvas data is stored). Once the points are stored (top, left, bottom and right), they're used to cut the original data of the canvas and append the new content to the created copy. This copy is returned by the function, which means another Canvas instance is returned.
Example
In this example, we'll show you how to trim a stickman that will be drawn inside a 400x400 canvas with the following code:
<canvas id="stickman" width="400" height="400"></canvas>

<script>
    var canvas = document.getElementById("stickman");

    context = canvas.getContext("2d"); // get Canvas Context object

    context.beginPath();
    context.fillStyle = "bisque"; // #ffe4c4
    context.arc(200, 50, 30, 0, Math.PI * 2, true); // draw circle for head
    // (x,y) center, radius, start angle, end angle, anticlockwise
    context.fill();

    context.beginPath();
    context.strokeStyle = "red"; // color
    context.lineWidth = 3;
    context.arc(200, 50, 20, 0, Math.PI, false); // draw semicircle for smiling
    context.stroke();

    // eyes
    context.beginPath();
    context.fillStyle = "green"; // color
    context.arc(190, 45, 3, 0, Math.PI * 2, true); // draw left eye
    context.fill();
    context.arc(210, 45, 3, 0, Math.PI * 2, true); // draw right eye
    context.fill();

    // body
    context.beginPath();
    context.moveTo(200, 80);
    context.lineTo(200, 180);
    context.strokeStyle = "navy";
    context.stroke();

    // arms
    context.beginPath();
    context.strokeStyle = "#0000ff"; // blue
    context.moveTo(200, 80);
    context.lineTo(150, 130);
    context.moveTo(200, 80);
    context.lineTo(250, 130);
    context.stroke();

    // legs
    context.beginPath();
    context.strokeStyle = "orange";
    context.moveTo(200, 180);
    context.lineTo(150, 280);
    context.moveTo(200, 180);
    context.lineTo(250, 280);
    context.stroke();
</script>
The previous code will generate a stickman on the canvas, if this is exported, the result of the png image would be the following:
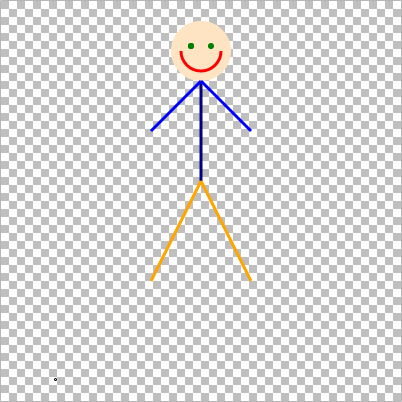
As you can see, we want only to have the stickman, but our canvas is larger than the drawn path, so there's a lot of space that we can simply throw away with the trimCanvas function by simply doing:
// Crop and obtain the new canvas
var trimmedCanvas = trimCanvas(canvas);

// data:image/png;base64,iVBORw0KGgoAAAANSUhE..........XTklIOUbk4AAAAAElFTkSuQmCC
console.log(trimmedCanvas.toDataURL());
If you show a preview of the generated base64 string that contains the image, the output will be now only our stickman as the trimCanvas function removed the empty pixels that surround the original canvas:
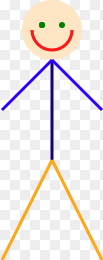
Happy coding !

