Inside an Electron Application, you will be able to create context menus with HTML, CSS and JavaScript, however sometimes they aren't enough if we want to mess up with native things on the app, like copying text, selecting all the text or switching to full screen. If you want to add a custom context menu to your application that uses the native interface of the operative system, you can use the electron-context-menu module to achieve it.
In this article, we'll show you how to implement and customize the native context menu of your Electron Application easily.
1. Install Electron Context Menu
Electron doesn't have a built-in context menu. You're supposed to handle that yourself. But it's both tedious and hard to get right. This module gives you a nice extensible context menu with items like Cut/Copy/Paste for text, Save Image for images, and Copy Link for links. It also adds an Inspect Element menu item when in development to quickly view items in the inspector like in Chrome. You can use this module directly in both the main and renderer process. To install this module, open the terminal, switch to the directory of your electron project and run the following command:
npm install electron-context-menuThis will install the module in your project and will allow you to require it with require('electron-context-menu') in your code later. For more information about this module, please visit the official repository at Github here.
2. Learning how the Context Menu works
The context menu is basically a function that can be required through the electron-context-menu. This function expects as first argument an object with the options that the API supports (more information here). You can customize the context menu when you are in the main process:
// ./main.js
const {app, BrowserWindow} = require('electron');
const contextMenu = require('electron-context-menu');

// Add an item to the context menu that appears only when you click on an image
contextMenu({
	prepend: (params, browserWindow) => [{
		label: 'Rainbow',
		// Only show it when right-clicking images
		visible: params.mediaType === 'image'
	}]
});

// Your code that starts a new application
let win;
(async () => {
	await app.whenReady();
	win = new BrowserWindow();
})();
Or directly from the renderer process as well:
<!DOCTYPE html>
<html>
    <head>
        <meta charset="UTF-8">
        <title>Hello World!</title>
    </head>
    <body>
        <h1>Hello World!</h1>
        <!-- All of the Node.js APIs are available in this renderer process. -->
        We are using Node.js <script>document.write(process.versions.node)</script>,
        Chromium <script>document.write(process.versions.chrome)</script>,
        and Electron <script>document.write(process.versions.electron)</script>.

        <script>
            const contextMenu = require('electron-context-menu');

            // This code adds 2 new items to the context menu to zoom in the window (in and out)
            // Read other steps for more information
            contextMenu({
                prepend: (params, browserWindow) => [
                    {
                        role: "zoomIn"
                    },
                    {
                        role: "zoomOut"
                    },
                ],
            });
        </script>
    </body>
</html>
2.1. Adding items to the context menu with a custom behaviour
If you want to add an item that executes a custom JavaScript function in the project, you need to check the documentation of the MenuItem class of Electron, as this is basically the object that you need to prepend or append to the context menu. You can add a new item to the context menu with a custom action, adding an object to the prepend/append array of the context menu with at least a label and a click callback that is executed when the user clicks on the new option:
const contextMenu = require('electron-context-menu');

contextMenu({
    prepend: (params, browserWindow) => [
        {
            label: 'Destroy Atomic Bombs',
            click: (menuItem, browserWindow, event) => {
                // Note that the alert function is only avaialble in the renderer process
                //alert("You destroyed all the atomic bombs in the world, thanks :3")

                // If executed from the main process, the console log function will appear in the terminal, not in the developer tools
                console.log("You destroyed all the atomic bombs in the world, thanks :3")
            }
        }
    ]
});
Note that the previous code was executed in the renderer process, so the console.log function will output the information on the console tab of the developers tools:

2.2. Adding items to the context menu with predefined behaviours
Predefined behaviours on the context menu of Electron are meant to execute browser-level functions, like minimizing a window, closing it, zooming on it, selecting all the text etc. This can be assigned through the role property of a MenuItem. It is best to specify role for any menu item that matches a standard role, rather than trying to manually implement the behavior in a click function, so the built-in role behavior will give the best native experience. The label and accelerator values are optional when using a role and will default to appropriate values for each platform. Every menu item must have either a role, label, or in the case of a separator a type. The role property can have following values:
undoredocutcopypastepasteAndMatchStyleselectAlldeleteminimize- Minimize current window.close- Close current window.quit- Quit the application.reload- Reload the current window.forceReload- Reload the current window ignoring the cache.toggleDevTools- Toggle developer tools in the current window.toggleFullScreen- Toggle full screen mode on the current window.resetZoom- Reset the focused page's zoom level to the original size.zoomIn- Zoom in the focused page by 10%.zoomOut- Zoom out the focused page by 10%.editMenu- Whole default "Edit" menu (Undo, Copy, etc.).windowMenu- Whole default "Window" menu (Minimize, Close, etc.).
The following additional roles are available on macOS:
about- Map to theorderFrontStandardAboutPanelaction.hide- Map to thehideaction.hideOthers- Map to thehideOtherApplicationsaction.unhide- Map to theunhideAllApplicationsaction.startSpeaking- Map to thestartSpeakingaction.stopSpeaking- Map to thestopSpeakingaction.front- Map to thearrangeInFrontaction.zoom- Map to theperformZoomaction.toggleTabBar- Map to thetoggleTabBaraction.selectNextTab- Map to theselectNextTabaction.selectPreviousTab- Map to theselectPreviousTabaction.mergeAllWindows- Map to themergeAllWindowsaction.moveTabToNewWindow- Map to themoveTabToNewWindowaction.window- The submenu is a "Window" menu.help- The submenu is a "Help" menu.services- The submenu is a "Services" menu.recentDocuments- The submenu is an "Open Recent" menu.clearRecentDocuments- Map to theclearRecentDocumentsaction.
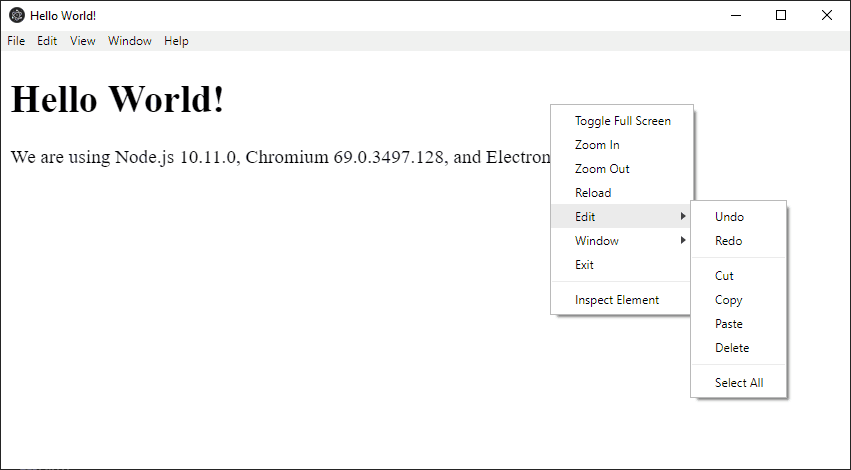
When specifying a role on macOS, label and accelerator are the only options that will affect the menu item. All other options will be ignored. Lowercase role, e.g. toggledevtools, is still supported. The enabled and visibility properties are not available for top-level menu items in the tray on MacOS. For example, to add 2 new options to the context menu that allows the user to zoom in and zoom out, we would add them like this:
contextMenu({
	prepend: (params, browserWindow) => [
        {
            role: "zoomIn"
            // If you want to change the label "Zoom In"
            // label: "Custom Zoom In Text"
        },
        {
            role: "zoomOut"
            // If you want to change the label "Zoom Out"
            // label: "Custom Zoom Out Text"
        },
    ],
});
This would generate the following context menu:

2.3. Customizing predefined behaviours labels
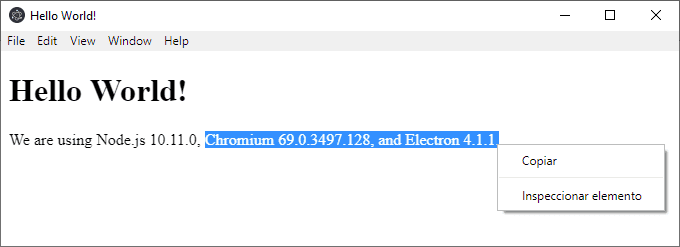
Required for localization, you can override the text that appears on predefined actions of the context menu, for example in spanish:

These labels can be overriden through the labels property of the context menu like this:
contextMenu({
    // Change the labels of the predefined context menu
    // e.g Cut, Copy, Paste
    labels: {
        cut: 'Custom Cut Text',
        copy: 'Custom Copy Text',
        paste: 'Custom Paste Text',
        save: 'Custom Save Image Text',
        saveImageAs: 'Custom Save Image As… Text',
        copyLink: 'Custom Copy Link Text',
        copyImageAddress: 'Custom Copy Image Address Text',
        inspect: 'Custom Inspect Element Text'
    }
});
Note that the label of the items with a predefined behaviour needs to be assigned during the assignation of it, not in the labels property of the context menu. To finish this article, we recommend you to read the official documentation of the module as well, because it has a lot to offer and we didn't cover everything but the basics in here, so check the docs.
Happy coding !


