
A web portal is not just another website. It is a gated, personalized environment where authenticated users log in to access data, services, and tools that belong specifically to them, think customer portals, employee intranets, student dashboards, or partner platforms. That means the three things you have to get right are authentication, role-aware dashboards, and a clean API layer to move data around.
Laravel is one of the most practical frameworks for this kind of project. It ships with batteries-included authentication, an expressive ORM, first-class API support through Sanctum, and a mature ecosystem for roles and permissions. In this guide, we will walk through how to assemble those pieces into a working portal without reinventing the wheel.
Plan the Portal Before You Scaffold Anything
The fastest way to waste a week of development is to start coding before you have defined who logs in and what they are allowed to see. A portal almost always has multiple user types (for example, admins, staff, and end customers), and each type sees a different slice of the application.
Before touching the terminal, settle three things: the portal type and its core purpose, the user roles and what each can access, and the primary data entities those users will interact with. If you want a non-technical overview of how that planning phase fits into the bigger picture, this step-by-step guide to building a web portal is a useful primer that covers the product and business side. Once your scope and roles are locked, the engineering becomes far more straightforward.
Setting Up the Laravel Project
Spin up a fresh project with Composer and point it at your database:
composer create-project laravel/laravel web-portal

cd web-portal

php artisan key:generate
Configure your database credentials in the .env file, then run the default migrations to confirm the connection works:
php artisan migrateWith the skeleton in place, the next priority is letting users in securely.
Implementing Authentication
For most portals, Laravel Breeze is the quickest way to get login, registration, password reset, and email verification scaffolded out of the box. Install it and choose your preferred stack (Blade, Vue, or React):
composer require laravel/breeze --dev

php artisan breeze:install blade

npm install && npm run build

php artisan migrate
Breeze gives you working auth views and routes immediately. If your portal needs API token authentication for a separate frontend or mobile client, reach for Laravel Sanctum instead, which we will use later for the API layer. For larger portals that need two-factor authentication and more control, Fortify is the headless option worth considering.
Adding Role-Based Access Control
A portal is defined by what different users cannot see, so role management is essential. The community standard is the spatie/laravel-permission package:
composer require spatie/laravel-permission

php artisan vendor:publish --provider="Spatie\Permission\PermissionServiceProvider"

php artisan migrate
Add the HasRoles trait to your User model, then create roles and assign them:
use Spatie\Permission\Models\Role;

Role::create(['name' => 'admin']);

Role::create(['name' => 'customer']);

$user->assignRole('customer');
Now you can protect routes with middleware so only the right users reach the right screens:
Route::middleware(['auth', 'role:admin'])->group(function () {
    Route::get('/admin/dashboard', [AdminController::class, 'index']);
});
This single layer is what turns a generic logged-in area into a true multi-role portal.
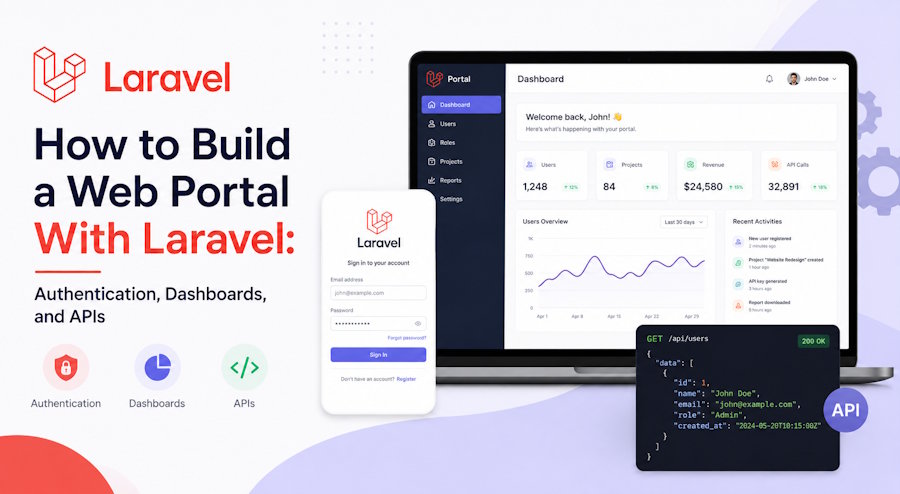
Building the Dashboard
The dashboard is the heart of the portal, the first thing users see after logging in. The cleanest approach is to route each role to its own dashboard controller rather than stuffing conditional logic into one bloated view.
Route::middleware(['auth'])->get('/dashboard', function () {
    if (auth()->user()->hasRole('admin')) {
        return redirect()->route('admin.dashboard');
    }

    return redirect()->route('customer.dashboard');
});
In the controller, pass only the data that user is entitled to:
public function index()
{
    $orders = auth()->user()->orders()->latest()->take(10)->get();

    return view('customer.dashboard', compact('orders'));
}
Keep the Blade views focused: a summary panel, recent activity, and quick actions. Resist the temptation to show everything at once; a portal dashboard should answer "what do I need to do next?" rather than dumping every record in the database.
Exposing Data Through an API
Most modern portals eventually need an API, whether for a JavaScript frontend, a mobile app, or third-party integrations. Sanctum makes token-based authentication simple:
composer require laravel/sanctum

php artisan vendor:publish --provider="Laravel\Sanctum\SanctumServiceProvider"

php artisan migrate
Add the HasApiTokens trait to your User model, then issue a token on login:
$token = $user->createToken('portal-token')->plainTextToken;Define protected API routes in routes/api.php and use an API Resource to control exactly what data is exposed:
Route::middleware('auth:sanctum')->get('/orders', function (Request $request) {

    return OrderResource::collection($request->user()->orders);

});
API Resources are important here: they let you shape the JSON response so you never accidentally leak internal fields like password hashes or admin flags.
Securing the Portal
Because portals hold personal and often sensitive data, security is not optional. A few non-negotiables:
- Validate every input using Laravel's form requests rather than trusting incoming data.
- Guard against mass assignment by setting $fillable on your models and never blindly passing $request->all().
- Rate-limit authentication and API routes with Laravel's built-in throttling to slow down brute-force attempts:
Route::middleware('throttle:6,1')->group(function () {

    Route::post('/login', [AuthController::class, 'login']);

});- Enforce HTTPS in production and keep dependencies patched, since outdated packages are one of the most common breach vectors.
- Scope every query to the authenticated user so one customer can never read another's records by guessing an ID.
Wrapping Up
Building a web portal with Laravel comes down to three layers working together: solid authentication to control who gets in, role-based dashboards to control what each person sees, and a well-shaped API to move data safely between the backend and your clients. The framework handles most of the heavy lifting, which lets you focus on the business logic that actually makes your portal valuable.
Start small with one role and one dashboard, get authentication and permissions rock-solid, then expand outward. A portal built on those foundations will scale cleanly as you add user types, features, and integrations over time.

