

Composer is a tool for dependency management in PHP, it allows you to declare the libraries your project depends on and it will manage (install or update) them for you. A lot of projects and frameworks use composer to handle the dependency management. But, these packages needs to be registered somewhere and that's what packagist does. Packagist is the default Composer package repository. It lets you find packages and lets Composer know where to get the code from. You can use packages the community developed and you can contribute with your own packages too.
In this article, you will learn how to create a PHP Packagist package in Github to be used in composer and how to register it in Packagist.org.
1. Create the basic structure of a package
To create a package in its least expression, we will need to create the basic structure (2 folders and 3 files).
- Start by creating a folder with the name of your package, in this case the container folder will be
hello-composer. - Create a new folder inside of
hello-composerwith the namesrc, this folder will contain the source code of your package. - Create the first class of your package (inside of
hello-composer/src), in this case our class will beHellowith filenameHello.phpand it will contain the following code:
<?php

/*
 * (c) YOUR NAME <[email protected]>
 *
 * This source file is subject to the MIT license that is bundled
 * with this source code in the file LICENSE.
 */

// If you don't to add a custom vendor folder, then use the simple class
// namespace HelloComposer;
namespace ourcodeworld\HelloComposer;

class Hello
{
    public function say($toSay = "Nothing given")
    {
        return $toSay;
    }
}
The namespace can be changed as you wish, in this case we add the ourcodeworld prefix as you can create a lot of packages, but with a preffix they will be always related to you (besides, it will be created in one single folder in the vendor directory).
2. Create the composer.json file
The composer.json file should reside at the top of your package (hello-composer/composer.json) repository, and is the way you describe your package to both packagist and composer.
First of all, you must pick a package name. This is a very important step since it can not change and it should be unique enough to avoid conflicts in the future, this name needs to be in the "name" property of the composer.json file.
There are 2 ways of create the composer.json file for your package:
A. With the composer assistant
Create the composer.json with a dinamic assistant that will ask for every property in the console, to start it navigate to the folder of the package with the console:
cd c:/folder-where/your-package-is-located/hello-composerand then execute:
composer initFollow the interactive prompt and provide a value for every field. In case you need more field in the generated composer.json, see the documentation for more properties or use the following composer.json.
B. Manually
You can create your own composer.json manually following the next example (change the values according to yours):
{
    "name": "ourcodeworld/hello-composer",
    "description": "My first packagist package",
    "type": "package",
    "require": {
        "php": ">=5.3.0"
    },
    "license": "mit",
    "authors": [
        {
            "name": "Your Name",
            "email": "[email protected]",
            "homepage": "http://yourhomepage-if-you-have.com"
        }
    ],
    "minimum-stability": "dev",
    "autoload": {
        "psr-4": {
            "ourcodeworld\\HelloComposer\\": "src/"
        }
    }
}
The most important point in the composer.json is the "autoload", inside of "psr-4" you will specify that all the files with the namespace ourcodeworld\HelloComposer inside the src/ folder of your package should be autoloaded. Namespace prefixes must end in \\ to avoid conflicts between similar prefixes. For example Foo would match classes in the FooBar namespace so the trailing backslashes solve the problem: Foo\\ and FooBar\\ are distinct.
Then, when your package has been published and installed (not yet), you can instantiate the previously created class Hello with:
<?php
require_once __DIR__ . '/../vendor/autoload.php';

use ourcodeworld\HelloComposer\Hello;

$instance = new Hello();

echo $instance->say("Hello World");
Feel free to modify the namespaces as you wish in the composer.json and your classes. Once all the files are created, the structure of your project should look like (you can visit the test repository in Github to see the structure there):

3. Host your package
In order to publish your package in Packagist, you will need to host your package in a repository with version control as GIT, Subversion or Mercurial. As mentioned in this article, we are going to use Github to host our test package with Git.
Create a Github repository in case that it isn't created yet with the name of your package (in this case hello-composer) and license if you want:

Once created, clone the repository in your desktop and save the content of our package inside. We assume that you have knowledge with Git and you know how to commit all the files of the repository. Commit all the files into your repository, once commited, check that all files have been succesfully uploaded:

Now the repository should be located in https://github.com/ourcodeworld/hello-composer and the git url is https://github.com/ourcodeworld/hello-composer.git.
4. Register package in packagist
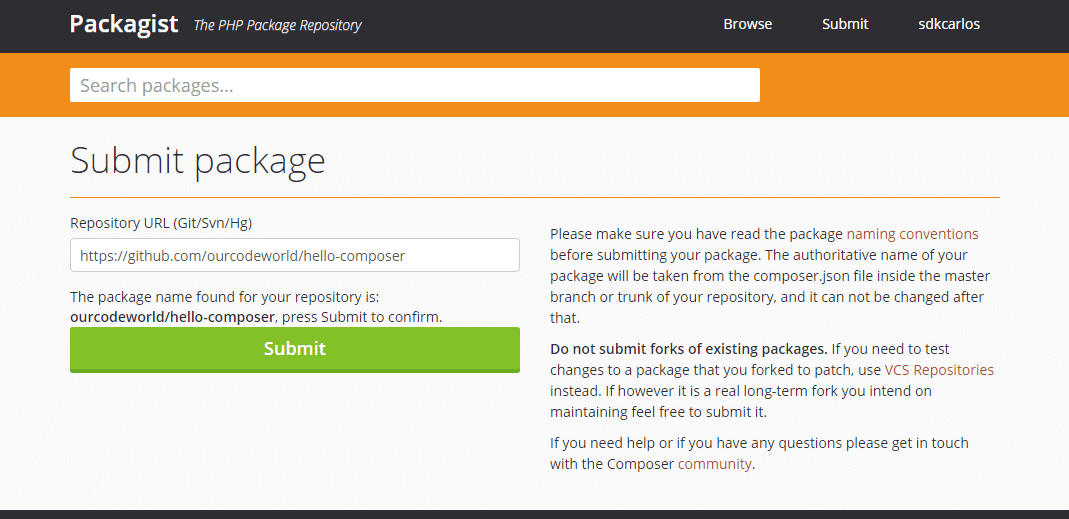
Navigate to Packagist and create a new account in case you don't have one. When you have an account, login and go to Submit and proceed to create your package.
Give a Repository URL, in this case of our repository https://github.com/ourcodeworld/hello-composer and then Click on Check, Packagist will check if the package name is available, if it is, click on Submit.
The package name will be retrieven from the composer.json file in your repository:
Once your package is accepted, you should see your package finally published:
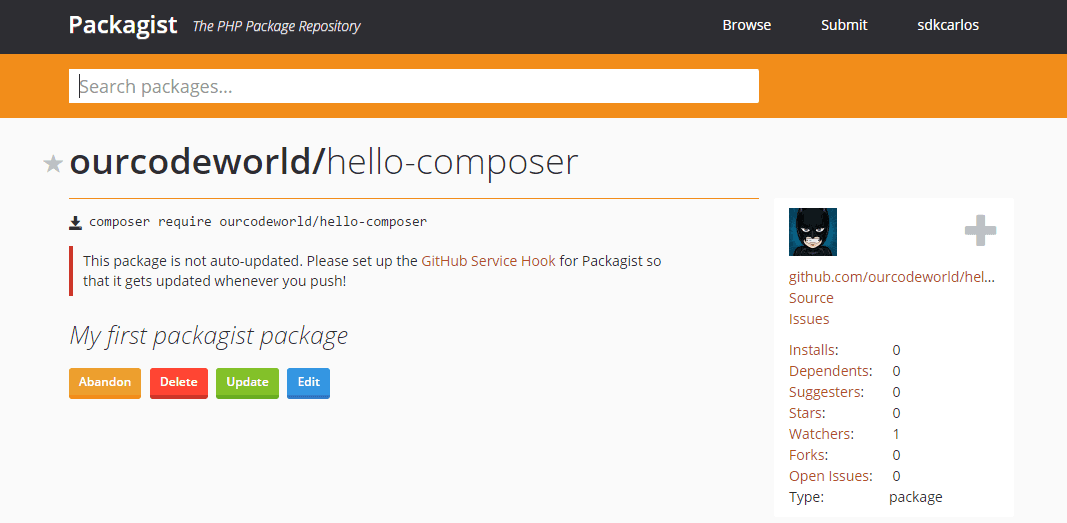
Note that the warning "This package is not auto-updated" will be removed if you follow the Step number 6.
5. Require your package and test it
Your package is published and you can require it with composer ! The command to require your package with composer is composer require <vendor-name>/<package-name> that in this case will be:
composer require ourcodeworld/hello-composerNote that if the "minimum-stability" property in your package.json was set to "dev", then the project where you require the package needs to have the same "minimum-stability" property, otherwise you'll get the following exception in the console:
Could not find package <vendor-name>/<package-name> at any version for your minimum-stability (stable). Check the package spelling or your minimum-stability
If you execute the previous command to add the package into your project, the following output should be shown:
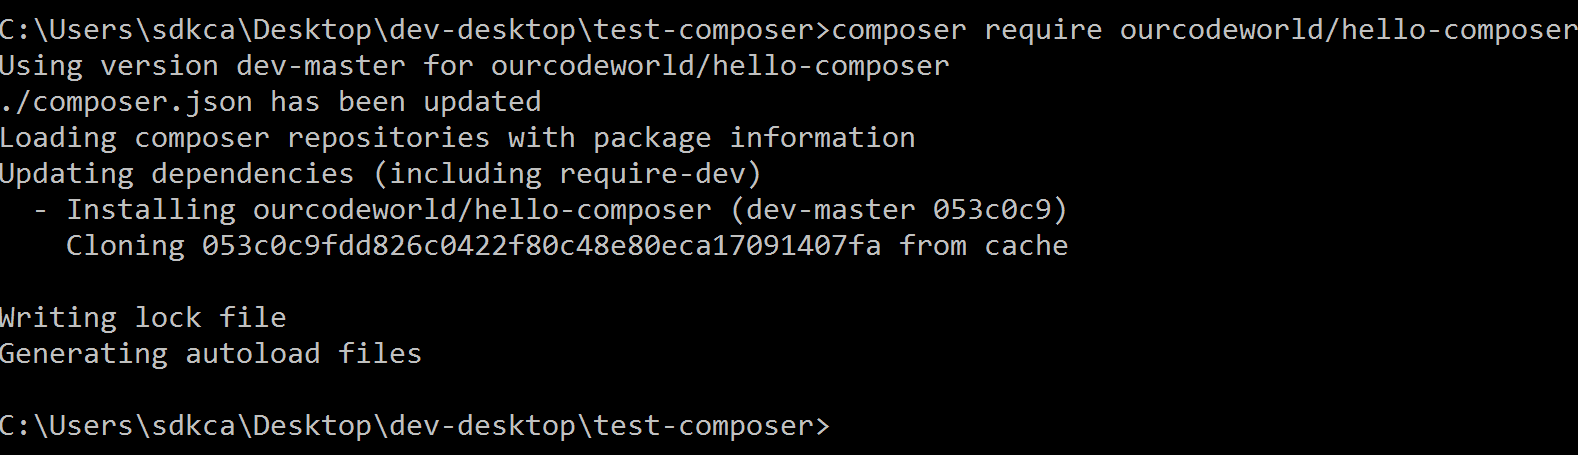
For this example in order to test if our created package works we are going to execute the following php script (as this is a test, we load the autoload.php of composer, if you're using a framework like symfony you probably don't need to do it):
<?php
// some-test-folder/index.php
require_once __DIR__ . '/vendor/autoload.php';

use ourcodeworld\HelloComposer\Hello;

$instance = new Hello();

echo $instance->say("Hello World");
Using the command:
php index.phpAnd the final output should be:

Congratulations, you've just created and published your first packagist package succesfully !
6. Set autoupdate package on every push with Webhooks
Normally, to update a packagist package, you need to commit your changes and then access to your package inside of Packagist.org and click on Update:

But this can become quite annoying as well as confusing and disorganized, which is precisely what we want to avoid with composer. To make the things pretty easy, you can use the Webhooks of the repository in Github. The concept of a WebHook is simple to understand, a WebHook is simply an HTTP callback, an HTTP POST that occurs when something happens and it sends a simple event-notification via HTTP POST, in this case this POST request will be executed automatically by Github everytime you push some changes to your repository.
To enable this feature:
- Navigate to your repository in Github and click on Settings.
- In this document select the Integrations & Services option from the left menu.
- Click on Add service and search for Packagist and then click on it.

Now you will be probably redirected to confirm your password, then the following window will appear:

In this window, provide in the form your username of Packagist.org and the Packagist Token (this token is unique and you can find it in your profile of Packagist), check the Active box and click on Add service. Now your package will be automatically update in Packagist everytime you commit and push some changes.
Happy coding !

