
Everybody loves Material Design, the comprehensive design used as a guide for visual, motion, and interaction design across platforms and devices. Although the Material Design is specifically used by the Android OS and other Google Products, you can still use the design as you want and wherever you want.
To use material design in your WinForms applications, you can use the MaterialSkin library for adding a theming to .NET WinForms, C# or VB.Net with Google's Material Design Principles. This library follows the guidelines defined in the material design specification and use the same components and functionalities.
1. Install MaterialSkin via NuGet
The preferred way of installation is via NuGet. Install the package with Visual Studio, by accessing the NuGET package manager. Do right click in your project in the Solution Explorer at the right top of Visual Studio and select Manage NuGet packages in the dropdown menu:

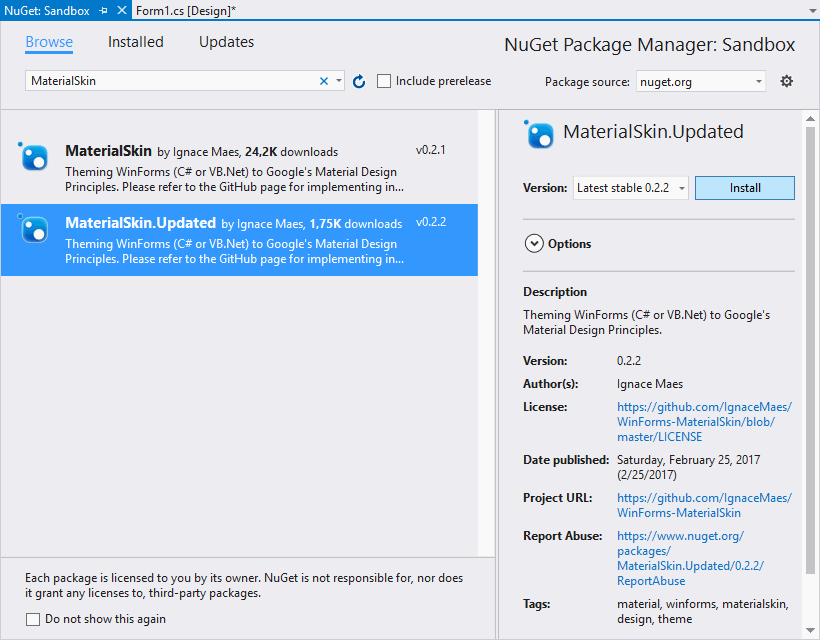
In the emergent Window, go to the Browse tab and search for MaterialSkin, select the package (with the latest version namely MaterialSkin updated) in the list and install it in your project:
Note
According to the version of .NET Framework that you're using, you will need to download a specific version of the plugin. For example, the MaterialSking.Updated package requires at least .NET Framework 4.6.2.
Once the installation of the package finishes, you will be able to work with the Material Design in your project. Visit the official repository at Github for more information about this library.
2. Add Material Controls to the Controls Toolbox
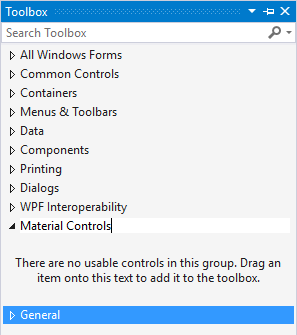
With MaterialSking you will be able to drag and drop controls into your forms in the same way you do with the traditional controls. To be organized, we recommend you to create a custom Toolbox Tab to store inside the exclusive controls of this library. Do right click on an empty space of the Toolbox and from the Dropdown menu select Add Tab, this will allow you to create an empty Tab and to give a custom name, in this case we'll name it Material Controls:
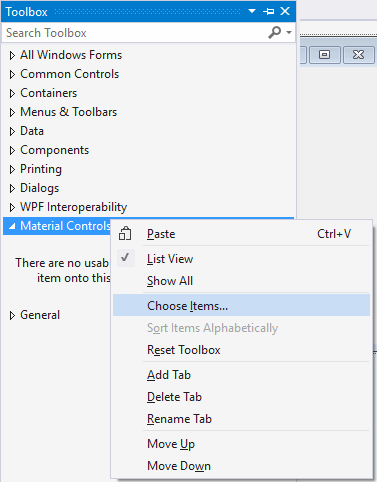
Then do right click on the custom tab that you've created (Metro Controls) and select Choose Items from the menu:
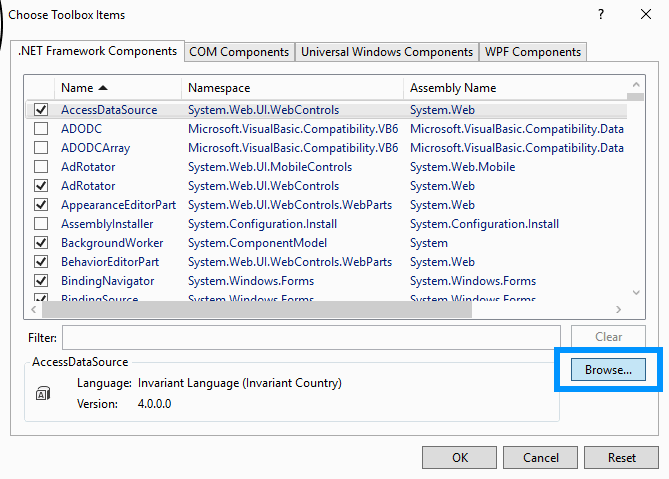
In the new window, go to the .NET Framework Components tab and click on Browse:
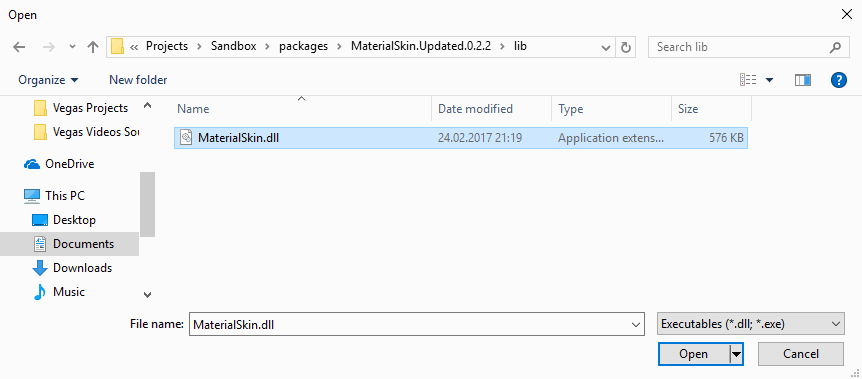
Once the filebrowser appears, you will need to navigate to the folder of your WinForms project, then inside the packages folder search for the MaterialSking folder, then on lib. Inside the lib folder there should be a dll file, select it an click on open:
Then a loading bar will appear and the controls will appear on the list of .NET components, finally click on OK:
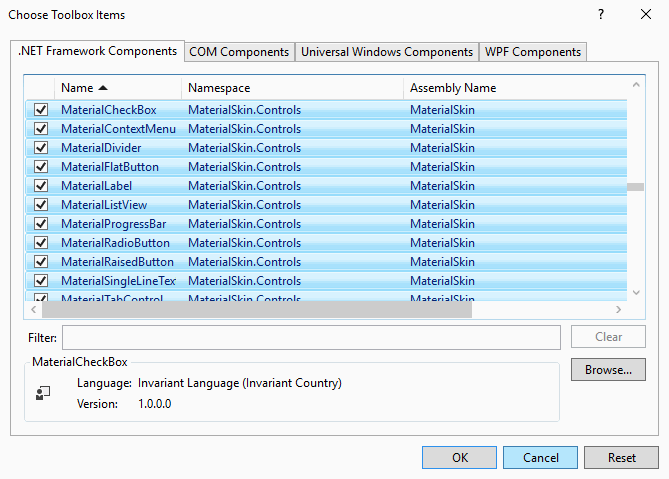
By default all components will be selected, however you can unselect the one you don't want. Finally the controls will appear in the previously created tab of Controls:

And you will be able to simply drag and drop the controls you need in your form in the same way you do with the default components of Windows.
3. Set Material Style
Till the previous step, you can now drag and drop elements into your form easily as you do with the tipical controls of .NET. However, if you want to provide a Material Style to your entire form (not only the elements inside of the form), then you will need to modify the code of your Form.
Start by importing the MaterialSkin namespaces at the top of your class:
using MaterialSkin;
using MaterialSkin.Controls;
Then you'll be able to change the type of your form. Usually, the declaration of your form is of the Form type e.g class Form1 : Form, but if you want it with Material Style, then you need to change the type Form to MaterialForm:
namespace Sandbox
{
    public partial class Form1 : MaterialForm
    {

  // ... //

  // ... //

  // ... //
Now in the constructor function of your class, in this case Form1, under the InitializeComponent function , add some code to use the Material Skin instead of the default and change the color palette of the form:
public Form1()
{
    InitializeComponent();

    // Create a material theme manager and add the form to manage (this)
    MaterialSkinManager materialSkinManager = MaterialSkinManager.Instance;
    materialSkinManager.AddFormToManage(this);
    materialSkinManager.Theme = MaterialSkinManager.Themes.LIGHT;

    // Configure color schema
    materialSkinManager.ColorScheme = new ColorScheme(
        Primary.Blue400, Primary.Blue500,
        Primary.Blue500, Accent.LightBlue200,
        TextShade.WHITE
    );
}
As you can see, the implementation of custom controls for WinForms is pretty easy. Save the changes and run your form to see what happens !
4. Example
The following example shows how to create a Material Styled form on your main form on a simple WinForms project:
using System;
using System.Collections.Generic;
using System.ComponentModel;
using System.Data;
using System.Drawing;
using System.Linq;
using System.Text;
using System.Threading.Tasks;
using System.Windows.Forms;

// Import the Material Skin
using MaterialSkin;
using MaterialSkin.Controls;

namespace Sandbox
{
    public partial class Form1 : MaterialForm
    {
        public Form1()
        {
            InitializeComponent();

            // Create a material theme manager and add the form to manage (this)
            MaterialSkinManager materialSkinManager = MaterialSkinManager.Instance;
            materialSkinManager.AddFormToManage(this);
            materialSkinManager.Theme = MaterialSkinManager.Themes.LIGHT;

            // Configure color schema
            materialSkinManager.ColorScheme = new ColorScheme(
                Primary.Blue400, Primary.Blue500,
                Primary.Blue500, Accent.LightBlue200,
                TextShade.WHITE
            );
        }

        private void Form1_Load(object sender, EventArgs e)
        {

        }
    }
}
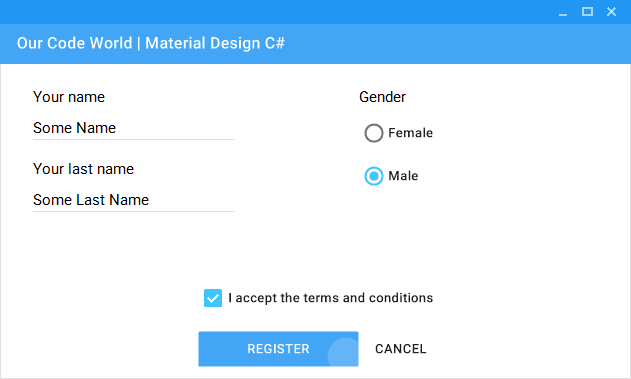
The previous code would generate the following form:

Then you can simply drag and drop some controls from the toolbox created in the step 2 and create awesome forms:
For more information or to read the docs of the library, we recommend you to visit the official repository at Github here. Although this project is no longer under active development, it's well made and has a lot of useful components and contributions are still welcome. Besides the community will likely still help if you open an issue.
Happy coding !

