

The WebRTC brings many benefits to the user and the developer that have been less available in the past to create communication and collaboration tools on the web. For example it offers a variety of ways to connect, with the common element of a live chats and videos. To create a real-time voice or video connections, PeerJS is one of the most awesome libraries that allows you to implement such a feature in your web application without having (too much) headaches. PeerJS wraps the browser's WebRTC implementation to provide a complete, configurable, and easy-to-use peer-to-peer connection API. Equipped with nothing but an ID, a peer can create a P2P data or media stream connection to a remote peer easily.
In this article you will learn how to implement a Videochat with your own hosted PeerJS server with Node.js.
Before continue
You will need to be patient as at first try it may not work as expected if you don't configure everything correctly. So be persistent, read carefully all the instructions and you may succeed ad first time.
If you think that this tutorial is very long, we recommend you then to clone the official example in this repository at Github that contains all the example code that you will find on this article, however without explanation. It's useful to test it by yourself though.
Content guide
This tutorial will be extense, so here as a quick introduction to all the steps that you will need to follow:
- Get some Auto-signed SSL certificate for testing.
- Create Demo Project Structure
- Create a secure local server with Express to serve our HTML,CSS and JS files.
- Create a secure PeerJS server that handles the exchange of information.
- Write Code to handle Videochat.
- Understand how PeerJS works.
- Create markup to create an example chat.
- Allow inbound connections for Node.js and update client host (only if local testing)
- Run Servers and Test
1. Create or get some SSL Certificate
In order to work either in production or locally to test, you will need to handle your project using a SSL certificate, otherwise some things on the browser may fail due to user permissions. This step is totally up to you, so according to your operative system you may search for another tutorial about how to create your own self signed SSL certificates. This article shows how to create a self signed certificate using openssl in Windows.
Alternatively, you can download self-signed certificates from the example repository in Github here and use them in your own implementation.
2. Demo Project Structure
To create a basic videochat, we'll need a basic structure of a HTML project and JavaScript:
Note
All the files (except the certificates and peer.min.js) should be empty as we'll tell you what to write inside every file later.
YourProjectFolder
ââââcertificates
âââ cert.pem
âââ key.pem
ââââpublic
âââ index.html
âââ website-server.js
âââ source
â âââ js
| âââ peer.min.js
â âââ scripts.js
âââ package.json
ââââserver
âââ peer-server.js
âââ package.jsonYou will need 3 folders inside the test folder, namely certificates, public and server. On the certificates file you will need to store the required files to make the server works in HTTPS (see step 1). On the public folder you will find the index file that allows the user to chat and execute a videocall with someone else, besides the scripts inside source are the source code of peer.js for the client side and the scripts.js that will be written on the step 5.
Remember that the structure doesn't need to be the same, it is just an example, however the paths of the files in the code will follow this pattern, so if you change the structure, be aware to change it in your code too.
3. Setup Test Local Server
For our example, we'll make accesible a simple html file (index.html) at https://localhost:8443 . To create our server, we'll use the express module, so open a terminal, switch to the project/public directory and modify the package.json file at least with the following data, note that you can change the name of your project at the version, the main point is that you need to create a valid file:
{
    "name": "peerjs-videochat-application-client",
    "version": "1.0.0"
}
Once the package.json file is valid, proceed to install the Express module executing:
npm install expressAfter the installation of this module, you will be able to setup a local server easily. Now go to the public folder of the project and modify the website-server.js file with the following code:
Note
The servers uses the certificate files mentioned on the first step, so if you decided to change the structure of your example project, be sure to change the path to the certificate files too.
// project/public/website-server.js
/**
 * This script starts a https server accessible at https://localhost:8443
 * to test the chat
 *
 * @author Carlos Delgado (Our Code World)
 */
var fs     = require('fs');
var http   = require('http');
var https  = require('https');
var path   = require("path");
var os     = require('os');
var ifaces = os.networkInterfaces();

// Public Self-Signed Certificates for HTTPS connection
var privateKey  = fs.readFileSync('./../certificates/key.pem', 'utf8');
var certificate = fs.readFileSync('./../certificates/cert.pem', 'utf8');

var credentials = {key: privateKey, cert: certificate};
var express = require('express');
var app = express();

var httpServer = http.createServer(app);
var httpsServer = https.createServer(credentials, app);

/**
 *  Show in the console the URL access for other devices in the network
 */
Object.keys(ifaces).forEach(function (ifname) {
    var alias = 0;

    ifaces[ifname].forEach(function (iface) {
        if ('IPv4' !== iface.family || iface.internal !== false) {
            // skip over internal (i.e. 127.0.0.1) and non-ipv4 addresses
            return;
        }

        console.log("");
        console.log("Welcome to the Chat Sandbox");
        console.log("");
        console.log("Test the chat interface from this device at : ", "https://localhost:8443");
        console.log("");
        console.log("And access the chat sandbox from another device through LAN using any of the IPS:");
        console.log("Important: Node.js needs to accept inbound connections through the Host Firewall");
        console.log("");

        if (alias >= 1) {
            console.log("Multiple ipv4 addreses were found ... ");
            // this single interface has multiple ipv4 addresses
            console.log(ifname + ':' + alias, "https://"+ iface.address + ":8443");
        } else {
            // this interface has only one ipv4 adress
            console.log(ifname, "https://"+ iface.address + ":8443");
        }

        ++alias;
    });
});

// Allow access from all the devices of the network (as long as connections are allowed by the firewall)
var LANAccess = "0.0.0.0";
// For http
httpServer.listen(8080, LANAccess);
// For https
httpsServer.listen(8443, LANAccess);

// Serve the index.html file as content of the / route
app.get('/', function (req, res) {
    res.sendFile(path.join(__dirname+'/index.html'));
});

// Expose the js resources as "resources"
app.use('/resources', express.static('./source'));
This code setups a very basic Express server that as mentioned can be accessed at localhost in the port 8443 (https) in the browser when executed. Besides it will list (once executed in the console) the address where it can be accessed from another devices within the LAN (refer to step 6), alternatively you can remove it if you are deploying it on the production server.
Save the changes on the file and go to the next step.
4. Setup PeerJS Server
PeerServer helps broker connections between PeerJS clients and the data is not proxied through the server. To install the server side module of PeerJS, open the package.json file created at project/server and add at least the required parameters to create a valid file:
{
    "name": "peerjs-videochat-application-server",
    "version": "1.0.0"
}
Once created, in the same directory run the following command to install the server
npm install peerProceed to modify the peer-server.js file inside the server folder (project/server) of your project with the following content:
// project/server/peer-server.js
var fs = require('fs');
var PeerServer = require('peer').PeerServer;

var server = PeerServer({
    port: 9000,
    path: '/peerjs',
    ssl: {
        key: fs.readFileSync('./../certificates/key.pem', 'utf8'),
        cert: fs.readFileSync('./../certificates/cert.pem', 'utf8')
    }
});
As you can see, the configuration of the server side for PeerJS is very simple and you won't need to do anything else in the server side. You can add some events listeners, however it isn't required as Peer Server will handle all the required logic automatically. This server will run on your server at the port 9000 when executed.
5. Setup Client Side Code
The client side can be very simple. Imagine this as another boring web page but that does something awesome. The styles that you provide to your project is up to you, for example we are using the bootstrap framework to create a nice layout using the Cerulean Theme from Bootswatch.
The Markup (project/public/index.html) that we'll use for our example looks like:
<!DOCTYPE html>
<html lang="en">

<head>
    <meta charset="UTF-8">
    <title>Video Chat with PeerJS</title>

    <!-- Using some styles Bootswatch CSS from cdn -->
    <link rel="stylesheet" href="https://maxcdn.bootstrapcdn.com/bootswatch/3.3.7/cerulean/bootstrap.min.css">
</head>

<body>
    <div class="container">
        <div class="row">
            <div class="col-md-6 col-lg-6">
                <!--
                    Display video of the current user
                    Note: mute your own video, otherwise you'll hear yourself ...
                 -->
                <div class="text-center">
                    <video id="my-camera"  width="300" height="300" autoplay="autoplay" muted="true" class="mx-auto d-block"></video>
                    <span class="label label-info">You</span>
                </div>
            </div>

            <div class="col-md-6 col-lg-6">
                <!-- Display video of the connected peer -->
                <div class="text-center">
                    <video id="peer-camera" width="300" height="300" autoplay="autoplay" class="mx-auto d-block"></video>
                    <span class="label label-info" id="connected_peer"></span>
                </div>
            </div>
        </div>

        <div class="row">
            <h1 class="text-center">
                Videochat Example
                <br>
                <small> Share the following ID with the pal that wants to talk with you</small>
            </h1>
            <!-- The ID of your current session -->
            <h4 class="text-center">
                <span id="peer-id-label"></span>
            </h4>
            <div class="col-md-12 col-lg-12">
                <div class="form-horizontal" id="connection-form">
                    <fieldset>
                        <legend>Connection Form</legend>
                        <div class="form-group">
                            <label for="name" class="col-lg-2 control-label">Username</label>
                            <div class="col-lg-10">
                                <input type="text" class="form-control" name="name" id="name" placeholder="Your random username">
                            </div>
                        </div>
                        <div class="form-group">
                            <label for="peer_id" class="col-lg-2 control-label">Peer ID (id of your pal)</label>
                            <div class="col-lg-10">
                                <input type="text" class="form-control" name="peer_id" id="peer_id" placeholder="Peer ID" autocomplete="off" autocorrect="off" autocapitalize="off" spellcheck="false">

                                <!-- Show message if someone connected to the client -->
                                <div id="connected_peer_container" class="hidden">
                                    An user is already connected to your session. Just provide a name to connect !
                                </div>
                            </div>
                        </div>
                        <div class="form-group">
                            <div class="col-lg-10 col-lg-offset-2">
                                <button id="connect-to-peer-btn" class="btn btn-primary">Connect to Peer</button>
                            </div>
                        </div>
                    </fieldset>
                </div>
            </div>
            <div class="col-md-12 col-lg-12">
                <div id="chat" class="hidden">
                    <div id="messages-container">
                        <div class="list-group" id="messages"></div>
                    </div>
                    <div id="message-container">
                        <div class="form-group">
                            <label class="control-label">Live chat</label>
                            <div class="input-group">
                                <span class="input-group-btn">
                                    <button id="call" class="btn btn-info">Call</button>
                                </span>
                                <input type="text" class="form-control" name="message" id="message" placeholder="Your messag here ...">
                                <span class="input-group-btn">
                                    <button id="send-message" class="btn btn-success">Send Message</button>
                                </span>
                            </div>
                        </div>
                    </div>
                </div>
            </div>
        </div>
    </div>

    <!--
        Include the Client Side version of peer.js
        using a script tag !
    -->
    <script src="resources/js/peer.min.js"></script>

    <!-- Include the scripts that will handle the chat -->
    <script src="resources/js/script.js"></script>
</body>

</html>
The important on the structure of the markup, is that you follow the providen IDs to make for the following JavaScript. Note that the first video tag (the one that will display your own video) needs to have the muted attribute set to true, otherwise you will hear yourself once the transmission begins. The Client version of Peer.js needs to be included as well, this file can be obtained from the official repository here, or from any free CDN. The point is that the peer.min.js file needs to be located in project/public/js.
Now for the project/public/js/scripts.js file, we'll write the code that handles so start by writing a DOMContentLoaded event listener:
// When the DOM is ready
document.addEventListener("DOMContentLoaded", function(event) {
    // All the code of scripts.js here ...
}, false);
All the code that we'll explain now, we'll need to be inside of the previous callback. The first you need to do, is to decide how will be the initialization on the client side of PeerJS and create some global variables (only for the scripts.js file):
var peer_id;
var username;
var conn;

/**
 * Important: the host needs to be changed according to your requirements.
 * e.g if you want to access the Peer server from another device, the
 * host would be the IP of your host namely 192.xxx.xxx.xx instead
 * of localhost.
 *
 * The iceServers on this example are public and can be used for your project.
 */
var peer = new Peer({
    host: "localhost",
    port: 9000,
    path: '/peerjs',
    debug: 3,
    config: {
        'iceServers': [
            { url: 'stun:stun1.l.google.com:19302' },
            {
                url: 'turn:numb.viagenie.ca',
                credential: 'muazkh',
                username: '[email protected]'
            }
        ]
    }
});
In this step plays the WebRTC knowledge an important role, so if you don't know nothing about it, we recommend you to read more about the ice Servers in this well written article of HTML5 Rocks here. This example uses free Ice Servers to make it work, however they may not run or be active forever, so it's recommendable in case you are running a business, to buy and own your own STUN or TURN servers. So you will have all of the infrastructure you need to deploy production grade WebRTC applications.
By the otherside, we are using localhost as the host that usually maybe enough for production to make it work. In case you are testing, you know that you can't use the same computer to test the videochat because 2 browsers can't have access to the camera at the same time, so you probably will expose the Local Server to the LAN (explanation in the next step) by changing the host to the IP of your computer.
Now, add some event listeners to the peer that will allow you to execute some actions when the most important events of Peer happen as the video call etc:
// Once the initialization succeeds:
// Show the ID that allows other user to connect to your session.
peer.on('open', function () {
    document.getElementById("peer-id-label").innerHTML = peer.id;
});

// When someone connects to your session:
//
// 1. Hide the peer_id field of the connection form and set automatically its value
// as the peer of the user that requested the connection.
// 2. Update global variables with received values
peer.on('connection', function (connection) {
    conn = connection;
    peer_id = connection.peer;

    // Use the handleMessage to callback when a message comes in
    conn.on('data', handleMessage);

    // Hide peer_id field and set the incoming peer id as value
    document.getElementById("peer_id").className += " hidden";
    document.getElementById("peer_id").value = peer_id;
    document.getElementById("connected_peer").innerHTML = connection.metadata.username;
});

peer.on('error', function(err){
    alert("An error ocurred with peer: " + err);
    console.error(err);
});

/**
 * Handle the on receive call event
 */
peer.on('call', function (call) {
    var acceptsCall = confirm("Videocall incoming, do you want to accept it ?");

    if(acceptsCall){
        // Answer the call with your own video/audio stream
        call.answer(window.localStream);

        // Receive data
        call.on('stream', function (stream) {
            // Store a global reference of the other user stream
            window.peer_stream = stream;
            // Display the stream of the other user in the peer-camera video element !
            onReceiveStream(stream, 'peer-camera');
        });

        // Handle when the call finishes
        call.on('close', function(){
            alert("The videocall has finished");
        });

        // use call.close() to finish a call
    }else{
        console.log("Call denied !");
    }
});
Now add some helper methods to display the received and sent data in the listview and to request the video/audio on the browser:
/**
 * Starts the request of the camera and microphone
 *
 * @param {Object} callbacks
 */
function requestLocalVideo(callbacks) {
    // Monkeypatch for crossbrowser geusermedia
    navigator.getUserMedia = navigator.getUserMedia || navigator.webkitGetUserMedia || navigator.mozGetUserMedia;

    // Request audio an video
    navigator.getUserMedia({ audio: true, video: true }, callbacks.success , callbacks.error);
}

/**
 * Handle the providen stream (video and audio) to the desired video element
 *
 * @param {*} stream
 * @param {*} element_id
 */
function onReceiveStream(stream, element_id) {
    // Retrieve the video element according to the desired
    var video = document.getElementById(element_id);
    // Set the given stream as the video source
    video.src = window.URL.createObjectURL(stream);

    // Store a global reference of the stream
    window.peer_stream = stream;
}

/**
 * Appends the received and sent message to the listview
 *
 * @param {Object} data
 */
function handleMessage(data) {
    var orientation = "text-left";

    // If the message is yours, set text to right !
    if(data.from == username){
        orientation = "text-right"
    }

    var messageHTML =  '<a href="javascript:void(0);" class="list-group-item' + orientation + '">';
            messageHTML += '<h4 class="list-group-item-heading">'+ data.from +'</h4>';
            messageHTML += '<p class="list-group-item-text">'+ data.text +'</p>';
        messageHTML += '</a>';

    document.getElementById("messages").innerHTML += messageHTML;
}
As next, define the event listeners that react to every action from the user interface as the login event, start call etc:
/**
 * Handle the send message button
 */
document.getElementById("send-message").addEventListener("click", function(){
    // Get the text to send
    var text = document.getElementById("message").value;

    // Prepare the data to send
    var data = {
        from: username,
        text: text
    };

    // Send the message with Peer
    conn.send(data);

    // Handle the message on the UI
    handleMessage(data);

    document.getElementById("message").value = "";
}, false);

/**
 *  Request a videocall the other user
 */
document.getElementById("call").addEventListener("click", function(){
    console.log('Calling to ' + peer_id);
    console.log(peer);

    var call = peer.call(peer_id, window.localStream);

    call.on('stream', function (stream) {
        window.peer_stream = stream;

        onReceiveStream(stream, 'peer-camera');
    });
}, false);

/**
 * On click the connect button, initialize connection with peer
 */
document.getElementById("connect-to-peer-btn").addEventListener("click", function(){
    username = document.getElementById("name").value;
    peer_id = document.getElementById("peer_id").value;

    if (peer_id) {
        conn = peer.connect(peer_id, {
            metadata: {
                'username': username
            }
        });

        conn.on('data', handleMessage);
    }else{
        alert("You need to provide a peer to connect with !");
        return false;
    }

    document.getElementById("chat").className = "";
    document.getElementById("connection-form").className += " hidden";
}, false);
As final step (and it's execution is not immediately required) you can call the requestLocalVideo method to start your own stream (that will be used to send to the other user):
/**
 * Initialize application by requesting your own video to test !
 */
requestLocalVideo({
    success: function(stream){
        window.localStream = stream;
        onReceiveStream(stream, 'my-camera');
    },
    error: function(err){
        alert("Cannot get access to your camera and video !");
        console.error(err);
    }
});
6. Allow inbounds connection for Node.js (only if working locally)
If you try to access the mentioned address (localhost:8443) but with the IP of your computer instead of localhost from your mobile devices (an Android Device) or other device on your local area network to make the videochat test (because you can't test the videochat on the same computer) and Node.js is blocked by some rule of the Firewall, it won't (probably) simply work :

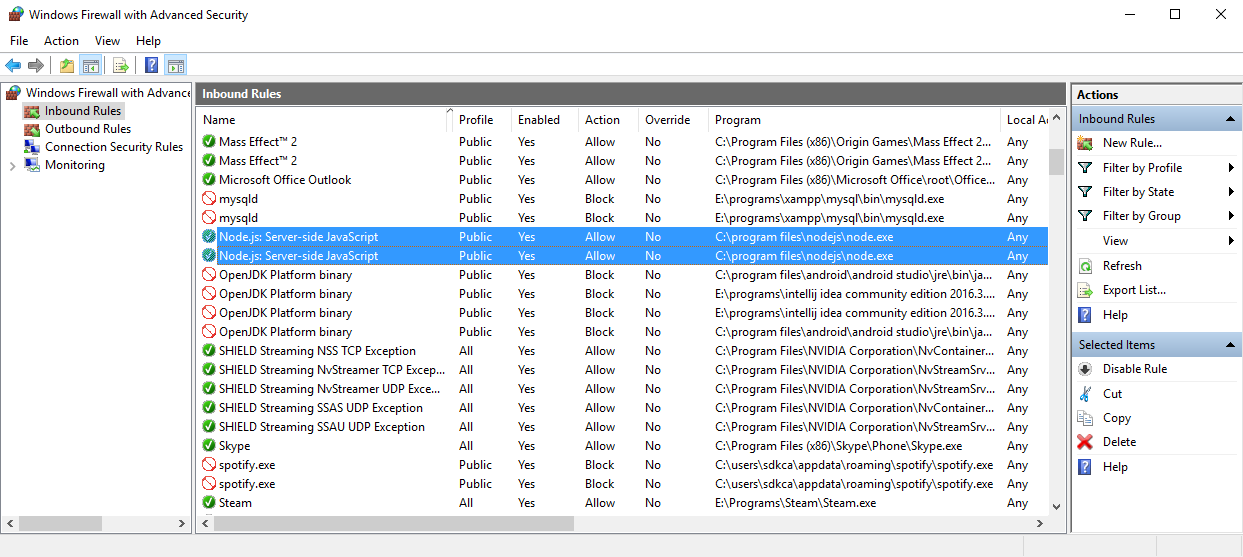
If you're sure that the server is running on your computer, then the problem could be caused by a Firewall restriction and to make it work you will need to allow all inbound connections to the Node.js application in your computer. For example, in Windows you could simply open the Firewall, navigate to the Inbound Rules and search Node.js in the list:
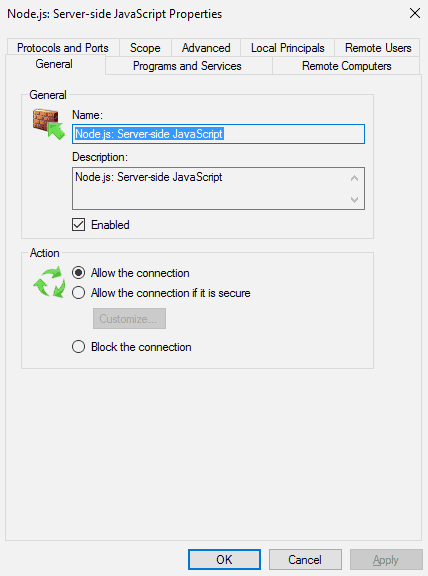
Right click on the selected item of Node.js and select Properties from the context menu. In this menu, navigate to the General tab and in the Action area, select the Allow the connection radio button:
That should immediately work, however to be sure, restart the terminal in which Node was open and start it again.
7. Running the Chat
If everything went as expected, you could be able now to test the videochat by yourself. All that you need to do is to run the server file of every directory (public and server) with Node and let them running in the background.
Open a new terminal and switch to the project/public directory and run the following command:
node website-server.jsThis will start the server for your website to test the videochat. Then open another terminal, switch to the project/server directory and run the following command:
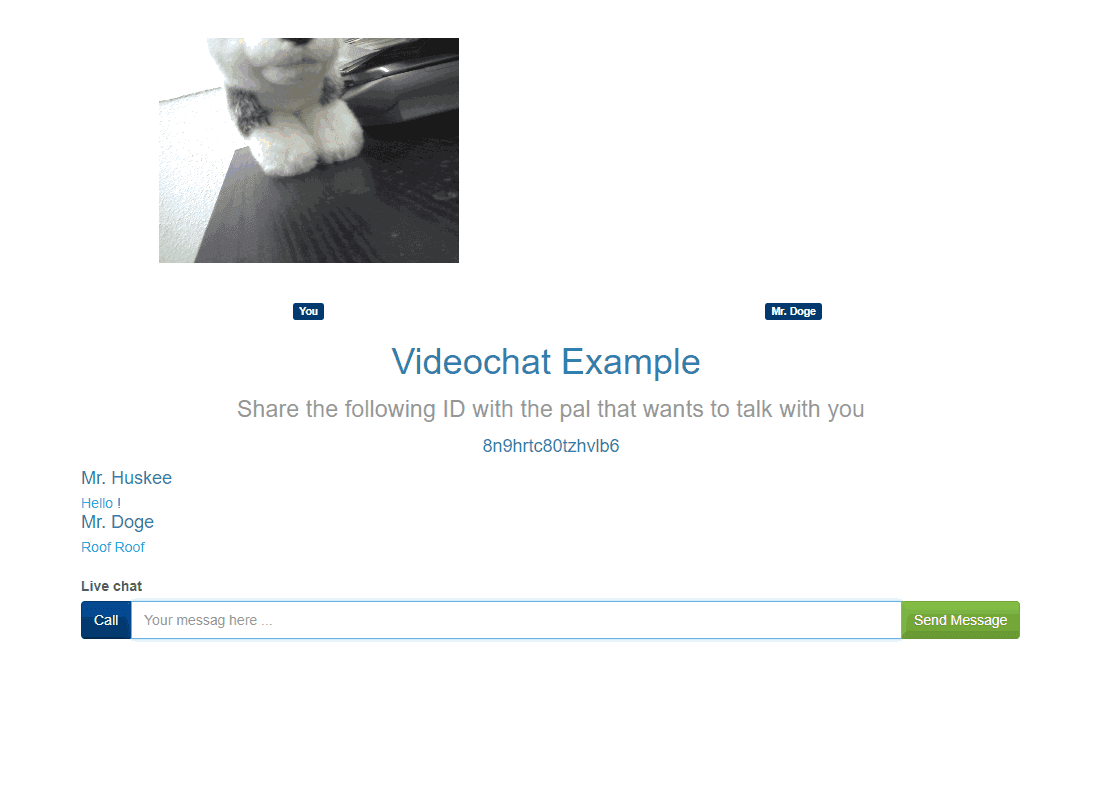
node peer-server.jsThis one will start the Chat server with Peer. Let the 2 terminal active and access the https://localhost:8443 url with your browser and you will see the Videochat template. For this example, we'll use 2 users namely Mr. Huskee (the first user) and Mr. Doge (the second user):
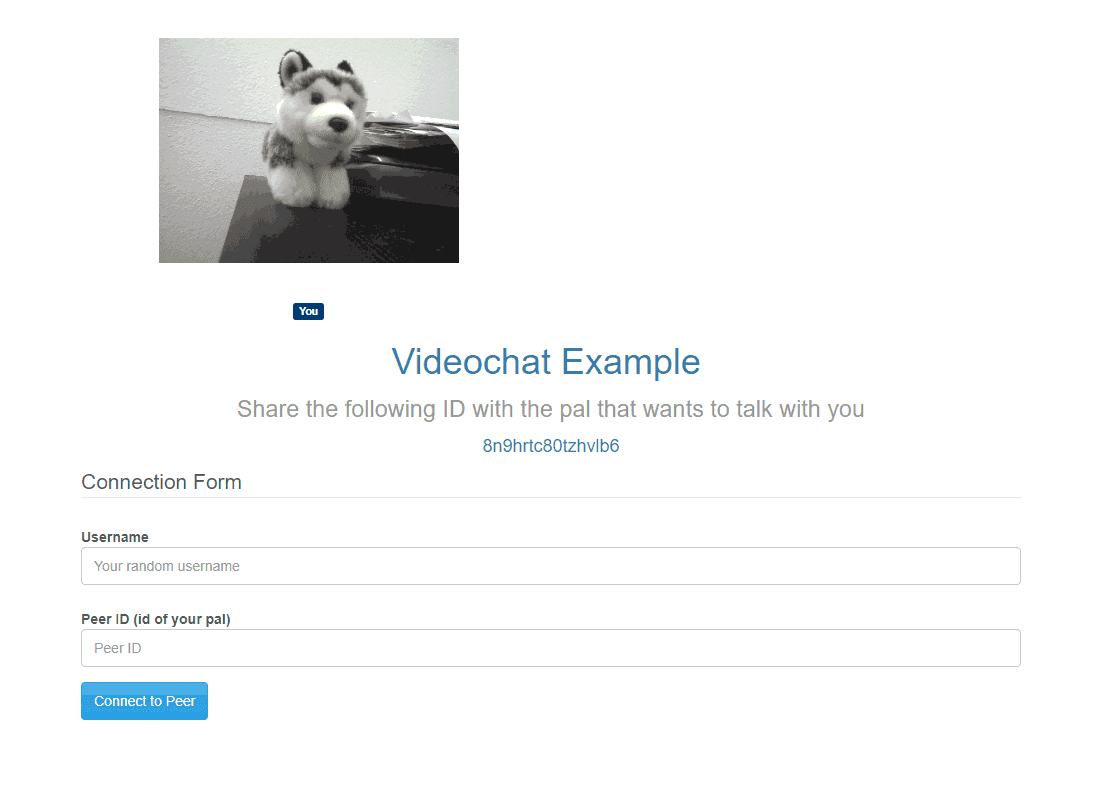
In this case the camera of Mr. Huskee starts automatically as defined behaviour that can be obviously changed as you want. The interface at this point expects for someone to connect using the ID at the middle of the screen, that means that if you want to start a videochat with someone, you only need to provide the ID to the other user. If you are not waiting for someone to connect, but you want to connect with someone, then you need the ID of the other user. With the other computer, or a mobile device in this example, Mr. Doge wants to start a chat with Mr. Huskee, so we need to type the ID of Mr. Huskee (in this case 8n9hrtc80tzhvlb6) in our form and our name:

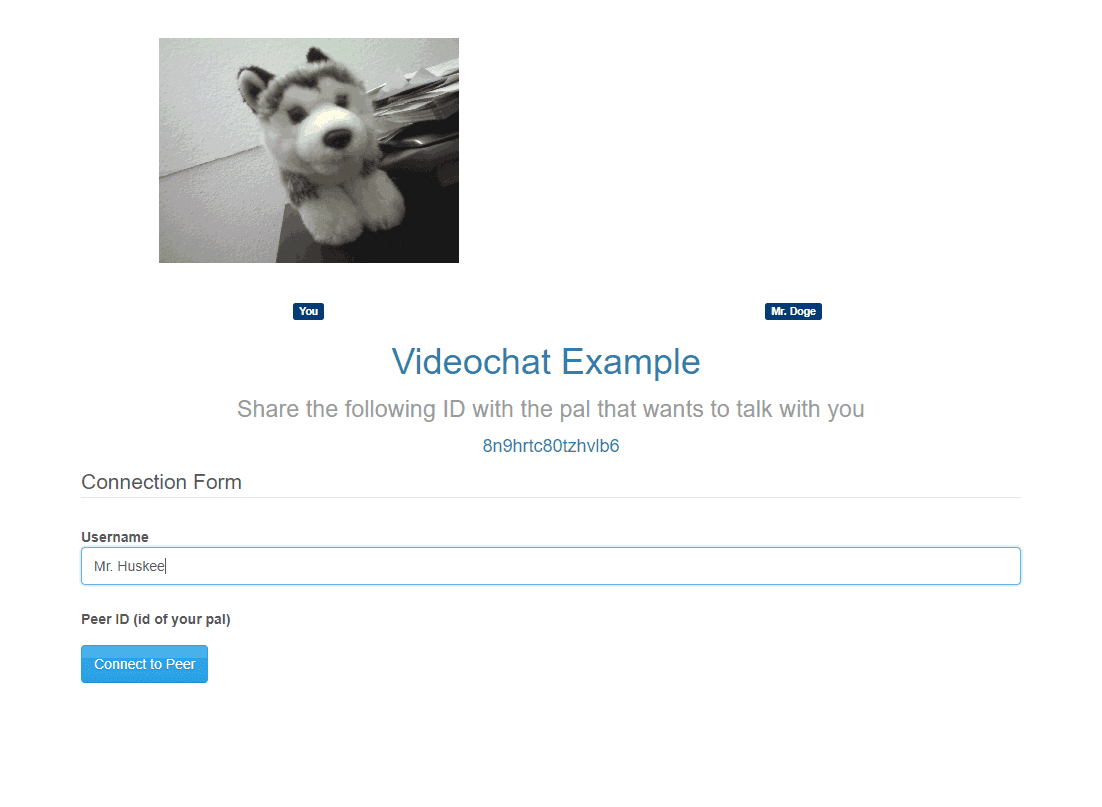
Once Mr. Doge has the basic data of the form and clicks on Connect to Peer, the screen of Mr. Huskee will be automatically updated and will show the message that someone is connected to the session namely Mr. Doge and he only needs to provide its username:
Now Mr. Huskee is logged in and can chat with Mr. Doge easily, therefore he can't provide the Peer ID to connect to someone else because he already has a connection. The chat at this moment doesn't have videochat but only text chat:
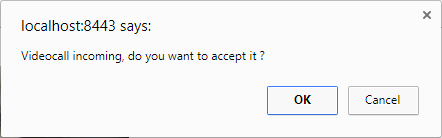
Therefore someone would need to click on the Call button, that in this case will be Mr. Doge at the mobile device. Then Mr. Huskee will receive the prompt in the browser if he want's to start the call:
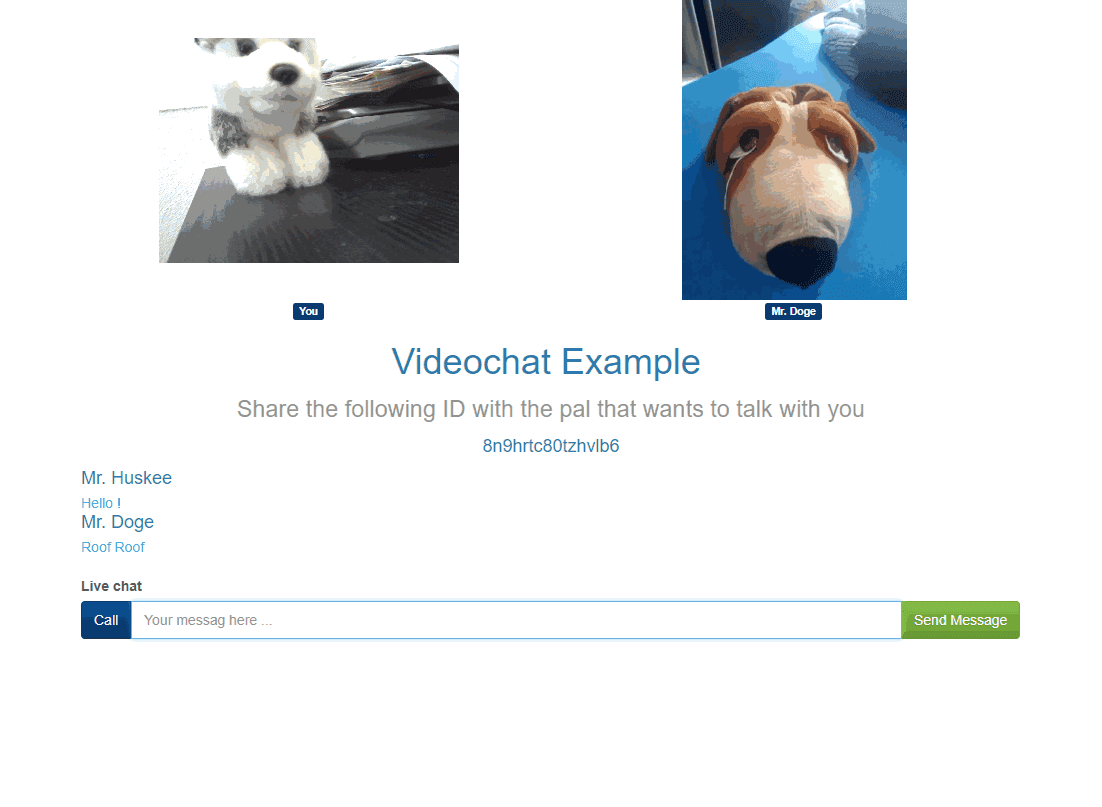
If accepted, the Video Chat will start without a problem and they can talk and write in the same way they do with applications like Skype:
As mentioned at the beginning of the article, you can find the source code of this example in the official repository at Github here.
Happy coding !

