

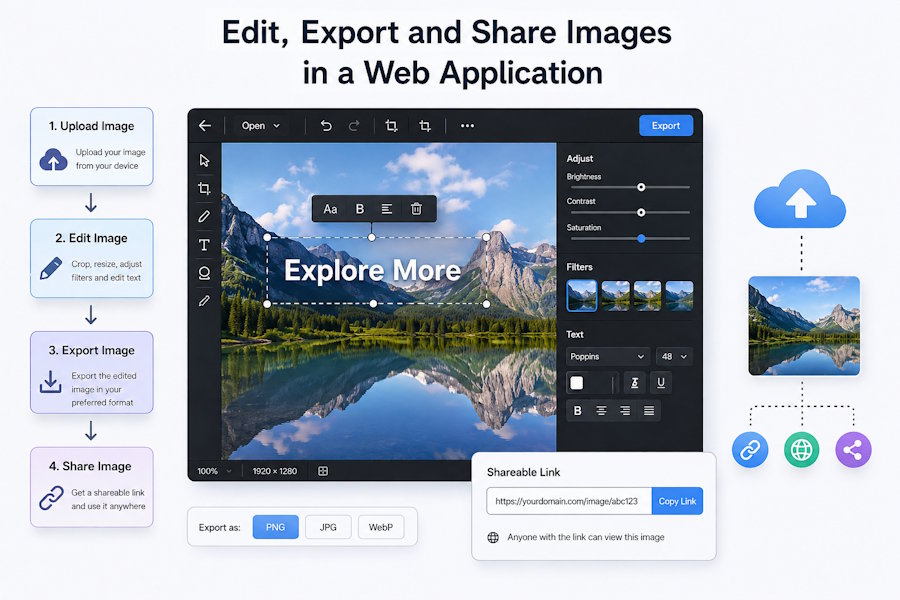
A simple image upload can turn into a much larger feature once users start asking for edits. At first, the requirement may only involve choosing a file and showing it on screen. Soon after that, someone wants to crop the image, fix some text, download the edited version or share it through a public URL.
A web application can handle much of this work inside the browser. JavaScript and the HTML Canvas API give you enough control to load an image, change its appearance, and export a new file without sending every edit to a server. The sharing stage needs a different approach because a file stored inside the browser does not automatically have a public address.
This article follows the complete workflow from image upload to the final shareable output. It also explains where browser-side editing works well and where a separate service or server becomes useful.
What an Image Editing Workflow Actually Includes
An image editor is not just a collection of crop and rotate buttons. The full workflow starts before the image appears on the canvas and continues after the user finishes the edit.
A typical flow looks like this:
Upload → Render → Edit → Export → Share
Each part solves a different problem. The upload stage deals with the original file, while the editing stage controls what the user sees and changes. Export creates a new image from those changes, and the final stage decides whether the result stays on the device or receives a public URL.
Keeping these parts separate also makes development easier. You can improve the editor later without having to rebuild your storage or sharing logic at the same time.
Loading an Image Into the Browser
Most web image tools start with a standard file input.
<input type="file" id="imageInput" accept="image/*">JavaScript can read the selected file and create a temporary browser URL for it.
const input = document.getElementById("imageInput");

input.addEventListener("change", () => {
  const file = input.files[0];

  if (!file) return;

  const imageUrl = URL.createObjectURL(file);
  const image = new Image();

  image.onload = () => {
    console.log(image.width, image.height);
    URL.revokeObjectURL(imageUrl);
  };

  image.src = imageUrl;
});
The same processing flow can also work with drag and drop. In that case, the file comes from the DataTransfer object instead of an input field, but the validation and rendering logic can remain almost identical.
File checks should happen before the editor starts processing the image. A very large photo can consume a noticeable amount of browser memory, while an unsupported file may fail before the user understands what went wrong. MIME type checks and sensible size limits help you stop those problems before the image reaches the editor.
Rendering the Image for Editing
HTML Canvas is a common choice when the application needs direct control over image pixels and drawing operations.
A simple setup looks like this:
<canvas id="editorCanvas"></canvas>

const canvas = document.getElementById("editorCanvas");

const ctx = canvas.getContext("2d");

function drawImage(image) {

  canvas.width = image.naturalWidth;

  canvas.height = image.naturalHeight;

  ctx.drawImage(image, 0, 0);
}
One detail deserves attention here. The visible CSS size of a canvas and its actual pixel dimensions are not always the same. A canvas may appear 800 pixels wide on the page while its internal bitmap is only 400 pixels wide. Exporting that canvas can produce an image that looks softer than the original.
For image editors, the internal canvas dimensions should normally reflect the resolution you want in the exported file. CSS can then control how large that canvas appears inside the interface.
Adding Basic Editing Controls
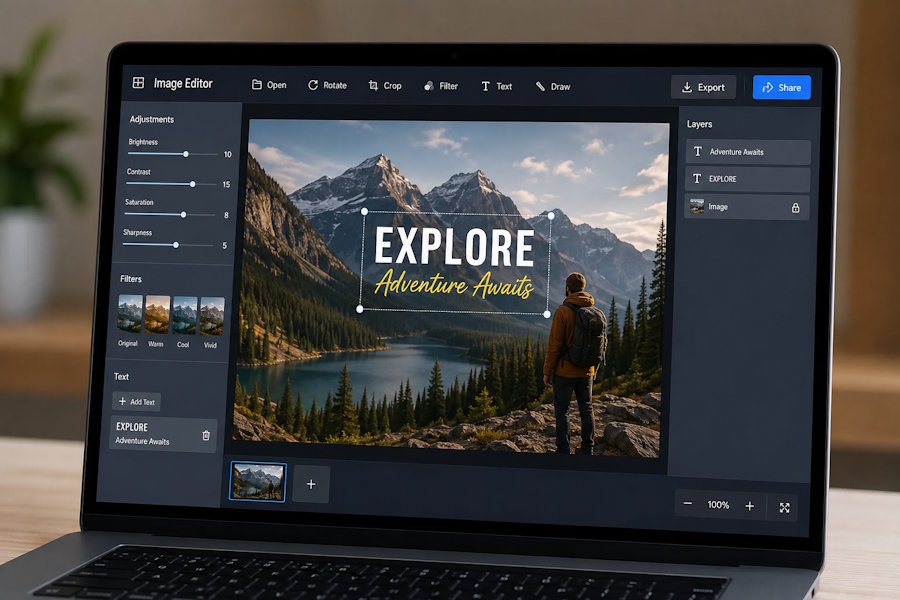
Once the image is on the canvas, you can layer different controls on top of the same rendering system.
Crop tools usually work by storing a selected rectangle and redrawing only that portion of the source image. Resize controls change the output dimensions, while rotation relies on Canvas transformations before the image is drawn again.
Simple filters can also be applied through the Canvas context.
ctx.filter = "brightness(110%) contrast(105%)";

ctx.drawImage(image, 0, 0);

ctx.filter = "none";
Annotations need another layer of state. An arrow, text box or freehand mark should ideally remain editable until the user exports the image. If every small change is immediately merged into the source bitmap, undo and reposition controls become much harder to manage.
Handling Text Inside an Existing Image
New text is straightforward because Canvas provides methods such as fillText(). You choose the font, position and colour, then draw the new text over the image.
Existing wording inside a JPG, PNG or WebP file is different. Once text has been rendered into an image, the browser sees pixels rather than selectable characters. There is no DOM element to click and no original font information stored as editable text.
When an uploaded image already contains wording that needs correction, a dedicated tool can help you edit the text in the image without rebuilding the entire visual manually.
A web application that tries to offer this feature itself has much more work to do. It may first need OCR or another text-region detection method. The old text area then has to be reconstructed before the replacement wording can be drawn in a way that matches the surrounding image.
Font matching creates another challenge. Even when the words are detected correctly, the replacement can look out of place if the original size or weight is not approximated properly. This is why changing existing image text belongs to a different level of complexity than adding a normal Canvas text layer.
Keep Edits Separate From the Original Image
A non-destructive editor stores changes as separate operations for as long as possible.
Instead of permanently changing the bitmap after every action, you can keep an editing state such as:
const editorState = {
  rotation: 0,
  brightness: 100,
  crop: null,
  textLayers: []
};
Whenever something changes, the application redraws the image from the original source and applies the current state again. Undo then becomes a question of restoring an earlier state rather than trying to reverse pixel changes.
This method also protects image quality. Repeatedly exporting and re-importing a lossy format such as JPEG can introduce additional compression, while one final render keeps that problem under better control.
Exporting the Edited Image
Once the user is satisfied with the result, the canvas needs to produce a real file.
canvas.toBlob() is useful for this because the browser returns binary image data that can be downloaded or uploaded.
canvas.toBlob((blob) => {
  if (!blob) return;
  console.log(blob.size);
}, "image/webp", 0.9);
canvas.toDataURL() can also export a canvas, but it returns a Base64-style string.
const dataUrl = canvas.toDataURL("image/png");
Data URLs are convenient for quick previews and small in-memory use cases. Blob output usually makes more sense when the next step is a file download or network upload because it avoids carrying the image as a large text string.
Choosing the Output Format
|
Format |
Good choice for |
Main consideration |
|
JPEG |
Photos and photographic content |
Compression removes some image data |
|
PNG |
Graphics that need transparency |
File size can increase quickly |
|
WebP |
Modern web images and compact exports |
Check support where older environments matter |
The best format depends on what the edited image contains. A screenshot with sharp text may benefit from PNG, while a photograph often needs far less storage as JPEG or WebP.
Creating a Download in the Browser
A Blob can become a temporary object URL that points to the exported file inside the current browser session.
function downloadImage(blob) {
  const url = URL.createObjectURL(blob);

  const link = document.createElement("a");
  link.href = url;
  link.download = "edited-image.webp";
  link.click();

  URL.revokeObjectURL(url);
}
This works well when the user only wants the file on their computer or phone. No upload server is required because the browser creates the exported file and initiates the download locally.
The temporary URL should not be confused with a public link. It only exists inside the browser environment that created it.
Downloading and Sharing to Solve Different Problems
This distinction becomes important once the user wants to send the finished image to someone else.
A normal download moves the image onto the user's device. A shareable link needs the image to exist somewhere that another browser can reach through the internet.
A blob: address cannot provide that. It might look like a URL, but it only references data inside the current browser session.
Base64 data URLs have a similar limitation for normal sharing. They contain the image directly inside a long string rather than giving the file a normal public location.
A persistent shareable URL, therefore, needs some form of hosting.
Turning the Exported Image Into a Shareable Link
At this stage, the application has already done the difficult editing work. The remaining question is where the exported Blob or file should go.
A full application may upload the file to its own backend and store it in object storage. That approach gives you complete control over permissions and retention rules, but it also adds infrastructure that may be unnecessary for a smaller workflow.
If the goal is only to turn the exported file into a public URL, an image to link service can handle the hosting step without requiring you to build a separate storage interface first.
That approach is useful when the editing feature and the storage system do not need to be tightly connected. The application can finish the image first, then hand the output to a dedicated file-hosting workflow.
Building Your Own Upload and Storage Flow
Applications with deeper media requirements will usually need their own storage layer.
The architecture may look like this:
Browser
↓
Upload API
↓
Object storage
↓
Public or signed URL
The browser sends the exported Blob through an API endpoint. That API validates the request and stores the image in services such as Amazon S3 or another compatible object-storage platform.
A public image can then receive a normal delivery URL. Private files need different handling because a permanent public address would bypass the application's permission system. Signed URLs solve that problem by giving the user temporary access after the server verifies that they are allowed to view the file.
A database is not always necessary for the image itself. It becomes useful when the application needs to associate that file with accounts, projects or other records.
Security Checks Before Accepting Uploads
Upload features deserve more attention than checking whether the filename ends with .jpg.
- The server should inspect the actual file type because a filename supplied by the browser can be changed before upload. MIME validation and image decoding give the server more reliable information about what it has received.
- File-size limits protect the service from accidental or deliberate oversized uploads. Image dimensions matter as well because a compressed file can still expand into a very large bitmap during processing.
- Random storage names reduce collisions and prevent users from controlling sensitive filesystem paths. The original filename can still be stored separately when the interface needs to display it.
- Private images should not sit in an unrestricted public bucket because anyone who receives the permanent URL may continue accessing the file. Access-controlled storage or temporary links provide a safer model when the content is sensitive.
The exact rules depend on the application, but upload security should be part of the design from the start rather than an addition after the feature goes live.
Common Problems During Image Export
The exported image looks blurry
Canvas resolution is often the cause. The visible editor may look sharp because CSS enlarges or shrinks the canvas, while the internal bitmap has a different size.
Check canvas.width and canvas.height rather than relying only on CSS dimensions.
Large images slow down the browser
Modern phone cameras can produce images with far more pixels than an editor needs for a typical web workflow. Keeping the full original resolution active during every edit increases memory usage and makes repeated redraws expensive.
A practical editor can work on a resized preview and apply the same edit state to a larger canvas only when the user requests the final export.
Text changes appearance after export
Canvas needs the font to be available before it draws the text. If a web font has not finished loading, the browser may render the text with a fallback font and bake that result into the image.
You can wait for the required font through the Font Loading API before performing the final render.
A shared URL stops working
This often happens when a temporary object URL is mistaken for an uploaded file.
Object URLs exist for local browser use. A link that needs to work for another person must point to a file stored on a reachable server or hosting service.
A Practical End-to-End Architecture
The complete workflow can stay fairly simple when each responsibility has its own place.
User selects an image
↓
Validate the file
↓
Load the image into Canvas
↓
Apply edits and text changes
↓
Render the final version
↓
Export to Blob
↓
Download locally
OR
Upload the result
↓
Return a shareable URL
The editor does not need to know every detail about the storage system. It only needs to produce a valid output file. In the same way, the storage layer does not need to understand how the crop or text tools worked before the upload arrived.
That separation keeps the application easier to maintain as the product grows.
When It Makes Sense to Build Everything Yourself
A custom editor and storage system can be worth the work when image processing is part of the core product. The same applies when media permissions are connected closely to user accounts and application data.
Existing services make more sense when the requirement is narrow. A project that only needs occasional text corrections or a quick public URL may gain very little from recreating specialised editing and hosting systems internally.
The useful question is not whether every part can be built with JavaScript. Most of it can. The better question is whether maintaining that part of the stack contributes enough to the product to justify the extra code and infrastructure.
Final Thoughts
Browser APIs now cover a large part of the image workflow that once needed desktop software or constant server processing. An image can enter the browser, move through a Canvas editor and leave again as a newly generated file without a server touching every intermediate change.
Sharing introduces a separate decision. A local export can remain entirely inside the browser, while a public image needs somewhere to live after that browser session ends.
Treating editing and delivery as separate responsibilities gives the application room to grow. You can improve one side without disturbing the other, and users still experience the whole process as one connected image workflow.

