

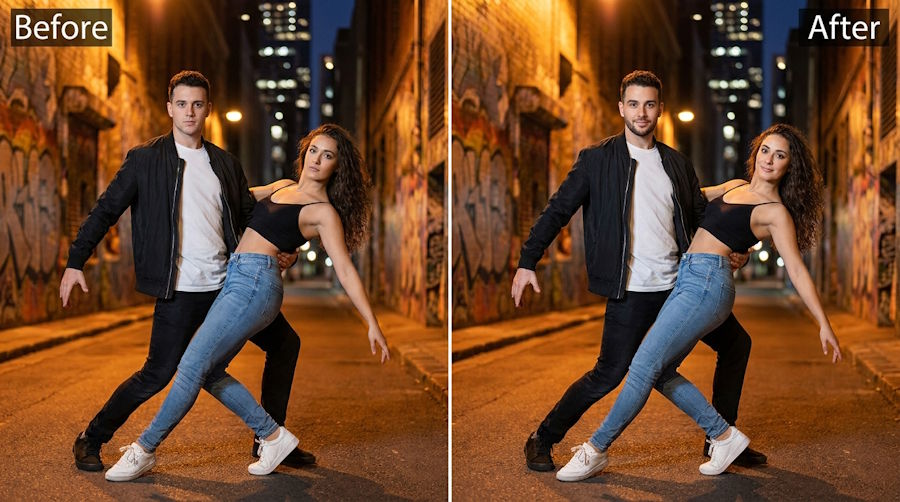
Swapping several faces in a dance performance video takes more than uploading a clip and pressing a button. Fast turns, changing formations, raised arms, hair covering the face, and strong stage lighting can all make face replacement less accurate. A good result starts with the right footage and depends on careful face matching, timing, and review.
This guide explains how to swap multiple faces while keeping the dancers’ movements, costumes, camera motion, and choreography intact. You’ll also learn how to fix common problems before you export the final video.
Prepare the Video and Face Sources
Start with a clean copy of the performance video. A front-facing group shot can work well, but a clip with rapid cuts or heavy motion blur will usually need more checking after processing. If possible, choose a video with steady lighting and enough resolution to show facial details clearly.
Next, collect one suitable source image for every face you want to add. Use clear photos with the person looking toward the camera, with the full face visible and no sunglasses, masks, hands, or hair covering the eyes. A neutral expression is often easier to match than a wide smile because the software can adapt it to different expressions in the dance clip.
You can use EasyFaceSwap to prepare a face swap project online without installing complex editing software. Before uploading anything, make sure you have permission to use both the performance video and the faces you plan to add. Face replacement can affect real people’s identity, so consent matters, especially if you intend to publish the result.
Keep your source photos reasonably consistent. If one image is a dark side profile and another is a bright front-facing portrait, the final faces may look noticeably different even when the tool handles the swap correctly. Matching the general angle, lighting, and image quality gives the software a better starting point.
It also helps to decide exactly which dancer receives each face. In a group performance, dancers may cross paths or appear at similar sizes, so write down a simple description such as “front left in the opening shot” or “center dancer in the red jacket.” This prevents you from assigning the wrong face when several people appear together.
Upload, Match, and Process the Dance Clip
Open the video face swap feature and upload the performance clip. A short test section is useful if the full video is long. Choose a portion that includes the most difficult movement, such as a spin, a formation change, or a close-up, because a successful test tells you more than a simple opening pose.
The multiple face swap video workflow is designed for clips where more than one person needs a replacement. Add the source faces one at a time and assign each one to the correct dancer. The exact controls may vary, but the basic idea is the same: identify each visible face, connect it to a source image, and let the tool track it through the selected footage.
Check the face assignments before starting the full render. Look at the first few seconds, then scrub to a point where the dancers have changed position. If two dancers overlap, the software may confuse them, particularly when their faces are similar in size or briefly leave the frame. Correcting the assignment at this stage is much easier than discovering the error after a long export.
If the tool lets you adjust detection or tracking, use the most reliable face as the starting point. A dancer who stays visible for several seconds can help you judge the overall blend. For dancers who turn sharply or disappear behind another performer, expect to inspect the result more closely and possibly process a shorter segment.
Large group videos can benefit from being divided into scenes. You might process the opening formation separately from a close-up section and then join the finished clips in a video editor. This takes more time, but it can improve tracking when the camera angle, lighting, or dancer positions change dramatically.
After processing, watch the entire result rather than checking only still frames. A face may look convincing while the dancer is standing still but slip during a fast head turn. Pay close attention to eyes, jawlines, hair edges, and moments when one dancer passes in front of another.
Tips for a More Natural Result
The best face swaps preserve the original performance instead of making the replacement face look pasted on. If the source image has a very different head angle from the dancer’s movement, the face can appear flat or stretched. Choose a source photo that gives the software enough information around the cheeks, chin, and forehead.
Lighting is another major factor. Stage performances often include blue, red, or flashing lights, while source portraits are commonly taken in soft daylight. Some tools adjust color automatically, but the result may still need a small brightness, contrast, or color correction in an editor after the swap.
Use the table below as a quick review guide before you export.
| Problem to check | What usually helps |
|---|---|
| Face slips during a turn | Use a clearer source image and process the scene separately |
| Skin tone looks different | Adjust brightness, warmth, and contrast after the swap |
| Wrong dancer receives a face | Recheck assignments at formation changes |
| Face edges look sharp | Add a small amount of feathering or soften the mask |
| Motion looks unnatural | Lower the effect strength or use a shorter clip |
Keep the original audio whenever possible. Face swapping changes the visual layer, not the timing of the choreography, so the dance should remain synchronized with the music. If you cut the video into sections, preserve the exact start and end points to avoid creating an audio jump.
Resolution also matters. Upload the highest quality version you can access, but don’t assume that a larger file will fix blurry footage. If the original video is heavily compressed, a face replacement may exaggerate blocky edges and lose detail around the eyes. A clean 1080p source is often more useful than a badly enlarged file.
For privacy and presentation, consider adding a brief note that the video has been edited if viewers could mistake it for authentic footage. Avoid using face swaps to mislead people about a real performance, endorsement, or event. A creative dance edit is very different from presenting an altered video as evidence.
Common Mistakes to Avoid
One frequent mistake is choosing source photos for appearance alone. A beautiful portrait may still perform poorly if the face is angled away, partly hidden, or lit from an unusual direction. Technical suitability usually matters more than having a perfect-looking photo.
Another mistake is trying to process a long, complicated performance in one pass. A single take may include wide shots, close-ups, strobe lighting, dancers leaving the frame, and overlapping bodies. Splitting the project by scene gives you more control and makes it easier to correct one difficult section without redoing everything.
Don’t judge quality from the thumbnail or the first frame. Tracking errors often appear only during motion, especially when dancers tilt their heads or move quickly across the stage. Watch at normal speed first, then replay suspicious moments in slow motion to see exactly where the face begins to drift.
It’s also easy to overcorrect. Increasing sharpness, contrast, or face strength can make the swapped area stand out from the rest of the video. A slightly softer face that matches the surrounding image usually looks more believable than an overly sharp replacement with a visible border.
Finally, avoid adding too many source faces before testing the basic setup. Start with a short segment and confirm that the tool recognizes the dancers correctly. Once the tracking is stable, add the remaining faces or extend the project to the full performance.
Export and Review the Finished Video
When the result looks consistent, export it at the same frame rate and aspect ratio as the original whenever those options are available. Keeping the original format helps prevent unwanted cropping, stretched dancers, or audio synchronization problems. Save the untouched source file and the edited version separately so you can return to the project if a later correction is needed.
Watch the exported file on more than one screen. A blend that looks fine on a bright phone may reveal color differences on a larger monitor. Check the opening seconds, the busiest formation change, every close-up, and the final pose before sharing it.
Swapping multiple faces in a dance video works best when you treat it as a tracking and editing task, not just a one-click effect. Clear source images, accurate dancer assignments, short scene tests, and a careful final review will do more for the result than excessive filters or sharpening. With those habits, you can create a convincing creative edit while keeping the choreography and original energy intact.

