

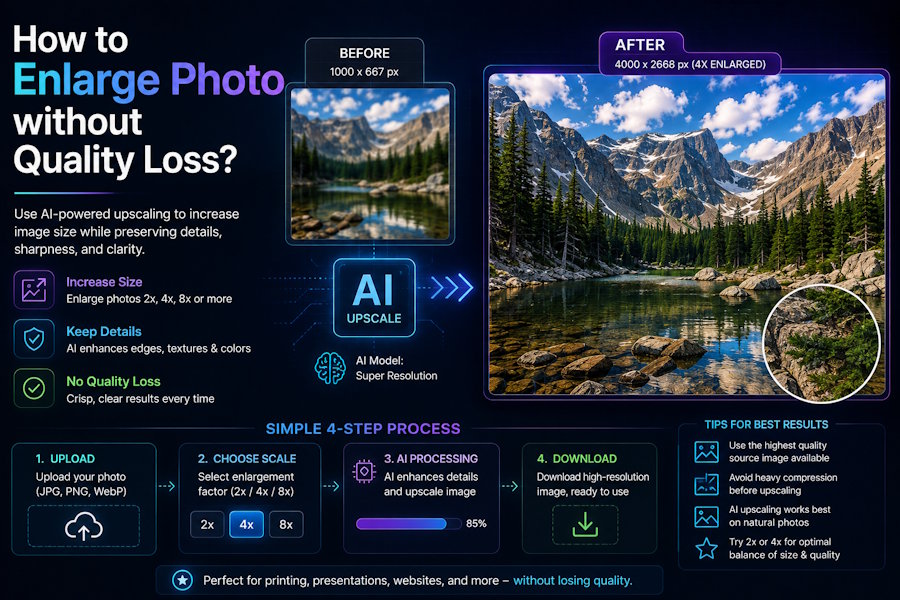
Small photos look fine until you zoom in. Stretching them usually turns pixels into mush. Good news: modern tools fix this problem well. AI studies patterns and rebuilds missing detail. That's very different from old-school resizing tricks. Beginners often struggle picking the right software though. Try these best AI driven photo editors for beginners now. This guide walks through every method that works. You'll learn free options, paid tools, and simple steps. By the end, blurry results won't happen again. Fun fact: some AI models train on millions of real photos.
What Makes a Great Photo Enlarger?
Not every tool enlarges photos the same way. Some just stretch pixels and blur edges. Others rebuild real detail with smart AI. Photographers often waste money picking blindly. A few criteria really matter here:
- Strong AI detail reconstruction
- Manual control over sharpness
- Batch processing for many files
- Fair pricing without hidden fees
- Support for large final file sizes
Luminar Neo checks every box on this list. That's why it leads our top picks. Free tools still deserve real credit though. Paid software often wins on raw power. Your project size usually decides the winner. A quick print needs less power than a poster. A wedding album might need serious detail work. Keep your own workflow needs in mind. That choice saves both time and money.
Why Photos Lose Quality When Enlarged
Every photo is just a grid of pixels.
Pixels and Resolution Explained
Each pixel holds one small piece of color. Stretching a photo spreads those pixels apart. Gaps appear where no real data exists. Old methods just guess with nearby colors.
Common Mistakes That Cause Blur
Basic resizing just copies nearby pixels blindly. That trick worked fine decades ago. Today's screens and prints demand much sharper results. Phones now pack incredibly dense, tiny screens.
Luminar Neo – The Smartest Way to Enlarge Photos
This app leads our list for good reason. Its AI rebuilds detail instead of guessing.
AI Upscaling Technology Explained
The AI studies millions of sharp photos first. It learns what real detail usually looks like. Then it predicts missing pixels intelligently. Results look natural, not artificially sharpened. You barely need any editing skill at all.
Keeping Edges and Textures Sharp
Hair, fabric, and skin stay looking real. Edges around objects stay crisp and clean. Nothing turns smooth or plastic-looking. Portrait photographers really notice this small difference.
Batch Enlarging Multiple Photos
You can enlarge whole folders at once. This saves photographers a huge amount of time. Try the tool's own enlarge images feature directly. It handles dozens of files in minutes. A wedding shoot finishes in one short session.
Free Tools for Enlarging Photos
Free tools work well for small jobs.
Upscayl and Other Offline Options
Upscayl runs completely free on your computer. Waifu2x handles illustrations and anime especially well. Let's Enhance offers a solid free tier too. None of these need a monthly subscription.
Where Free Tools Fall Short
Most free tools cap the maximum file size. Bigjpg limits enlargement for really big prints. Some also add a small watermark. Speed can slow down during busy hours too.
Paid Tools Worth Considering
Paid tools aim at serious, repeated use.
Topaz Gigapixel AI and Similar Software
Topaz Gigapixel AI leads this category clearly. VanceAI offers strong automation as well. Both handle large batches with ease. Wildlife and sports photographers often rely on them.
When the Extra Cost Pays Off
Professionals doing daily work need reliable speed. Luminar Neo often costs less overall though. A one-time license beats endless monthly fees.
Step-by-Step: Enlarging a Photo the Right Way
Good results start before you even click enlarge.
Choosing the Right Starting File
Always start with the highest quality file. RAW or high-res JPEG works best. A blurry source stays blurry after enlarging. No AI can invent focus that never existed.
Picking the Correct Scale Factor
Match your scale to the final use. Small prints need less enlargement than posters. Going too far invents unnecessary extra detail. Doubling size usually works better than tripling.
Reviewing and Fine-Tuning the Result
Zoom in and check faces and edges. Adjust sharpness slightly if it looks soft. Small tweaks make a real difference here.
Enlarging Photos for Specific Uses
Different goals need slightly different settings.
Printing Large Formats
Large prints need much higher final resolution. Aim for at least 300 pixels per inch. Viewing distance also affects how sharp it looks. Billboards, oddly, can use far fewer pixels.
Preparing Images for Social Media
Social platforms compress images pretty heavily anyway. Slight oversharpening helps images survive compression. Test a few sizes before posting widely. Instagram and Pinterest compress images quite differently.
Common Mistakes to Avoid
A few habits ruin otherwise good results.
Enlarging Too Much at Once
Going from tiny to huge invents detail. Two smaller enlargement steps often work better. Quality holds up much longer this way.
Skipping Noise Reduction First
Noise gets bigger and clearer along too. Clean up grain before enlarging the photo. This keeps the final result looking smooth.
Final Thoughts on Enlarging Photos
Enlarging photos doesn't have to hurt quality. Smart AI tools rebuild detail instead of guessing. Free options work fine for small, casual jobs. Paid software pays off for serious, frequent use. Start with a clean, high-quality source file. Then pick a scale factor that fits your goal. Small habits protect quality at every single step. Soon every enlarged photo will look sharp and real. Your future prints and posts will thank you.

