


An AI image editor can produce a convincing result on the first attempt and still be a poor fit for production. The product may look right in one frame but change shape in the next. A label may survive a background replacement yet fail after a crop. A low-resolution preview may hide the warped edge that becomes obvious on a product page.
That is why a polished sample is weak evidence. Developers and product teams need a small, repeatable test suite that exposes where an editor holds up, where it drifts, and how much usable output actually costs. The goal is not to find a model that never fails. It is to make failures visible before generated assets reach a campaign, catalogue, support article, or app store listing.
A credible evaluation compares controlled variants rather than choosing the most attractive first result. Original editorial image generated for this article.
One Good Output Proves Almost Nothing
Image generation is probabilistic. The same instruction can produce different compositions, and a harmless wording change can affect parts of the image that were supposed to remain fixed. A useful evaluation therefore tests a class of tasks, not one prompt.
Start by writing down the actual production job. “Create better product images” is too broad. “Replace a neutral studio background while preserving product geometry, label text, colour, and shadow direction” is testable. So is “adapt one approved banner to three aspect ratios without moving the subject or inventing new copy.”
The narrower definition also prevents a common buying mistake: judging every tool by its most impressive feature. Strong text rendering is irrelevant if the job requires exact identity preservation. Fast output is not a win when reviewers reject half the batch.
Build a Fixture Pack Before You Compare Tools
A fixture pack is a small set of source images and instructions that every candidate editor receives. Five to eight fixtures are usually enough for an initial screen. They should represent the awkward edges of the real workload, not only clean studio photographs.
Include a mix such as:
- a product with a rigid silhouette and readable packaging;
- a person whose face, hair, and clothing must remain identifiable;
- a reflective or transparent object;
- a scene with hands, cables, furniture, or repeated items;
- a wide composition that must also work as a square or vertical crop;
- a low-quality source that should be rejected rather than “fixed” through invention.
Keep the originals immutable. Give each fixture an identifier, record its permitted use, and store a checksum if it will move between systems. The instruction belongs beside the file as plain text. Screenshots of prompts are poor test records because they are difficult to diff, search, or reuse.
Turn the Brief into Assertions
Most creative briefs mix requirements with preferences. A test matrix works only after separating them.
Requirements become hard assertions: the bottle shape must not change, the person must remain the same, the supplied headline must be spelled exactly, and the output must have the requested dimensions. Preferences become scored qualities: the light should feel warmer, the background should appear less busy, or the crop should leave comfortable space for copy.
A browser workspace is useful while defining those assertions because reviewers can change one variable without first building an integration. The independent Nano Banana Pro workspace currently exposes text-to-image and image-editing modes, reference-image input, model selection, aspect ratio, resolution, output count, and a visible credit cost. Those controls make it practical for exploratory testing, but they do not turn the site into an official Google API or replace a team’s own records. Capture the settings the interface actually shows; do not invent seed values or hidden parameters.
For every edit, write assertions in three groups:
| Group | Question | Example check |
|---|---|---|
| Preserve | What must remain unchanged? | Product outline overlaps the source mask within tolerance |
| Change | What should be different? | Background is now warm grey with no visible seam |
| Forbid | What must not appear? | No extra logo, prop, finger, reflection, or claim |
This structure is more useful than a single “looks good” score. It tells the team why an output failed and whether another prompt, another model, or manual editing is the sensible next step.
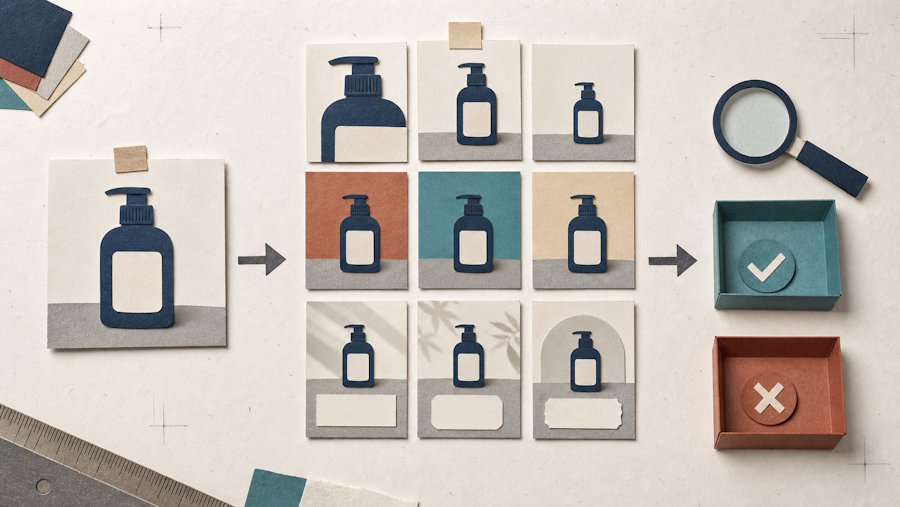
Conceptual test matrix: one fixed source, controlled variations, then pass-or-revise review. Original cut-paper illustration generated for this article.
Design the Matrix Around Controlled Changes
Do not test every combination. A giant matrix burns credits without explaining much. Begin with one baseline prompt, then vary a single factor at a time: instruction length, reference count, crop, resolution, or model. Run each meaningful condition more than once so a lucky result does not masquerade as reliability.
A compact first pass might contain four rows:
- Local edit: change one object or colour while locking everything else.
- Background edit: replace the setting while preserving subject edges and shadows.
- Composition edit: change aspect ratio or camera framing without redesigning the subject.
- Text-sensitive edit: preserve or insert a short verified phrase, then inspect every character.
Use a consistent prompt grammar across the matrix: source role, requested change, invariants, output constraints, and forbidden elements. A library of Nano Banana prompts can supply realistic examples and reveal how creators describe portraits, products, interiors, and restoration tasks. Treat those examples as raw fixtures, not as unquestionable recipes. Remove decorative quality tags, replace ambiguous language, and version the normalized prompt used in the test.
Score Failures by Release Risk
Pixel similarity alone is a poor judge of a creative edit. A new background should differ substantially from the source, while the product itself may need near-exact preservation. Combine automatic checks with a short human rubric.
Automatic checks can verify file type, dimensions, aspect ratio, alpha channel, blank borders, basic sharpness, and whether required text survives optical character recognition. Perceptual comparison or segmentation can flag unexpected movement in protected regions. These signals should route work for review, not silently approve it.
Human reviewers should score identity, geometry, legibility, lighting, brand fidelity, and contextual plausibility. Use a simple severity scale:
- Critical: wrong identity, altered product, fabricated endorsement, unsafe content, or misleading event.
- Major: broken anatomy, unreadable required text, impossible reflection, damaged edge, or unusable crop.
- Minor: small texture inconsistency, slight colour drift, or a retouchable background artifact.
Store the reason with the score. “Major: cap geometry changed” is useful training data for the next prompt revision. “Bad image” is not.
A Worked Product-Image Test
Suppose an ecommerce team wants to place one pump bottle in three seasonal settings. The source fixture includes the approved bottle, label, and colour reference. The baseline instruction asks the editor to replace only the background with a bathroom shelf in soft morning light while preserving bottle geometry, pump direction, label content, and the original camera angle.
The team generates three outputs at its normal delivery resolution. A script checks dimensions and compares a protected bottle mask. A reviewer then inspects the label at 100%, looks for added objects in the bottle’s reflection, and confirms that the new contact shadow agrees with the light direction.
If two outputs pass and one has a warped pump, the condition receives a 67% usable-output rate. The next run changes only the preservation clause. If the rate remains low, the team tests a different model rather than stacking more adjectives onto the prompt. That decision trail is the value of the matrix: each run answers a specific question.
Measure Cost per Approved Asset
Generation price is only the first line in the budget. Record credits or API cost, attempts, elapsed time, reviewer minutes, retouching time, and final acceptance. Then calculate cost per approved asset rather than cost per generation.
For example, a cheaper setting that needs five attempts and ten minutes of cleanup may cost more than a higher-quality setting that passes on the second attempt. The same calculation exposes expensive fixtures. If reflective products fail repeatedly, route that class of work to conventional photography or a controlled compositing workflow instead of treating every failure as a prompting problem.
Keep pricing and model availability outside the test definition. They change. The fixture, assertions, and acceptance thresholds should remain useful when a provider renames a model or adjusts a plan.
Release Checklist and Test Record Template
One short record per condition is enough to make later comparisons defensible:
Fixture ID:
Source-rights status:
Requested change:
Preserve assertions:
Forbidden elements:
Prompt version:
Tool and visible settings:
Runs attempted:
Automatic checks:
Human severity and reason:
Approved output ID:
Generation and review cost:
Do not overwrite a record when the prompt changes. Create the next version and keep the failed output beside it. A rejected image with a precise reason often teaches more than an approved image with no notes.
Keep a Human at the Release Boundary
No metric can determine whether an image falsely implies that a person used a product, whether a restored photograph invents a meaningful detail, or whether a generated diagram communicates a factual mistake with perfect typography. Those are editorial and legal decisions.
Require named approval for identity-sensitive, factual, safety-related, or reputation-bearing images. Confirm rights for every uploaded reference. Preserve the source, prompt version, visible settings, output, review result, and final edited file. If an asset is challenged later, the team should be able to reconstruct what happened without relying on browser history.
A useful AI image editor is not the one that wins a beauty contest with one prompt. It is the one whose failures your team can predict, price, and catch. Build the fixtures first, change one variable at a time, score the risks that matter, and let only approved assets cross the release boundary.

